Follow the end to end walkthrough below to learn how to set up a custom Label Editor configuration based on client metadata. This End-to-end example assumes you configure the Label Editor so that two files are displayed at a given time.Documentation Index
Fetch the complete documentation index at: https://docs.encord.com/llms.txt
Use this file to discover all available pages before exploring further.
This end-to-end example assumes that your files are stored in cloud storage.
STEP 1: Create Metadata Schema
Use the Encord SDK to import a metadata schema into Encord. The fieldsencord-LayoutGroup and encord-EditorGridPosition are the key client metadata used later for configuring the Label Editor layout. If you need to add additional client metadata to your schema, include them in the script below.
Metadata schema import example
STEP 2: Create JSON file for Data Registration
Before registering your cloud data to Encord you must first create a JSON file specifying the files you want to register.When the
audioMetadata, imageMetadata, or videoMetadata flags are present in the JSON file, we directly use the supplied metadata without performing any additional validation, and do not store the file on our servers. It is crucial that the metadata you provide is accurate. For most applications these flags can be omitted.encord-EditorGridPosition: Can take the valuesAorB.AandBare the two possible positions inside the Label Editor.encord-LayoutGroup: Files with the sameencord-LayoutGroupvalues are displayed concurrently in the Label Editor
STEP 3: Register or Import Files to Encord
Create a Folder
All files in Encord must be stored within folders. Therefore, you need to create a folder before registering any data with Encord. To create a folder:- Navigate to Files under the Index heading in the Encord platform.
- Click the + New folder button to create a new folder. Select the type of folder you want to create.

- Give the folder a meaningful name and description.
- Click Create to create the folder. The folder is listed in Files.
Import / Register Your Files
Using the JSON file you created you can import or register your audio data, using the UI or the SDK.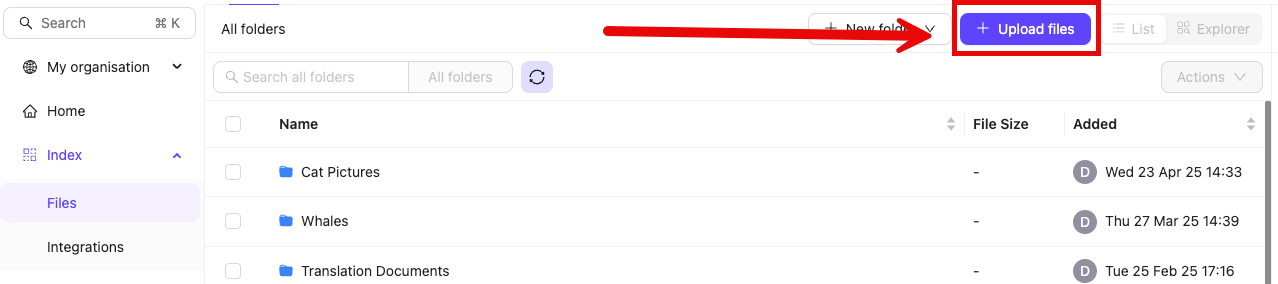

Register data using in the SDK
Register data using in the SDK
To use your data in Encord, it must be uploaded to the Encord Files storage. Once uploaded, your data can be reused across multiple Projects and contain no labels or annotations themselves. Files stores your data, while Projects store your labels. The following script creates a folder in Files and uses your AWS integration to register data in that folder.The following script creates a new folder in Files and initiates uploads from AWS. It works for all file types.Ensure that you:
- Replace
<private_key_path>with the path to your private key. - Replace
<integration_title>with the title of the integration you want to use. - Replace
<folder_name>with the folder name. The scripts assume that the specified folder name is unique. - Replace
path/to/json/file.jsonwith the path to a JSON file specifying which cloud storage files should be uploaded. - Replace
A folder to store my fileswith a meaningful description for your folder. - Replace
"my": "folder_metadata"with any metadata you want to add to the folder.
- “Upload is still in progress, try again later!”: The registration has not finished. Run this script again later to check if the data registration has finished.
- “Upload completed”: The registration completed. If any files failed to upload, the URLs are listed.
- “Upload failed”: The entire registration failed, and not just individual files. Ensure your JSON file is formatted correctly.
STEP 4: Set up your Project
Create a Dataset
- Click the New dataset button in the Datasets section in Annotate.

- Give your Dataset a meaningful title and description. A clear title and description keeps your data organized.
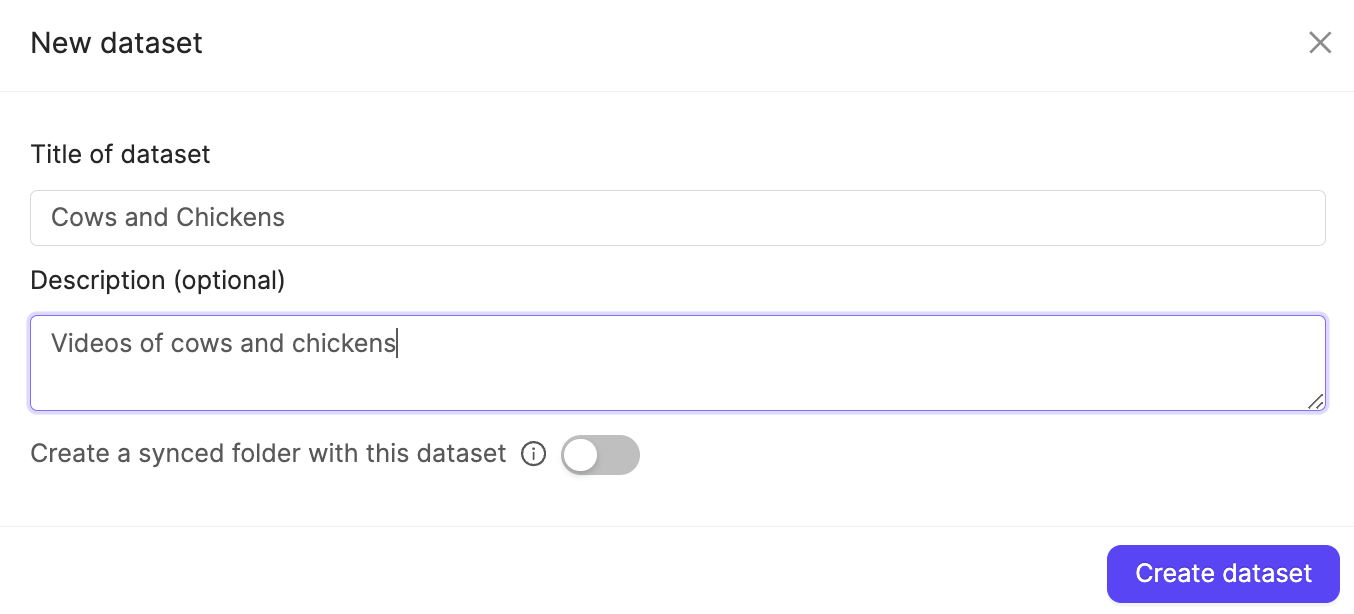
- Click Create dataset to create the Dataset.
Attach files
- Navigate to the Datasets section under the Annotate heading.
- Click the Dataset you want to attach data to.
- Click +Attach existing files.

- Select the folders containing the files you want to attach to the Dataset. To select individual files, double-click a folder to see its contents, and select the files you want to add to the Dataset.
- Click Attach data to attach the selected files to the Dataset.
Create an Ontology
We recommend learning about Ontology structure in Encord before creating Ontologies.
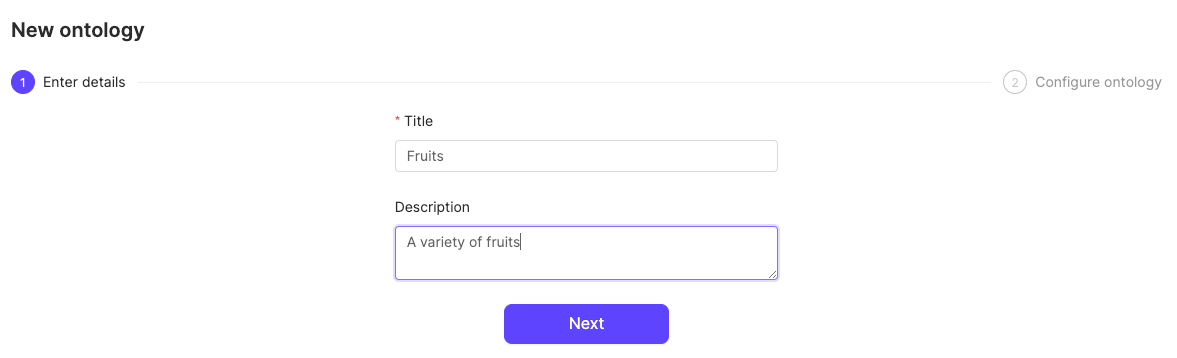
- Click the New ontology button in the Ontologies section to create a new Ontology.

- Give your Ontology a meaningful title and description. A clear title and description keeps your Ontologies organized.
- Click Next to continue.
- Define your Ontology structure. See our documentation on Ontology structure for more information on the various types of objects, classifications, and attributes.
- Click the Add object button.
-
Do one of the following:
- Select a Shared class
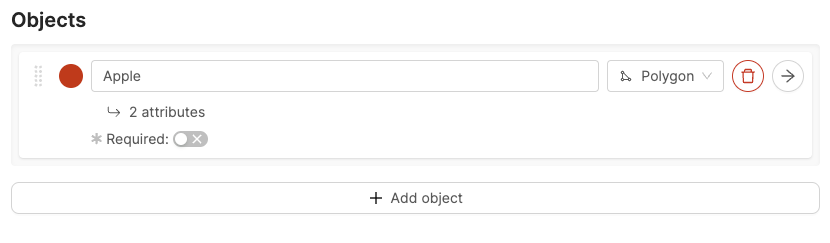
- Click New Object
Shared classes cannot be edited while creating an Ontology. To edit a shared class go to the Ontologies > Shared classes page. - To create a new object, give the object a name. For example “Apple”.
- Select a shape for the object. For example polygon.
- Optionally, enable the Required toggle to mark the object as Required.
- Optionally, add attributes to the object.
- Repeat these steps for as many objects as necessary.

- Click the arrow icon next to an object to add attributes to the object.
- Give the attribute a name. For example “Color”.
- Click the attribute type to change the attribute type. The default attribute type is a text field.
- Click Add option to add an option, if you have chosen a radio button or checklist attribute.
- Enter a name for the attribute option. For example, the attribute “Color” can have the options “Red”, “Green”, and “Yellow”.
- Click the Back to parent button to return the Ontology creation view.
- Click Add classification.
-
Do one of the following:
- Select a Shared class
- Click New classification
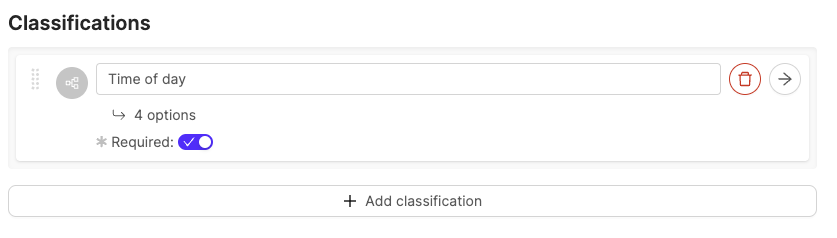
Shared classes cannot be edited while creating an Ontology. To edit a shared class go to the Ontologies > Shared classes page. - For a new classification, give the classification a name. For example, “Time of day”.
- Optionally, configure the classification. The default classification type is a text field.
- Optionally, enable the Required toggle to mark the object as Required.
- Repeat these steps for as many classifications as necessary.
- Click the arrow icon next to an object to configure the classification.

- Click the classification type to change the classification type. The default classification type is a text field.
- Click Add option to add an option if you have selected a radio button or check list classification.
- Enter a name for the classification option. For example, the classification “Time of day” can have the options “Night” and “Day”.
- Click the Back to parent button to return the Ontology creation view.
Create a Project
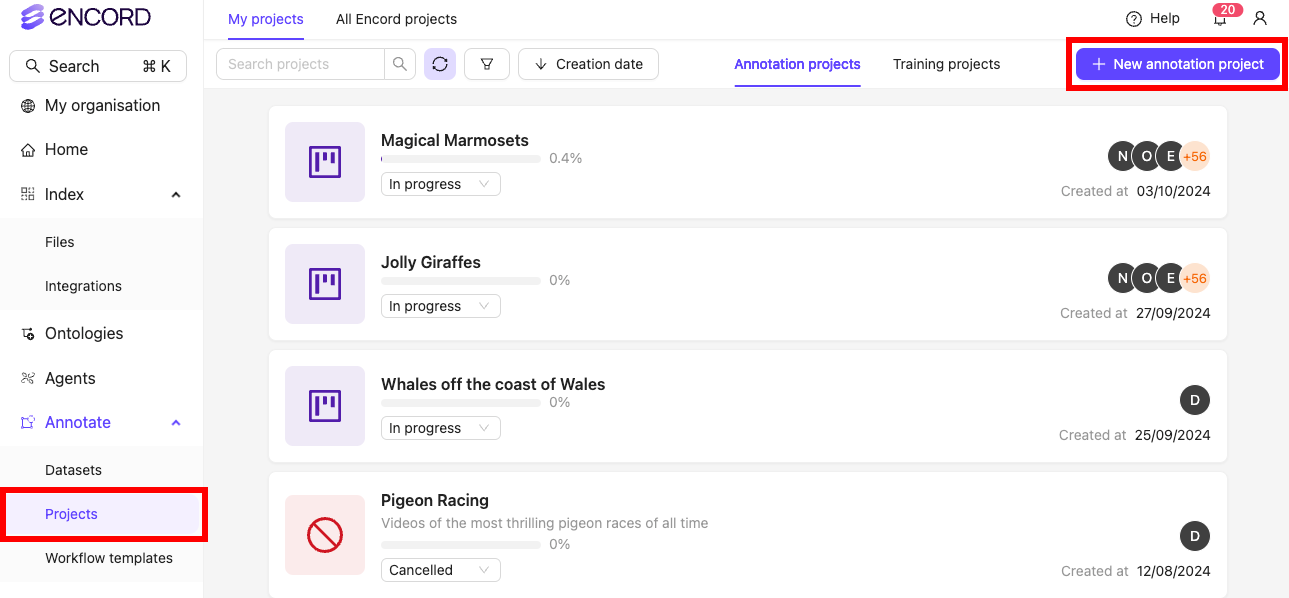
- In the Encord platform, select Projects under Annotate.
- Click the + New annotation project button to create a new Project.
- Give the Project a meaningful title and description.
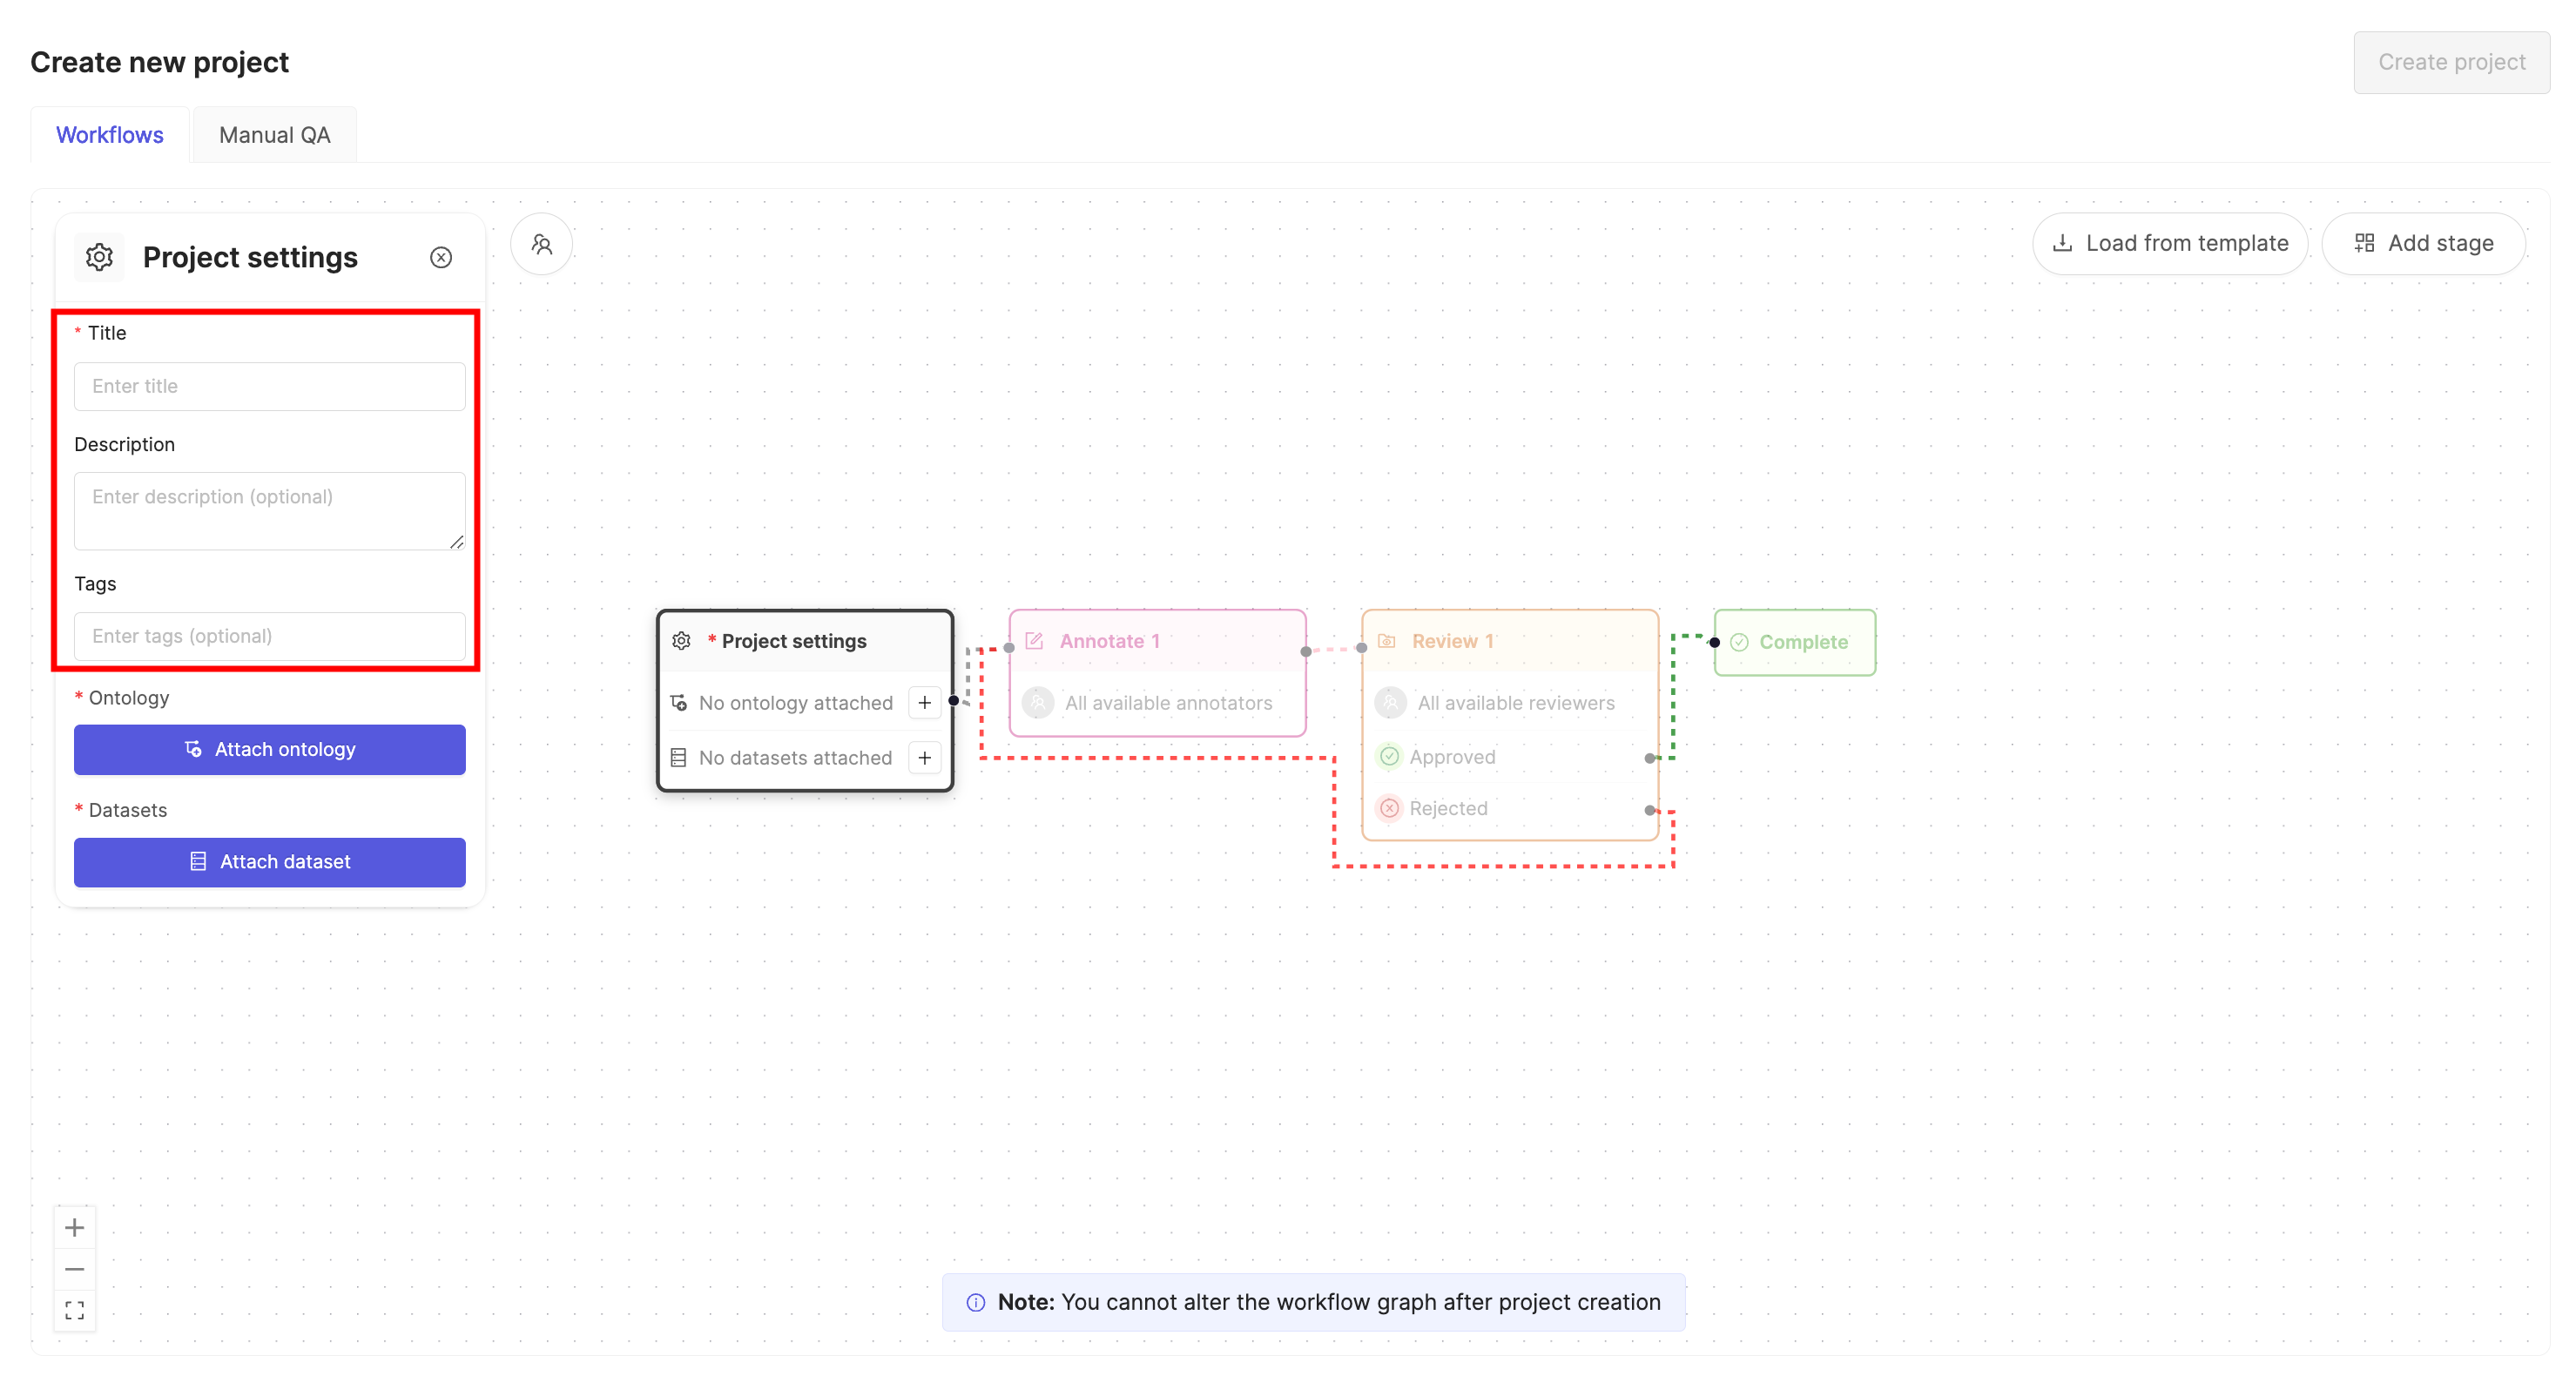
If you are part of an Workspace, an optional Project tags drop-down is visible. Project tags are useful for categorizing and finding your Projects. Select as many tags as are relevant for your Project.
- Click the Attach ontology button.
- Select the Ontology you created previously from the list using the Select button.
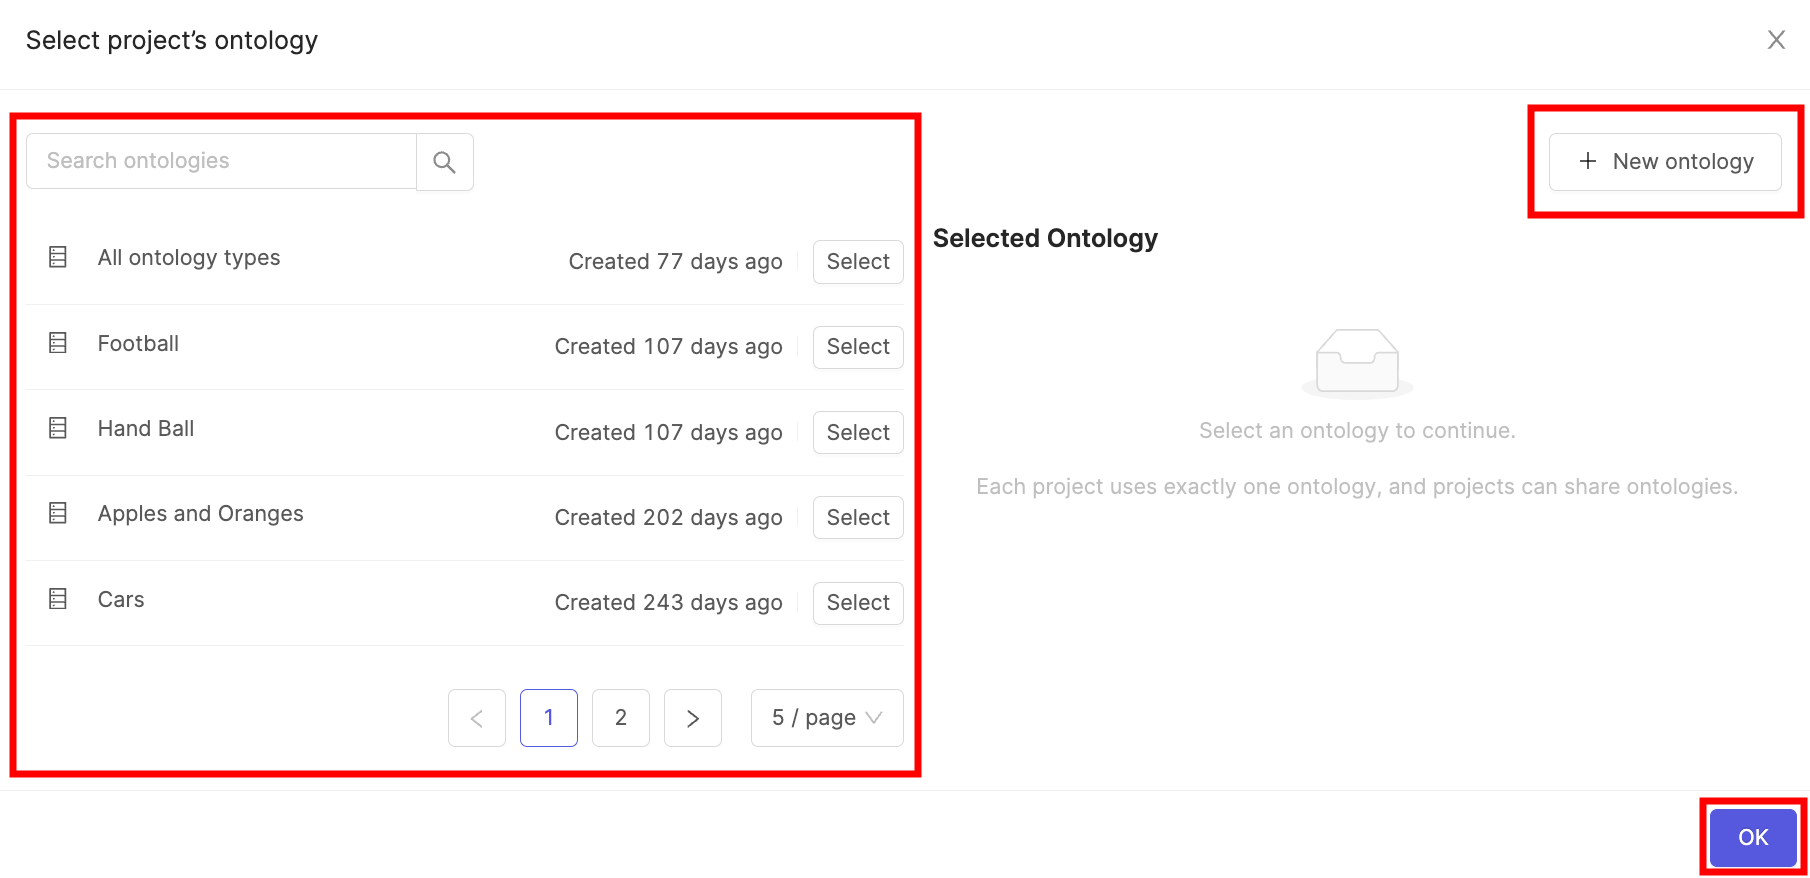
- Click OK to attach the Ontology to the Project.
- Click the Attach datasets button.
- Select the Dataset you created previously from the list using the Attach button.
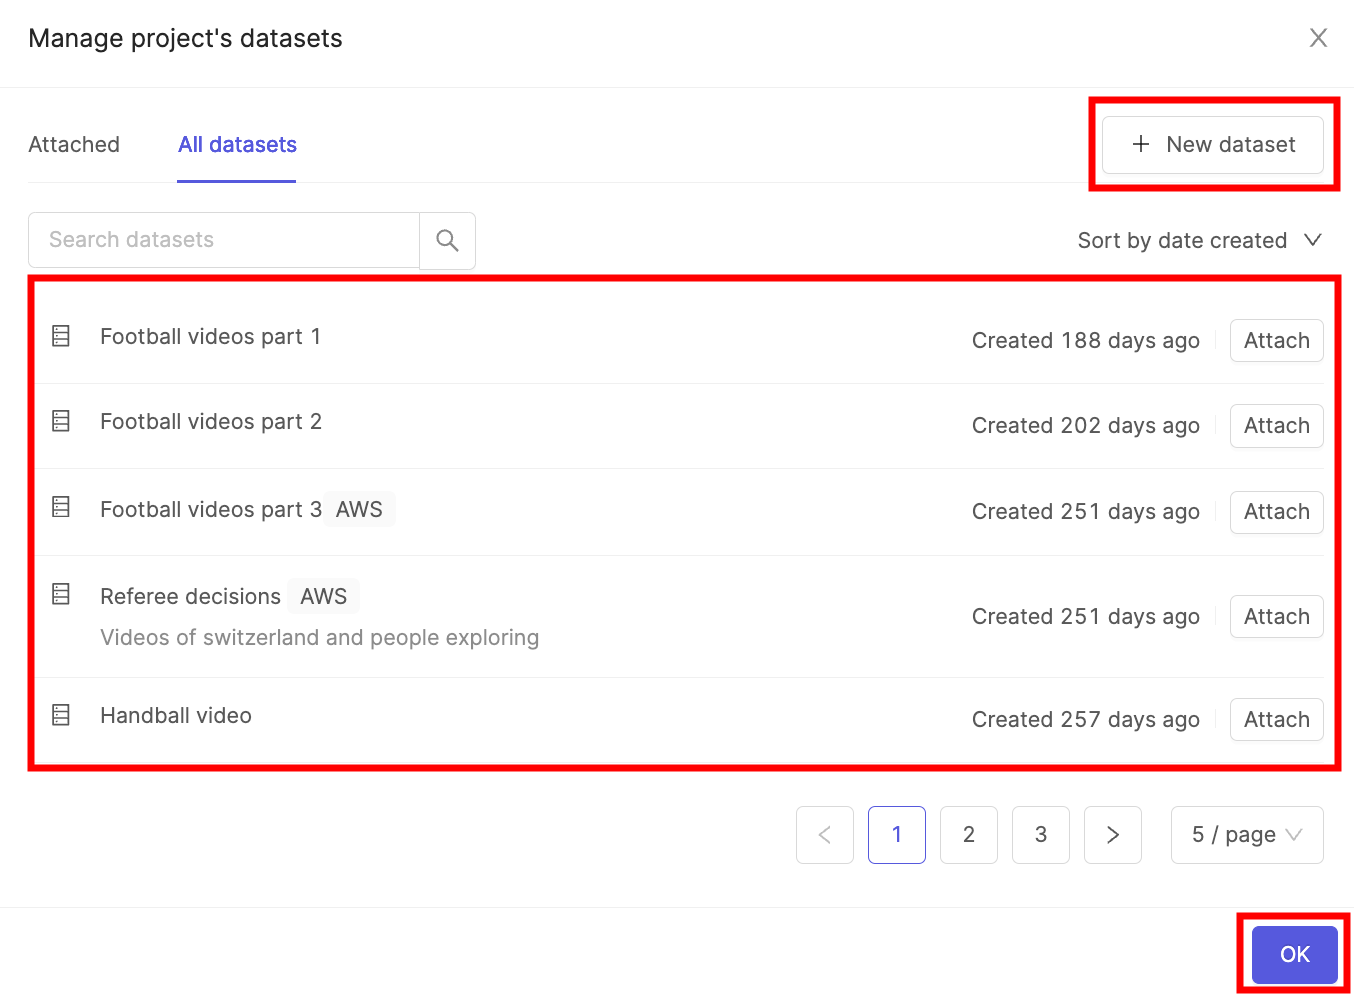
- Click OK to attach the Dataset(s) to the Project.
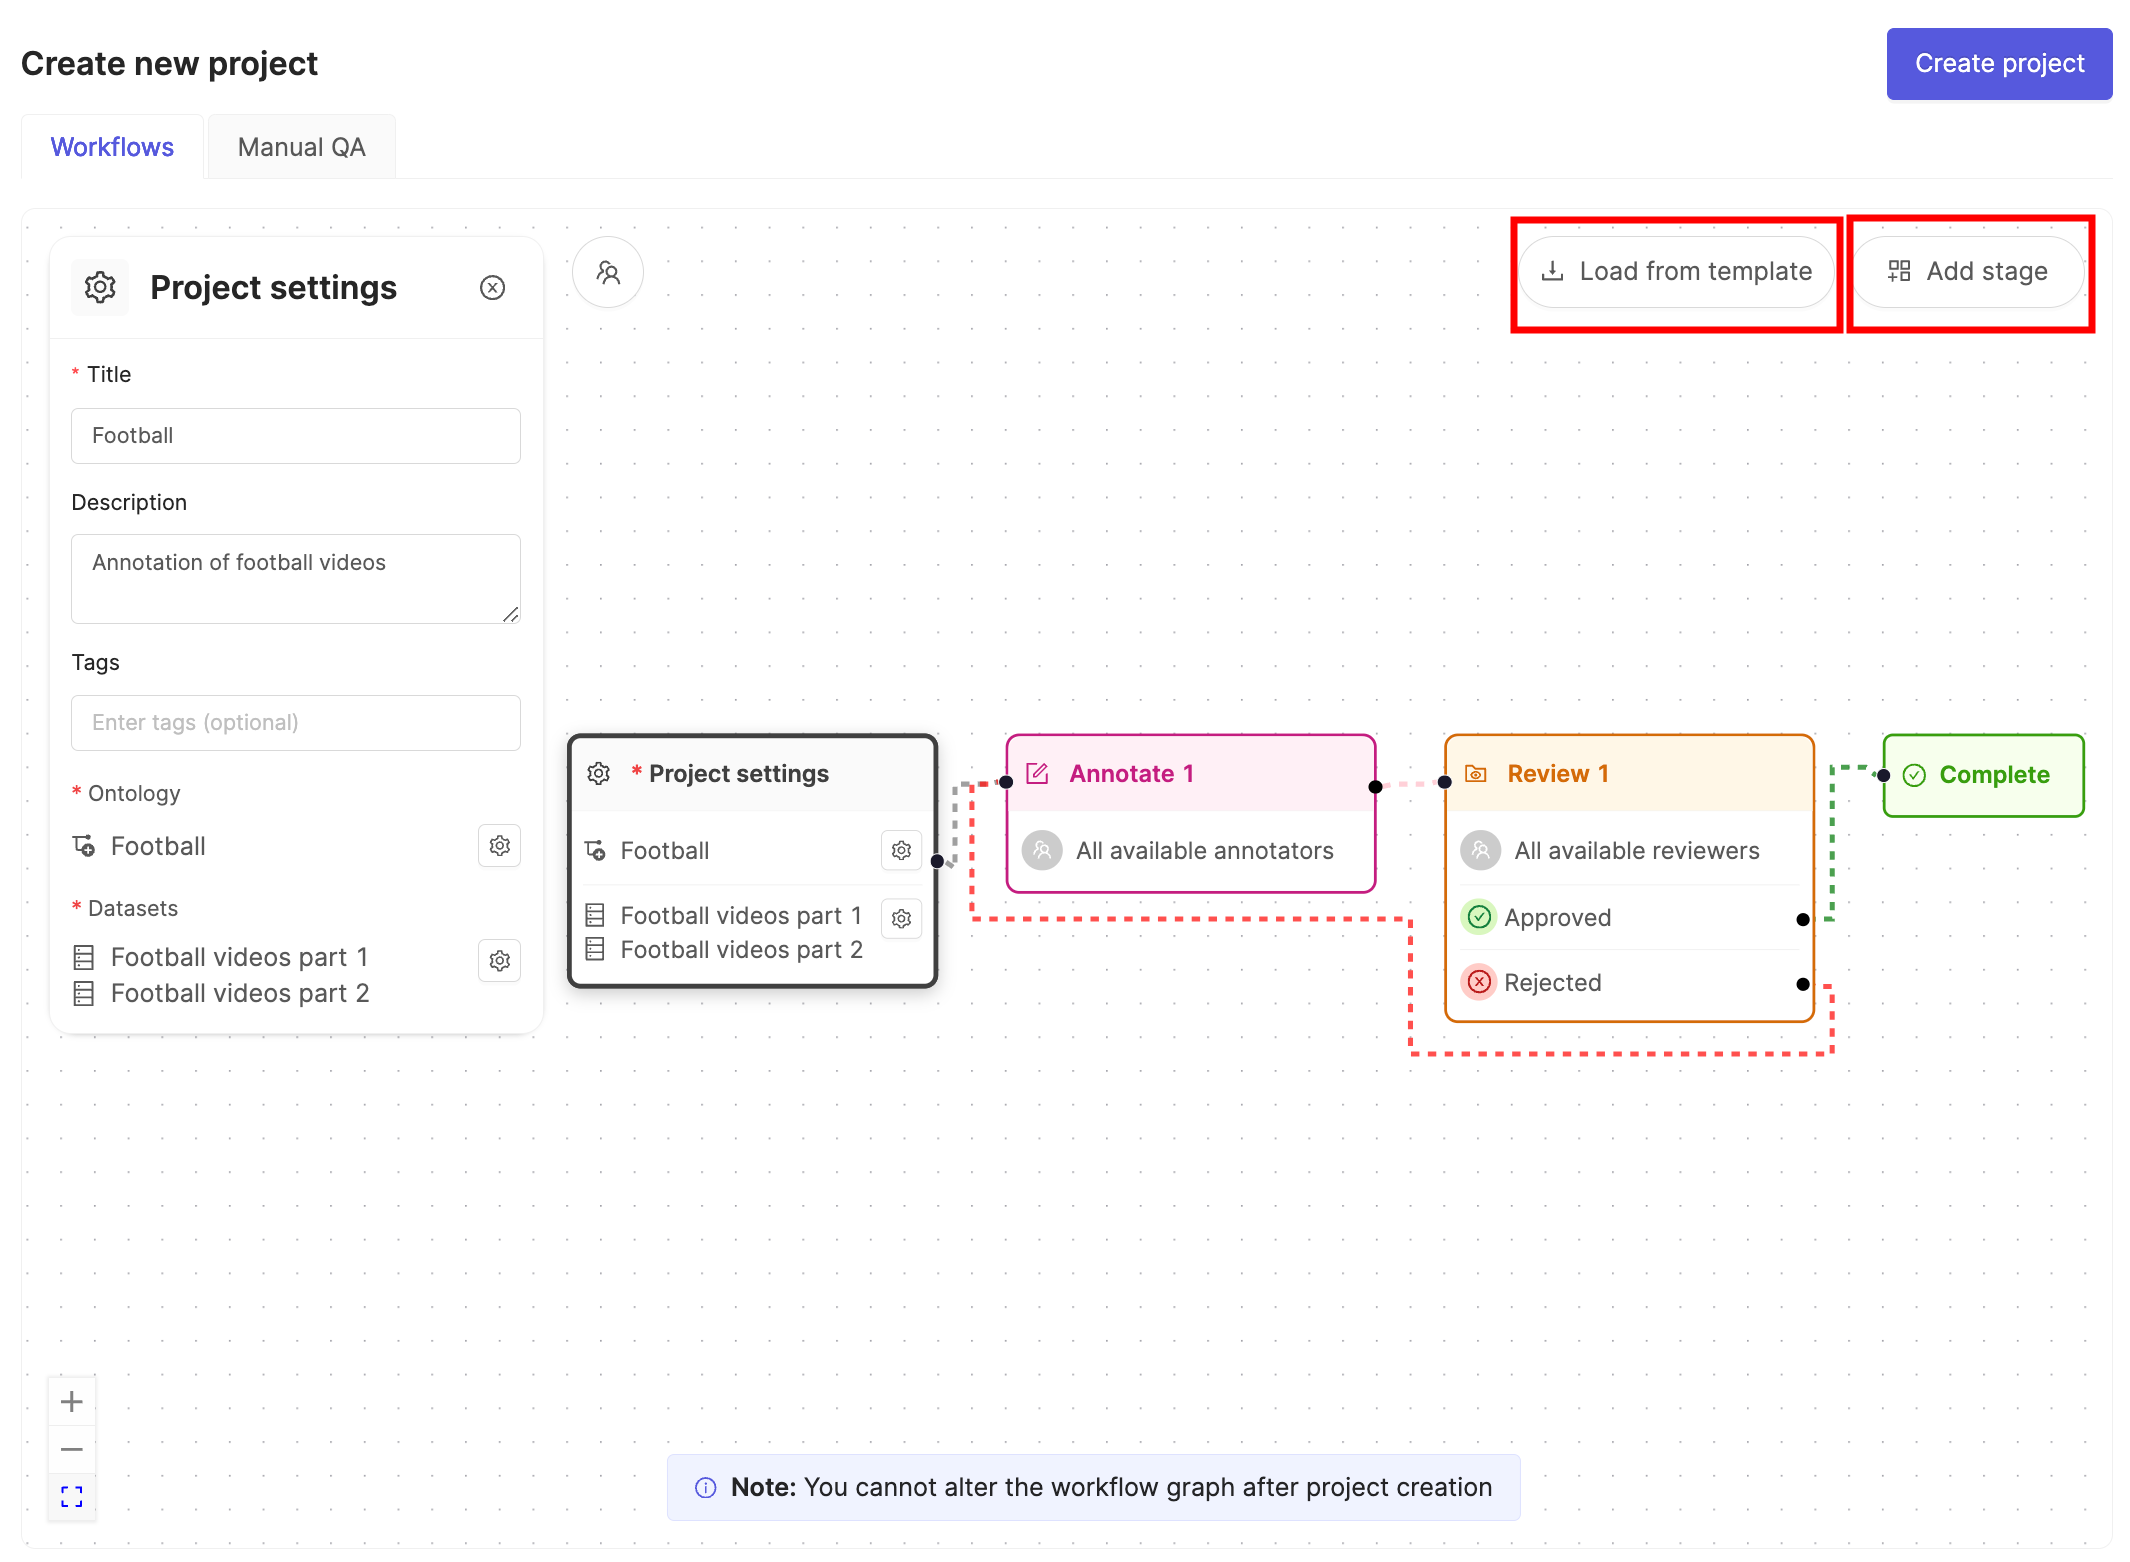
- Click the Load from template button to use a Workflow template.
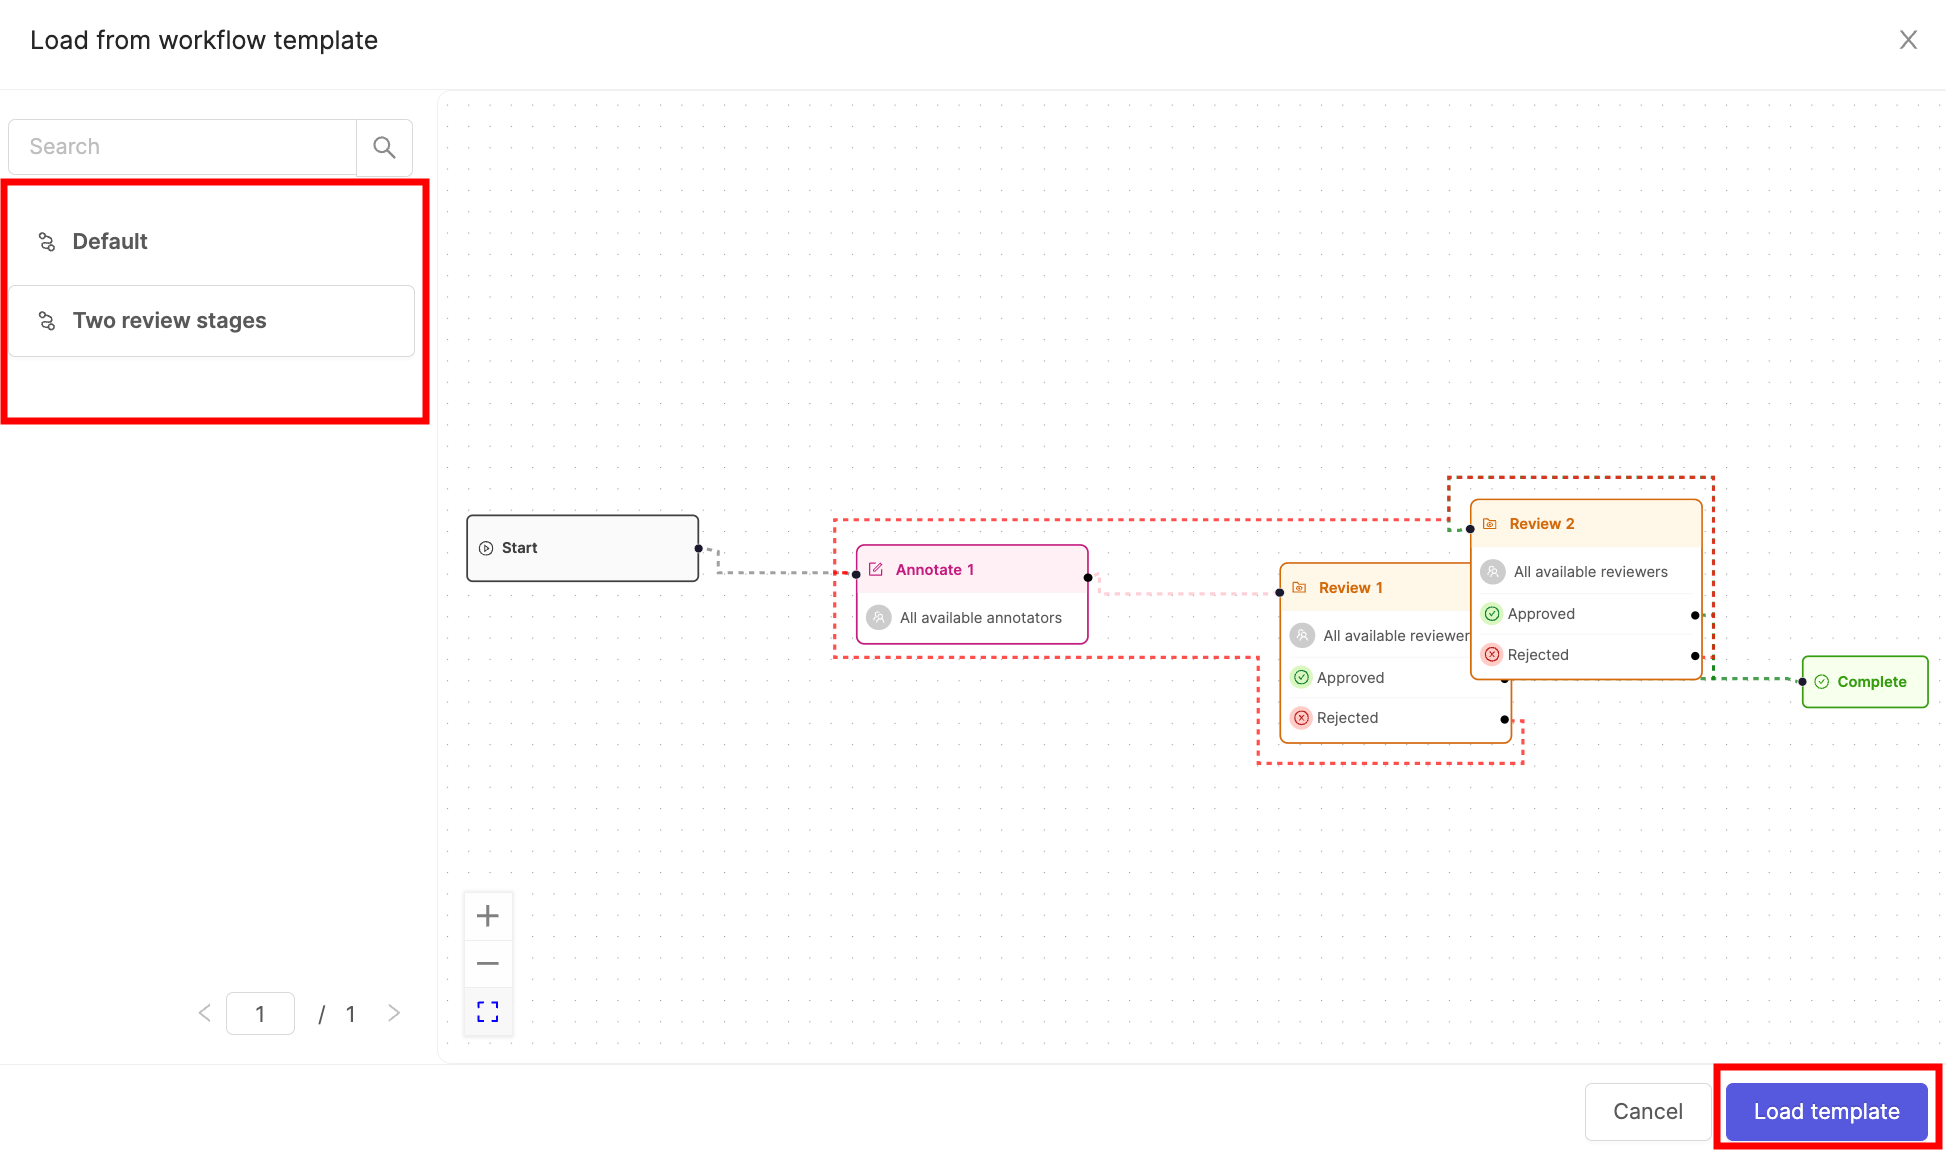
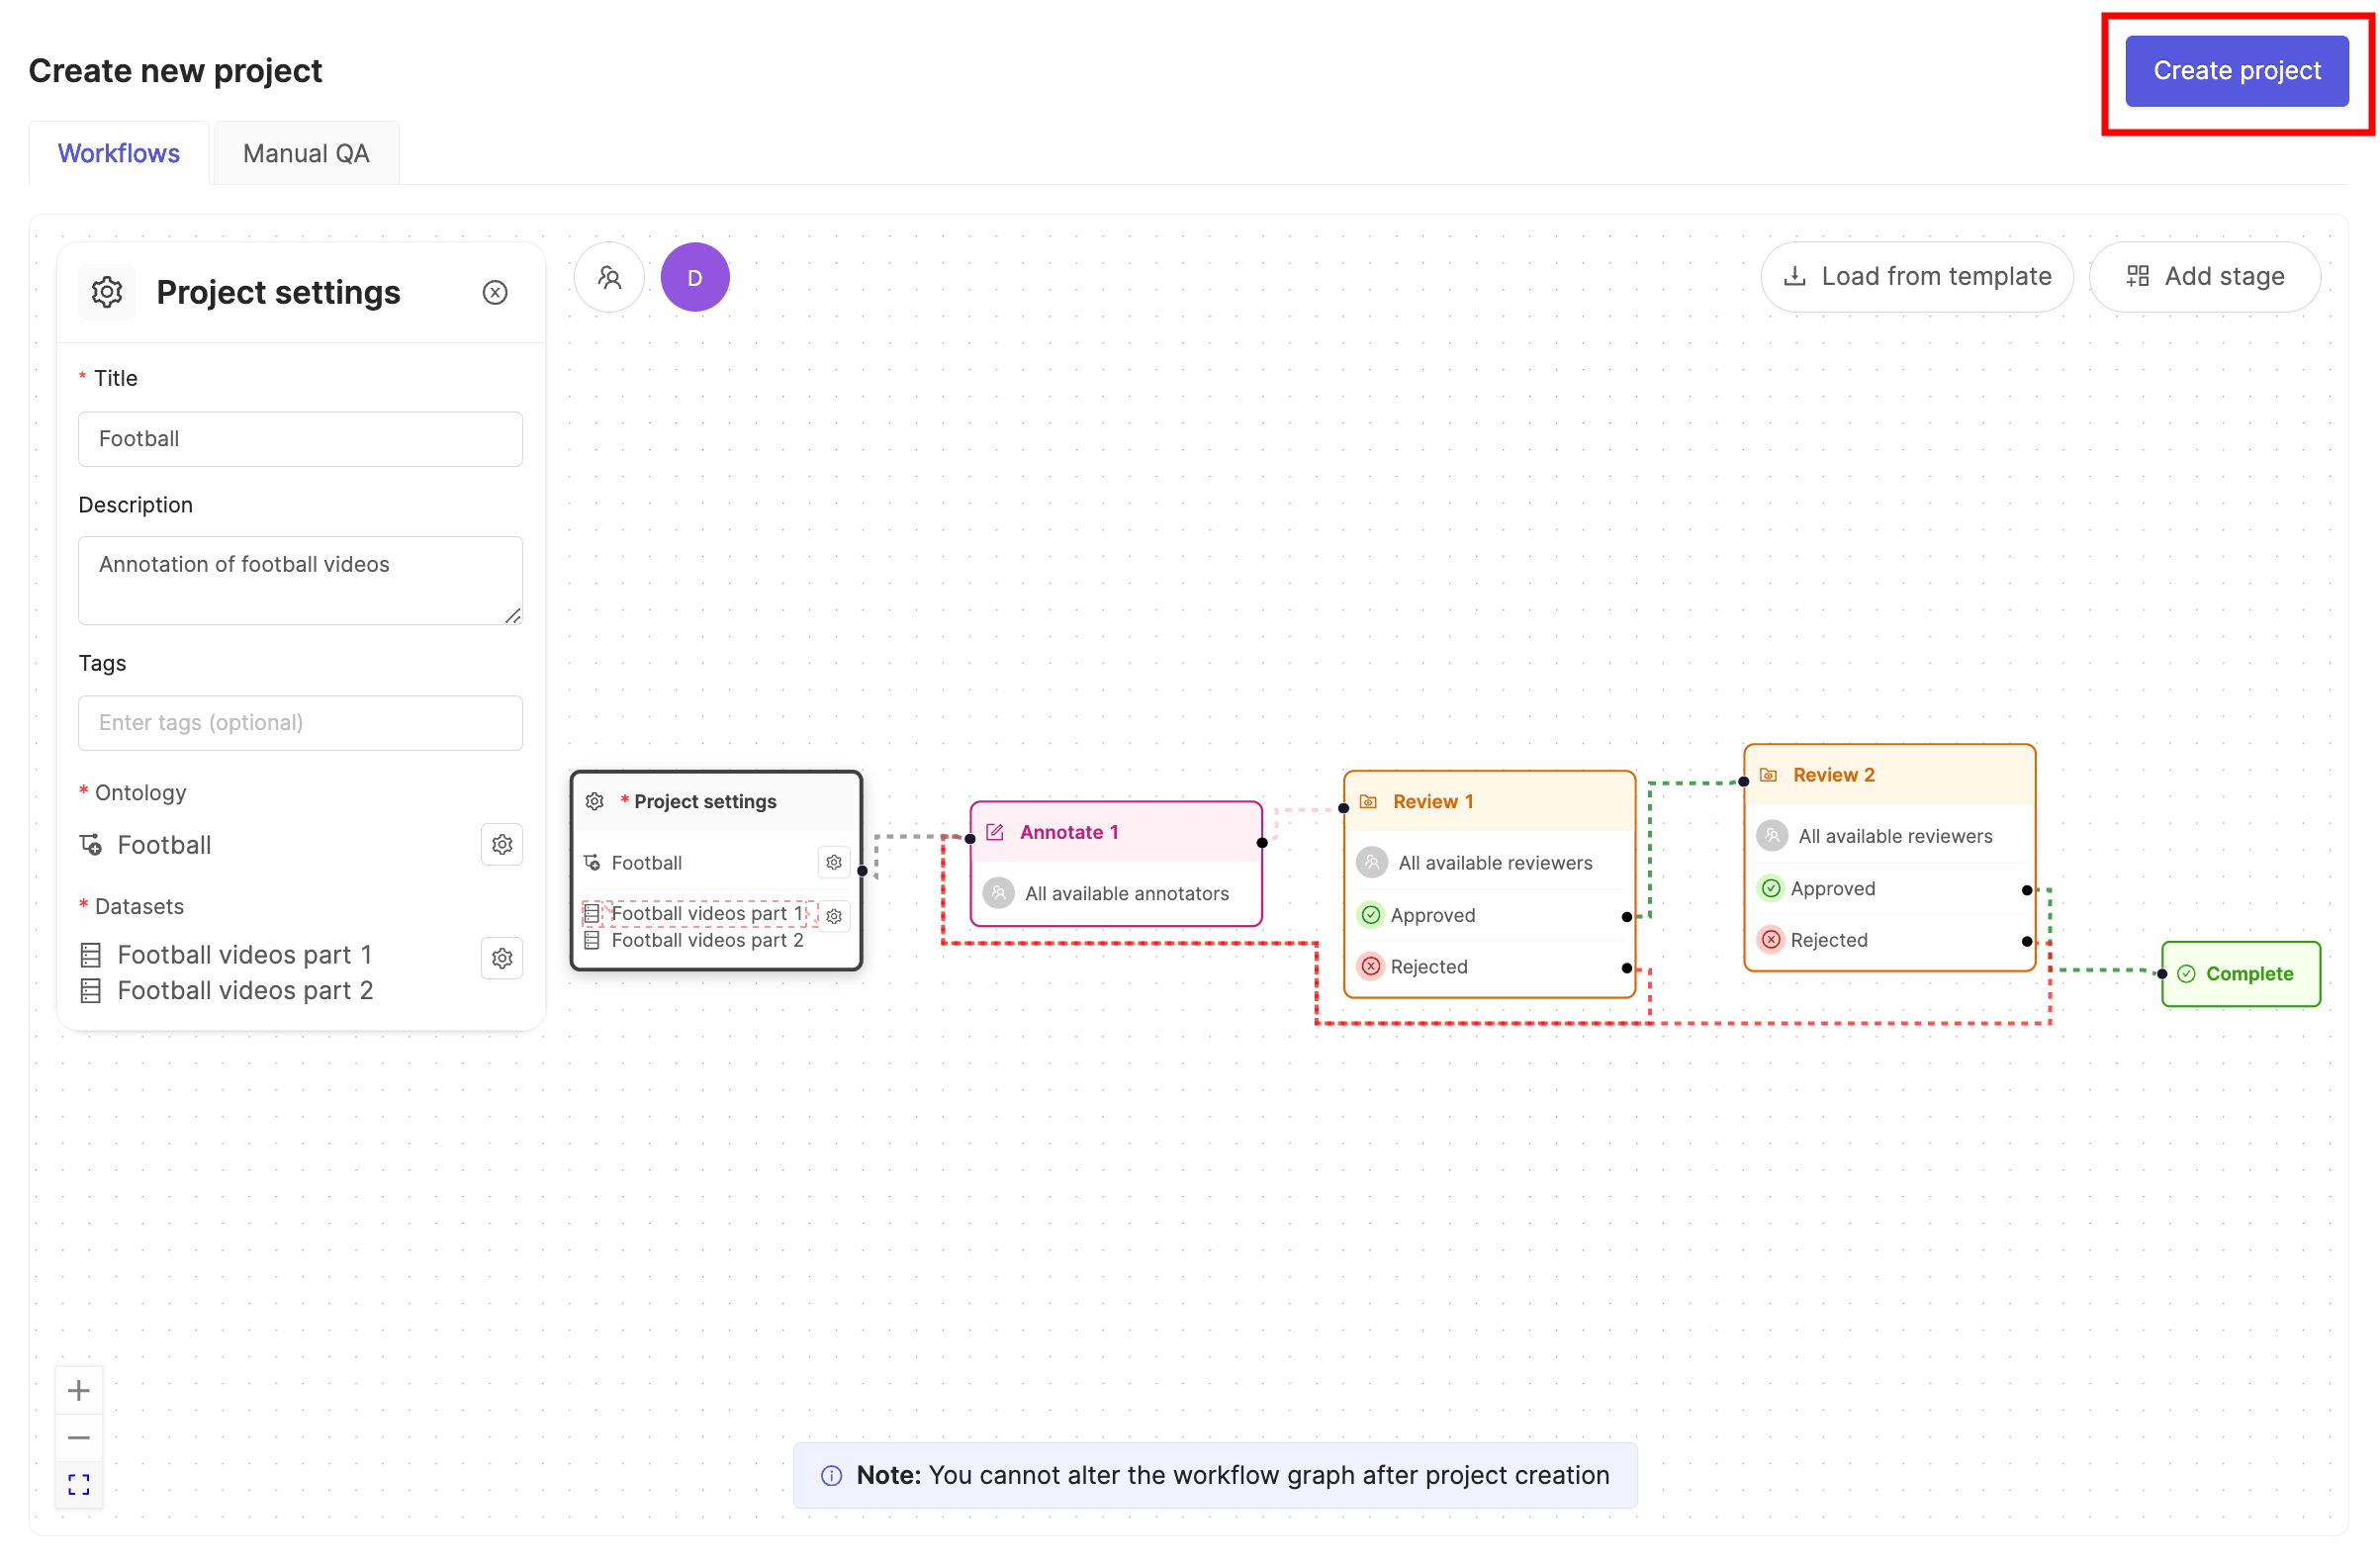
- Select the template you want to use and click Load template.
- Click Create project to finish creating the Project.
We recommend learning about Ontology structure in Encord before creating Ontologies.
- Click the New ontology button in the Ontologies section to create a new Ontology.
- Give your Ontology a meaningful title and description. A clear title and description keeps your Ontologies organized.
- Click Next to continue.
- Define your Ontology structure. See our documentation on Ontology structure for more information on the various types of objects, classifications, and attributes.
- Click the Add object button.
-
Do one of the following:
- Select a Shared class
- Click New Object
Shared classes cannot be edited while creating an Ontology. To edit a shared class go to the Ontologies > Shared classes page. - To create a new object, give the object a name. For example “Apple”.
- Select a shape for the object. For example polygon.
- Optionally, enable the Required toggle to mark the object as Required.
- Optionally, add attributes to the object.
- Repeat these steps for as many objects as necessary.
- Click the arrow icon next to an object to add attributes to the object.
- Give the attribute a name. For example “Color”.
- Click the attribute type to change the attribute type. The default attribute type is a text field.
- Click Add option to add an option, if you have chosen a radio button or checklist attribute.
- Enter a name for the attribute option. For example, the attribute “Color” can have the options “Red”, “Green”, and “Yellow”.
- Click the Back to parent button to return the Ontology creation view.
- Click Add classification.
-
Do one of the following:
- Select a Shared class
- Click New classification
Shared classes cannot be edited while creating an Ontology. To edit a shared class go to the Ontologies > Shared classes page. - For a new classification, give the classification a name. For example, “Time of day”.
- Optionally, configure the classification. The default classification type is a text field.
- Optionally, enable the Required toggle to mark the object as Required.
- Repeat these steps for as many classifications as necessary.
- Click the arrow icon next to an object to configure the classification.
- Click the classification type to change the classification type. The default classification type is a text field.
- Click Add option to add an option if you have selected a radio button or check list classification.
- Enter a name for the classification option. For example, the classification “Time of day” can have the options “Night” and “Day”.
- Click the Back to parent button to return the Ontology creation view.
STEP 5: Create Custom Editor Layout
After creating your Project, import a custom layout for the Label Editor. Start by creating a JSON file that determines the layout.Create a JSON for the Layout
Common layouts for two tasks displayed simultaneously are Side by Side and Stacked (On top of one another).Import the custom layout
- Navigate to the Project settings.
- Click on Editor Layouts.
- Click Upload JSON.
- Select the JSON file containing the layout you want the Label Editor to have.

What do the Layouts Look Like?
The Side By Side layout:
