Creating Workflows
Workflows are created when creating new annotation Projects, and when creating Workflow templates.
- Manage Collaborators allows you to seamlessly add users to your Workflow as collaborators, which can be added to different stages of the workflow.
- Add stage allows you to add more stages to your Workflow.
Workflow Stages
This section contains details for all Workflow library components.Only ANNOTATE, CONSENSUS, and AGENT nodes can be the first node after the START node in a workflow.
Start
Start

Annotate
Annotate
Annotate

Only collaborators with the Annotator or the Annotator & Reviewer roles are available for selection. All Admins and Team Managers are part of all annotation stages and therefore cannot be added, or removed.
Routers
Routers
Routers
A Router splits the path that annotate and review tasks take through the workflow. Two different types of router are available:Percentage router

Routing percentages can be changed after Project creation. Changing routing percentages resets the percentage router, and may alter the pathway taken by a given task.
Collaborator router

- Click Add pathway to choose a subset of collaborators that form the pathway. - only collaborators present in the previous stage can be selected. There is no limit on the amount of pathways you can create.
- Click Add to finish a pathway.
Collaborators can only be added to the Router after an input is connected.
Review
Review
Review

To attach the Rejected node of the review stage to another review stage, contact support@encord.com

Only collaborators with the Reviewer and Annotator & Reviewer roles are available for selection. All Admins and Team Managers are part of all review stages and cannot be removed.

Strict review
Strict review is enabled by default, but can be disabled under Advanced settings.
Video Tutorial - Strict review & change review judgment
Video Tutorial - Strict review & change review judgment

Whole task review
Allows reviewers to approve or reject the entire task with a single decision instead of reviewing each label individually.User assignment restriction
The User assignment restriction feature prevents team members working on tasks in the current stage that they have done in previous stages. This can prevent individuals with the Annotator & Reviewer role from being assigned their own annotations to review.This feature does not apply to users with the Admin or Team Manager roles, since they are added to each stage by default and cannot be removed.
Task visibility
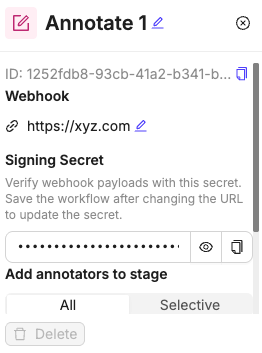
Show or hide unassigned tasks in the Task queue for Reviewers.Agent
Agent
Agent

Export
Export
Export
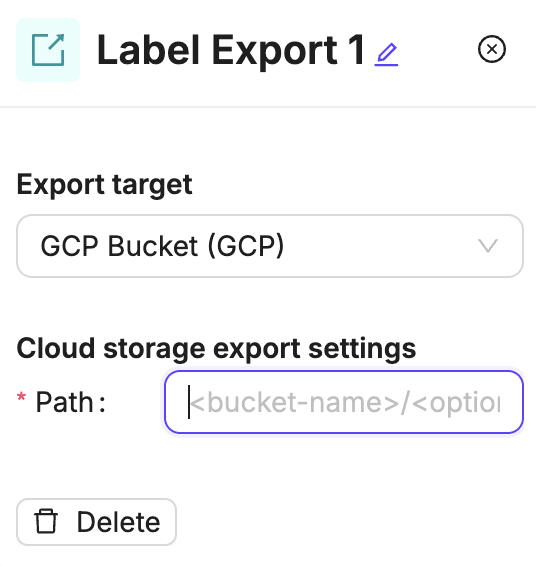
Export format
When configuring a cloud Export node, you can choose the format in which labels are written to your storage destination. The Format dropdown offers two options:- Encord JSON (default) — exports labels in Encord’s native JSON format.
- YOLO — exports labels directly in YOLO format, suitable for use with YOLO-based object detection, segmentation, or OBB training pipelines.
The YOLO export format option may not be visible to all users. Contact your Encord account team if you do not see this option.
YOLO export settings
When you select YOLO as the export format, a Class mapping selector appears. This selector lists the ontology external-ID namespaces configured on the Project’s Ontology. Encord uses the selected namespace to resolve ontology features to YOLO class numbers at export time.Class numbers are resolved live from the Ontology’s current external IDs each time a task is exported — they are not snapshotted when the node is saved. If you update your Ontology’s external IDs after configuring this node, the exported class numbers will reflect the updated mapping.
Namespace names are case-sensitive. Ensure the namespace name you select here matches the name configured in your Ontology’s external IDs settings exactly.
Before configuring YOLO export, ensure your Ontology has at least one external-ID namespace configured. The Class mapping selector is disabled if no namespaces exist on the Ontology.
1
Select YOLO format
In the Export node settings panel, open the Format dropdown and select YOLO.
2
Select a class mapping namespace
Under Class mapping, select the ontology external-ID namespace that maps your ontology features to YOLO class numbers.A preview panel displays up to 5 feature-to-class-number mappings for the selected namespace, so you can confirm the correct namespace is chosen.
3
Configure ontology mappings (if needed)
If no namespaces are available, the Class mapping selector is disabled and a prompt appears. Click Configure Ontology Mapping to open the Ontology’s external IDs settings page in a new tab and set up your YOLO class IDs before returning to save the node.
4
Save the Workflow
Click Save to save the Workflow. If YOLO format is selected but no class mapping namespace is chosen, the Workflow cannot be saved and displays the error: YOLO export requires a class mapping to be selected.
Complete
Complete
Complete

Parallelization
Parallelization
Parallelization
Parallelization splits a single annotation task into independent branches, each handling specific Ontology classes. Different annotators can work on different branches simultaneously, allowing specialized teams to annotate different parts of the same task in parallel.For example, assign one team to annotate vehicles, another to pedestrians, and a third to cyclists - all working on the same data concurrently instead of sequentially.Parallelization vs Consensus
- Parallelization assigns different classes to different annotators in parallel.
- Consensus assigns the same task to multiple annotators independently and compares their results. Use Parallelization to split work by class. Use Consensus to measure agreement.
- Click Add branch in the settings panel. A new branch appears with a default name.
- Click a branch to expand its settings.
- Specify a Branch name. Give the branch a descriptive name, such as the class group or team responsible for it (example: “Vehicles”, “Pedestrians”).
- Specify the Classes. Select the ontology classes that annotators in this branch will label. A class can only belong to one branch. If a class is already assigned to another branch, it is disabled in the selector and a conflict warning is shown.
- Required classes are marked with a red indicator in the class selector.
- You cannot modify branches while tasks are actively in progress on the node. Complete or reassign active tasks before making changes.
- Assign annotators to a branch. Each branch has an independent Annotate sub-node that controls who can work on it.
- Add a review stage to a branch. Each branch can optionally include its own review step. Branches can have review enabled or disabled independently.
- A task enters the Parallelization node from the upstream node.
- The node creates one sub-task per branch.
- Each sub-task is assigned to the annotators configured for that branch.
- Annotators in each branch see only the classes assigned to their branch.
- If a branch has review enabled, the sub-task moves to the review step after annotation.
Once all branches are
Complete, the task exits the Parallelization node and continues through the Workflow.- Maximum 10 branches per Parallelization node.
- Each ontology class can be assigned to only one branch. Assigning the same class to multiple branches is not allowed.
- Branch configuration cannot be changed while tasks are active in the node.
- At least one branch is required. A Parallelization node with no branches is invalid.
- Organize branches around annotator specialisms. Teams with domain expertise in specific object types will label faster and more accurately when scoped to those classes.
- Add review to high-priority or high-complexity branches only, rather than all branches, to keep overall cycle time down.
- Use descriptive branch names. Branches appear in the task queue and admin views, making it easier to monitor progress per class group.
- If all branches cover the same classes, consider using a Router node instead to distribute tasks by percentage or priority rather than by class.
Managing collaborators
User permissions
Workflow stage level collaborators
Collaborators can be added to a workflow stage by clicking + on a card that has been added to the workflow canvas.
- Annotator
- Annotator & Reviewer
- Team Manager
- Admin
Templates
Workflow templates allow you to save and reuse your most common workflows. You can then use these templates to create new annotation Projects, ensuring consistency and efficiency.Create Templates
New Workflow templates can be created each time a new Workflow is created.- Navigate to the Projects section of the Encord platform.
- Navigate to the Templates tab.
- Click Create template.

- Create your Workflow. Ensure your Workflow has a title.
- Click the Create workflow template button. The template is saved in the custom templates section.

Edit Templates
You can edit Workflow templates after they have been created.- Navigate to the Projects section of the Encord platform.
- Navigate to the Templates tab.
- Select the template you want to Edit.
- Click the Edit button in the top-right.
- Edit the template.
- Click Save changes.
You can not edit the start node.
Template Collaborators
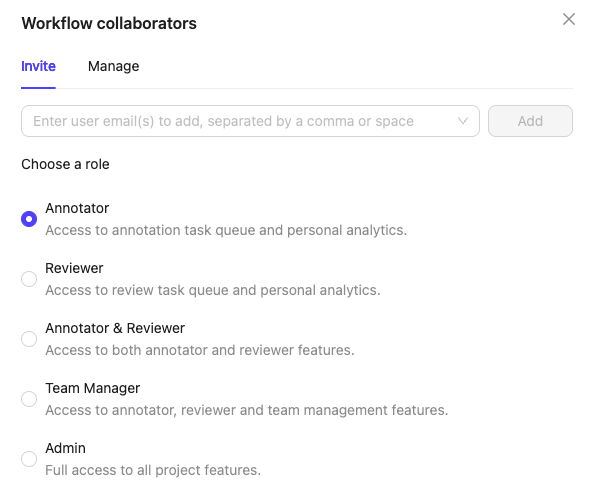
Template collaborators are annotators and reviewers that can be assigned to Workflow stages.Invite Collaborators
Invite Collaborators
- Click the Collaborators button.

- Select a role. You can assign the following roles to collaborators:
- Annotator: Labels tasks in the Project.
- Reviewer: Reviews and validates labeled tasks.
- Annotator & Reviewer: Performs both annotation and review tasks.
- Team Manager: Assigns tasks to users and manages Project collaborators.
- Admin: Grants full administrative control over the Project. This action is irreversible.
- Type the email address of the user you want to add and select the user from the list.
- Click the Add button to add the user with the specified role.
Manage Users
Manage Users
- Click the Collaborators button.
- Click the Manage tab.
- Change collaborator role: Click the dropdown and select a new role.
- Remove collaborator: Click the red Remove icon in the remove column.

Manage Template Access
Template Access determines which users can edit, share, and delete the template.Invite Users
Invite Users
- Click the Manage template access button.

- Search for the collaborator or the group you want to add. Multiple collaborators and groups can be added at once.
Only group members are added when a group is assigned to a Project. Group managers are not included.
-
Select a role. You can assign the following roles to collaborators:
- User: Can view the template.
- Admin: Grants full administrative control over the template. This action is irreversible.
- Click Add.
Edit User Role
Edit User Role
Only template admins can modify collaborator roles. Admin roles cannot be changed, not even by other admins.
- Click the Manage template access button.
- Click the user role in the Role column
- Select a new role from the dropdown.

Remove User
Remove User
- Click the Manage template access button.
- Click the red Remove icon in the remove column.
Delete Templates
To delete a template, click the red Delete icon next to the template.
Editing Workflows
Only ANNOTATE, CONSENSUS, and AGENT nodes can be the first node after the START node in a workflow.
| Workflow Editing | Description |
|---|---|
| Add new stages |
|
| Delete stages |
Any stage containing tasks cannot be deleted. Move tasks to a different stage before deleting a stage. |
| Modify workflow connections |
|
| Workflow management |
|
Edit Consensus Workflows
Limitations
Editing Workflows has the following limitations:- Cannot change an Annotate stage to a Review stage. You must delete the stage and add a different stage.
- Cannot change fundamental stage configurations for Consensus stages.
- Cannot modify completed tasks. Historical task data remains unchanged
- Cannot delete labels/annotations. Existing annotation data is protected by blocking deleting stages that have tasks.