DICOM customers might be more familiar with the term ‘labeling protocol’, which is equivalent to an Ontology.
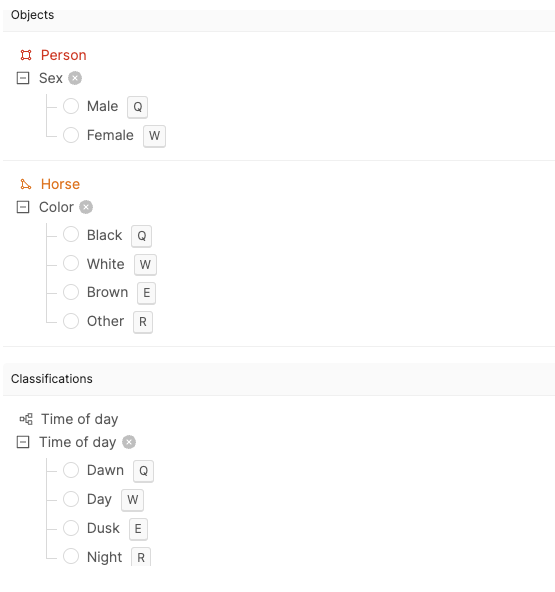
- Objects: Used to label specific locations in a frame, such as a car in a video frame.
- Classifications: Frame-level labels that do not have a specific location, such as indicating if an image is taken during the day or night.
- Attributes: These can be nested under objects, classifications, or other attributes to create detailed, hierarchical structures. For example, the object “horse” can have an attribute “color”.

READ ME FIRST
The annotation landscape is vast. Encord provides an incredible amount of flexibility in how to create an Ontology. Your Ontology is a product of your needs. Here are a few things to keep in mind when building your Ontology.Rating Scales/Rubrics
Rating Scales/Rubrics
Rating Scales or Rubrics are used for quality assessment or standardized evaluations of labels/classifications or data.
- Scale rating: Balance simplicity and granularity in your rating. We recommend using a rating system of 0 to 5 or 0 to 7. This should provide enough accuracy while not overwhelming your annotators/reviewers.
- Object/classification description: Be simple and concise. Try to keep your Ontology option descriptions to 7 words or less. This keeps visual clutter to a minimum. Use the Annotation instructions for more detailed descriptions. Annotators/Reviewers can quickly open and close the Annotation instructions if they need a reminder. For your more detailed descriptions, try and keep them to 30 words or less. And finally use a Flesch-Kincaid readability test to keep your descriptions to a 9th grade reading level. This keeps your descriptions to using plain language and makes the descriptions easy to understand.
- Guidance: Be concise while providing meaningful distinction between the scale rating options. Keep the guidance to a maximum of 3 words. 1 word is best.
Object labeling
Object labeling
You have a number of options when labeling objects: bounding boxes, polygons, bitmasks, and rotatable bounding boxes. Which label type depends on what you need to label and on the accuracy your use case requires. For example if you are annotating objects that are clustered together, using polygons or bitmasks provides more precise labeling. If objects are rarely close to each other or if you data displays only a single item at a time, bounding boxes could be used.
Primitives/Skeletons
Primitives/Skeletons
Use primitives to label objects in cases where you need to break down a complex object into smaller parts or when you need to define a basic outline for complex structures. An example of this would be annotating people in poses or motion.
Ontology Structure
Objects
Objects are configured with a title, an object annotation type, and optional attributes. You can also change their color. The following object annotation types are available:| Object | Description | Supported For |
|---|---|---|
| Bounding Box | A quick-to-draw box shape compatible with many advanced automated labeling techniques. | Single images, image groups, image sequences, videos, DICOM, NIfTI, Documents |
| Rotatable Bounding Box | A rotatable box for more accurate labels than standard bounding boxes. | Single images, image groups, image sequences, videos, DICOM, NIfTI, Documents |
| Polygon | Captures complex shapes that bounding boxes cannot. Known as segmentations, polygons cannot be self-intersecting, but can be nested within other polygons. | Single images, image groups, image sequences, videos, DICOM, NIfTI, Documents |
| Polyline | An unclosed polygon for representing long, thin annotations. | Single images, image groups, image sequences, videos, DICOM, NIfTI, Documents |
| Keypoint | A simple geometric point for tracking small objects or specific points on larger objects. | Single images, image groups, image sequences, videos, DICOM, NIfTI, Documents |
| Bitmask | Creates complex shapes with a brush tool, useful for parts of a frame or image. Multiple threshold filters can apply bitmasks to specific areas. | Single images, image groups, image sequences, videos, DICOM, NIfTI, Documents |
| Object Primitive | Previously called Skeleton template. A collection of connected geometric points, ideal for representing complex shapes like those in pose estimation. See here to learn more. | Single images, image groups, image sequences, videos, DICOM, NIfTI, Documents |
| Audio Region | An object used exclusively to label parts of an audio wave. See our documentation for labeling audio files to learn more. | Audio |
| Text Region | An object used exclusively to label parts of a text document. See our documentation for text files to learn more. | Text |
| Cuboid | A quick-to-draw 3D box used to label objects. | PCD (point cloud data) scenes |
| Segmentation | Creates complex shapes in PCD scenes using a brush tool. All associated points become part of the same object. | PCD (point cloud data) scenes |
Classifications
Classifications are supported for all modalities
- Checklist: Allows multiple values. For example, “Weather” could be both cloudy and rainy.
- Radio: Allows a single value. For example, “Time of day” could be “Day” or “Night.”
- Text: Allows freeform input for each situation.
- Number: Allows freeform numerical inputs.
Radio buttons can nest up to 7 layers deep. Check boxes and text fields do not support nesting.

Global Classifications
Global Classifications apply to an entire file rather than a specific range of frames. To create one, enable the Global toggle when setting up a classification.Global Classifications are supported for all modalities.

Mark as Required
Any object, classification, or attribute can be marked as Required. This means annotators must include at least one instance of the required feature in each task before submitting.

Attributes
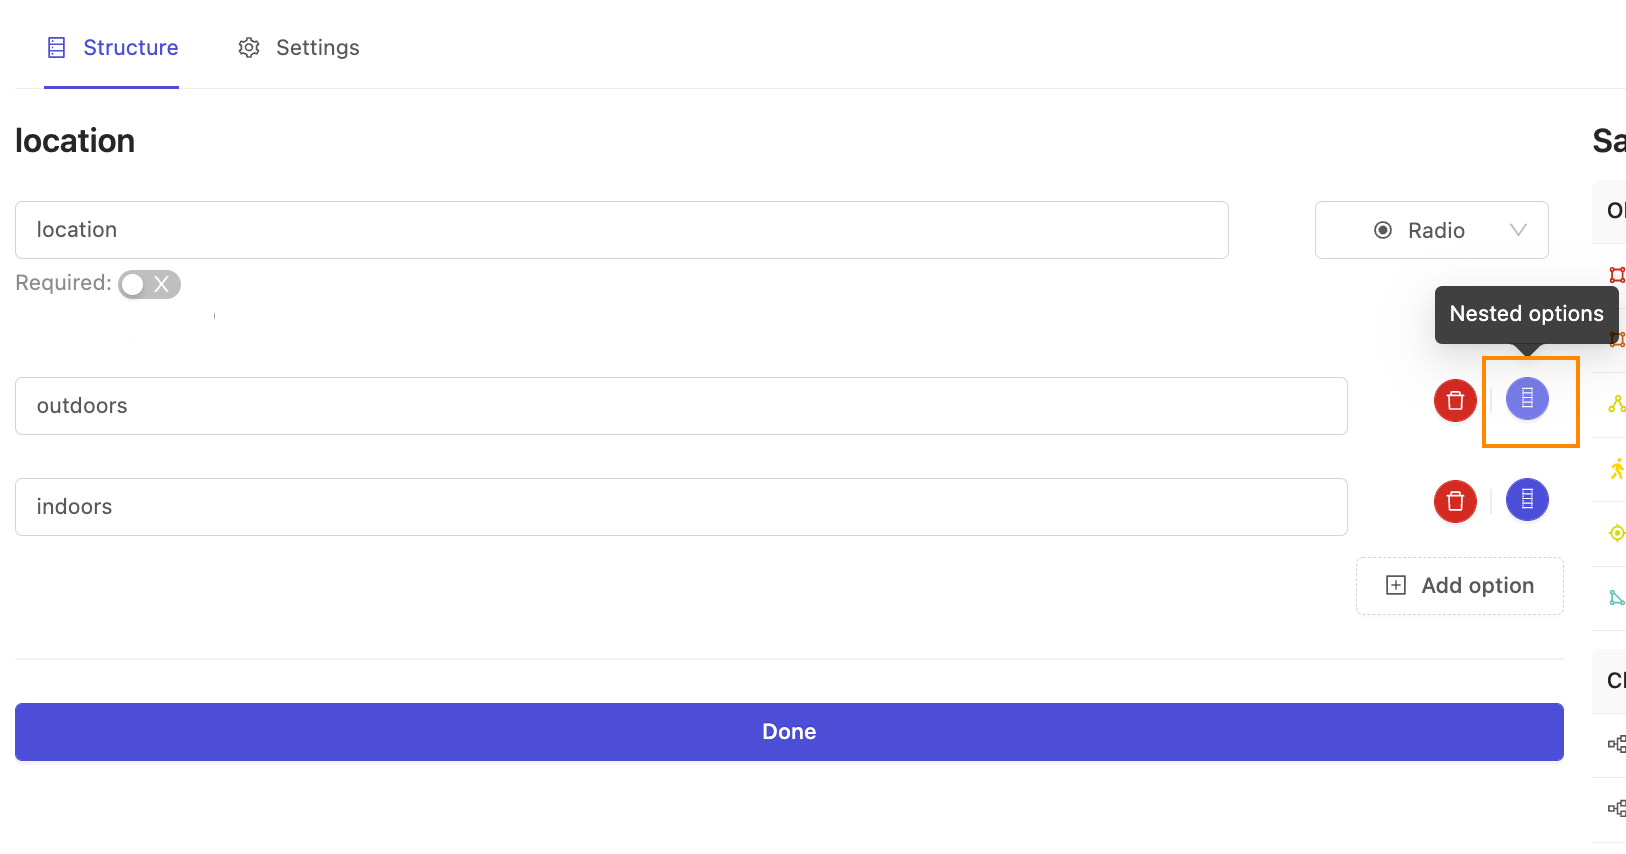
Attributes can be nested under objects or any classification with a Radio annotation type. To nest attributes, set the type to Radio, then click the Configure button next to the value where you want to add a new attribute.
Dynamic Attributes
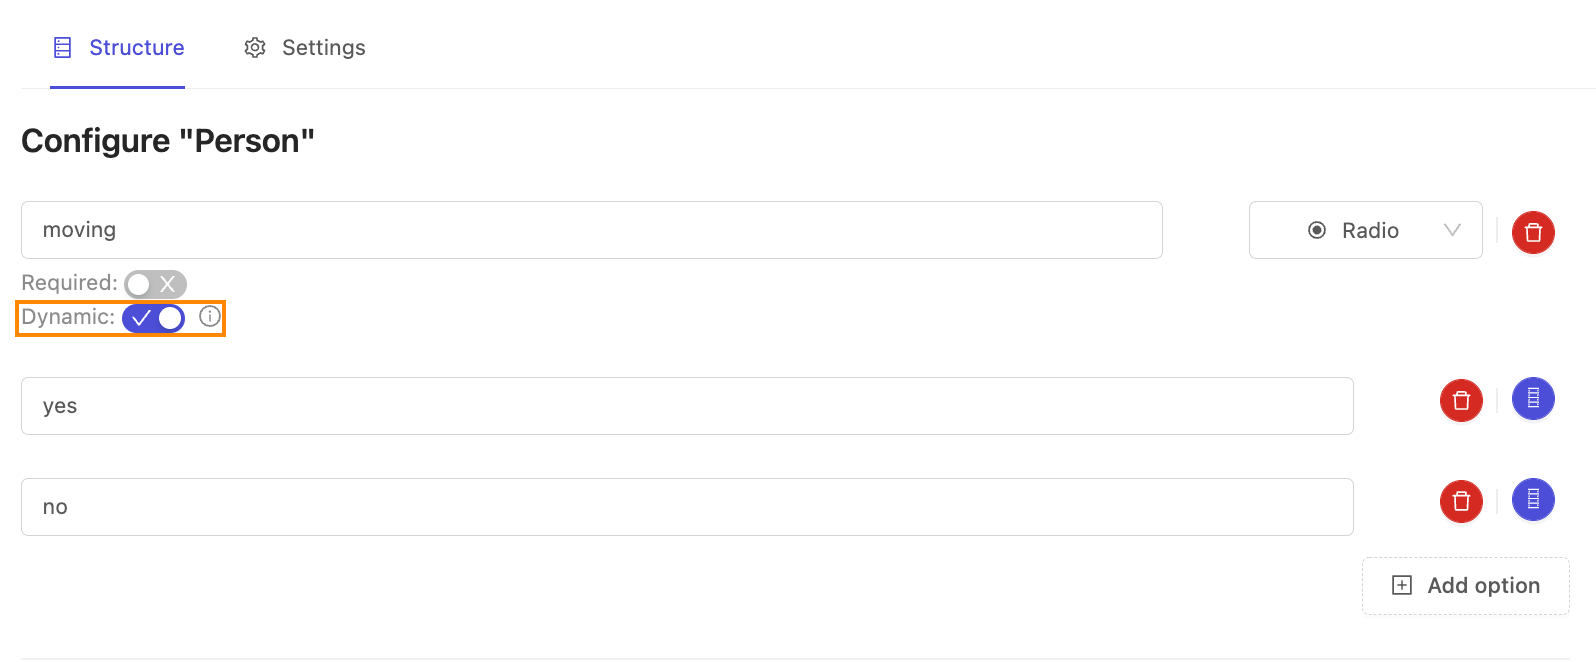
Top-level attributes can be marked as Dynamic to allow their values to change over time in a video. This is useful for representing temporary states—for example, a person can be labeled as “moving” in one segment and “stationary” in another.
Relation Attributes
The Relation attribute lets you link objects and define their relationship using free-text, regardless of annotation type.Only one of the linked objects needs a Relation attribute for the link to be established. For example, to relate a chicken and a chicken wing, add a Relation attribute to either object in the Ontology.

Objects are linked in the Label Editor during annotation, not during Ontology creation.
- Create both instance labels. In this example a chicken and its wing have been labeled using bounding boxes.
- Click the Edit attributes button for the object with the Relation attribute - in this example the chicken wing.

- Click the Set relation… bar and select the instance you want to link the selected instance to. In this example the chicken and the wing appear on the same frame, and therefore appear under the This frame heading. Instances in different frames appear under the heading Rest.

- Click Done. The instances are now linked. This is shown in the Instance labels section with the name of the linked instance being displayed.

Apply to new occurrences
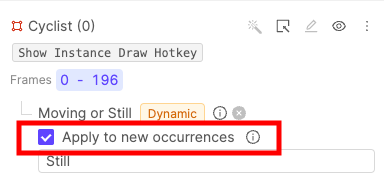
The Apply to new occurrences checkbox appears on the first instance of a label with a dynamic attribute. When selected, it applies the attribute value to all future labels of that instance.
Transcript Attributes
Transcript attributes are text fields for transcribing audio. Apply them to Audio Region objects and enter the transcription directly. For example, an Audio Region object called “Beautiful Voice” might use a Transcript attribute named “Lyrics” to transcribe song lyrics.Only Text attributes can be marked Transcript

Add Description
To give annotators clearer guidance on what to include and exclude, you can add descriptions to each element in your Ontology. This helps reduce confusion and leads to more accurate labels.- Adding Description
- What Annotators See

JSON Ontology Structure
You can preview a JSON of your Ontology structure when you are setting up or editing your Ontology. Preview the JSON by enabling the Display JSON toggle.
Ontology Best Practices
Creating an Ontology is a crucial step in developing effective machine learning applications. Keep the following considerations in mind when designing your Ontologies:- The Problem Domain: Ensure your Ontology is exhaustive, with a class or representation for all important concepts. Consider the appropriate level of detail. For example, an application recognizing various animals might have top-level classes like “cat” and “dog,” while one focused on dog breeds might use “German Shepherd” and “Border Collie” as top-level classes.
- The Team: Use terminology that is clear and communicable across your entire team, including annotators, reviewers, project managers, algorithm developers, and other stakeholders.
- The Workflow: Annotation can be difficult and time-consuming. Design your Ontology to represent classes and their attributes appropriately, but also aim for efficiency. Ensuring objects and scenes can be labeled both accurately and quickly will lead to a more efficient labeling process.


