1. Configure Cloudflare
- Log into Cloudflare. The Cloudflare dashboard appears.
- Click the account where your bucket is located. The Account home page appears.
-
Click R2 object storage from the left hand navigation.
The Overview R2 Object Storage page appears.
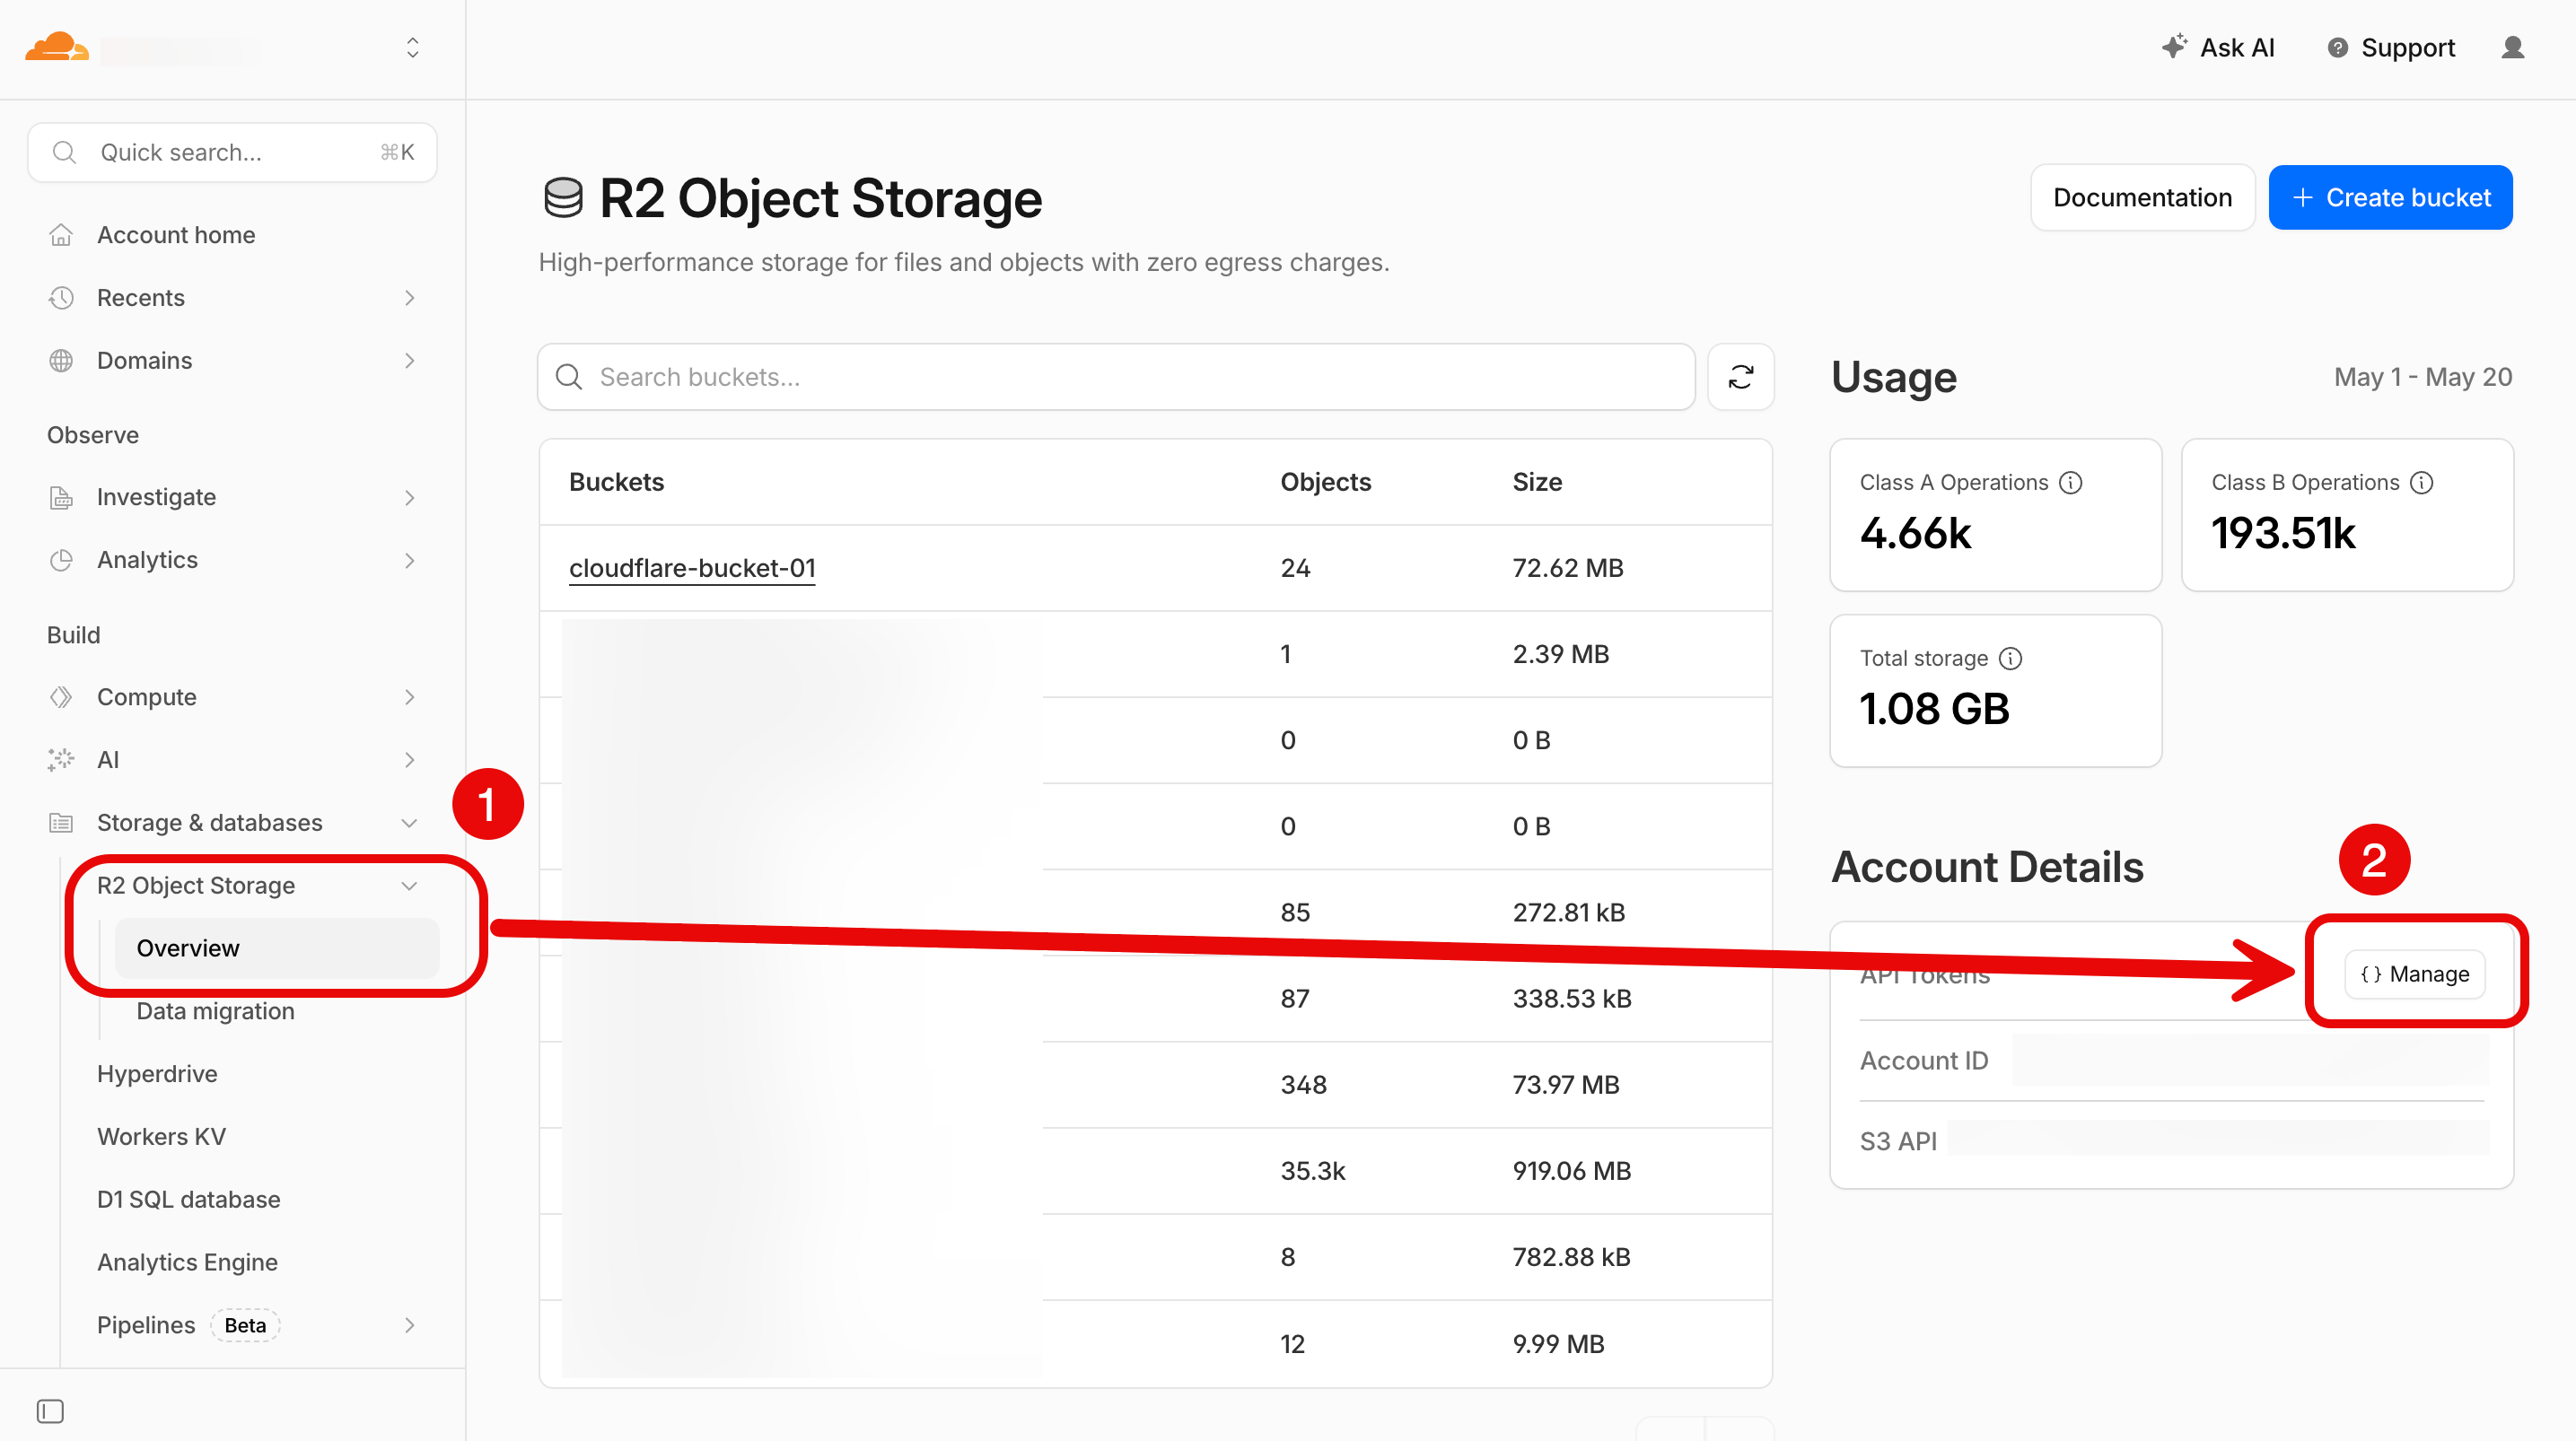
-
Click Manage.
The API tokens page appears.
-
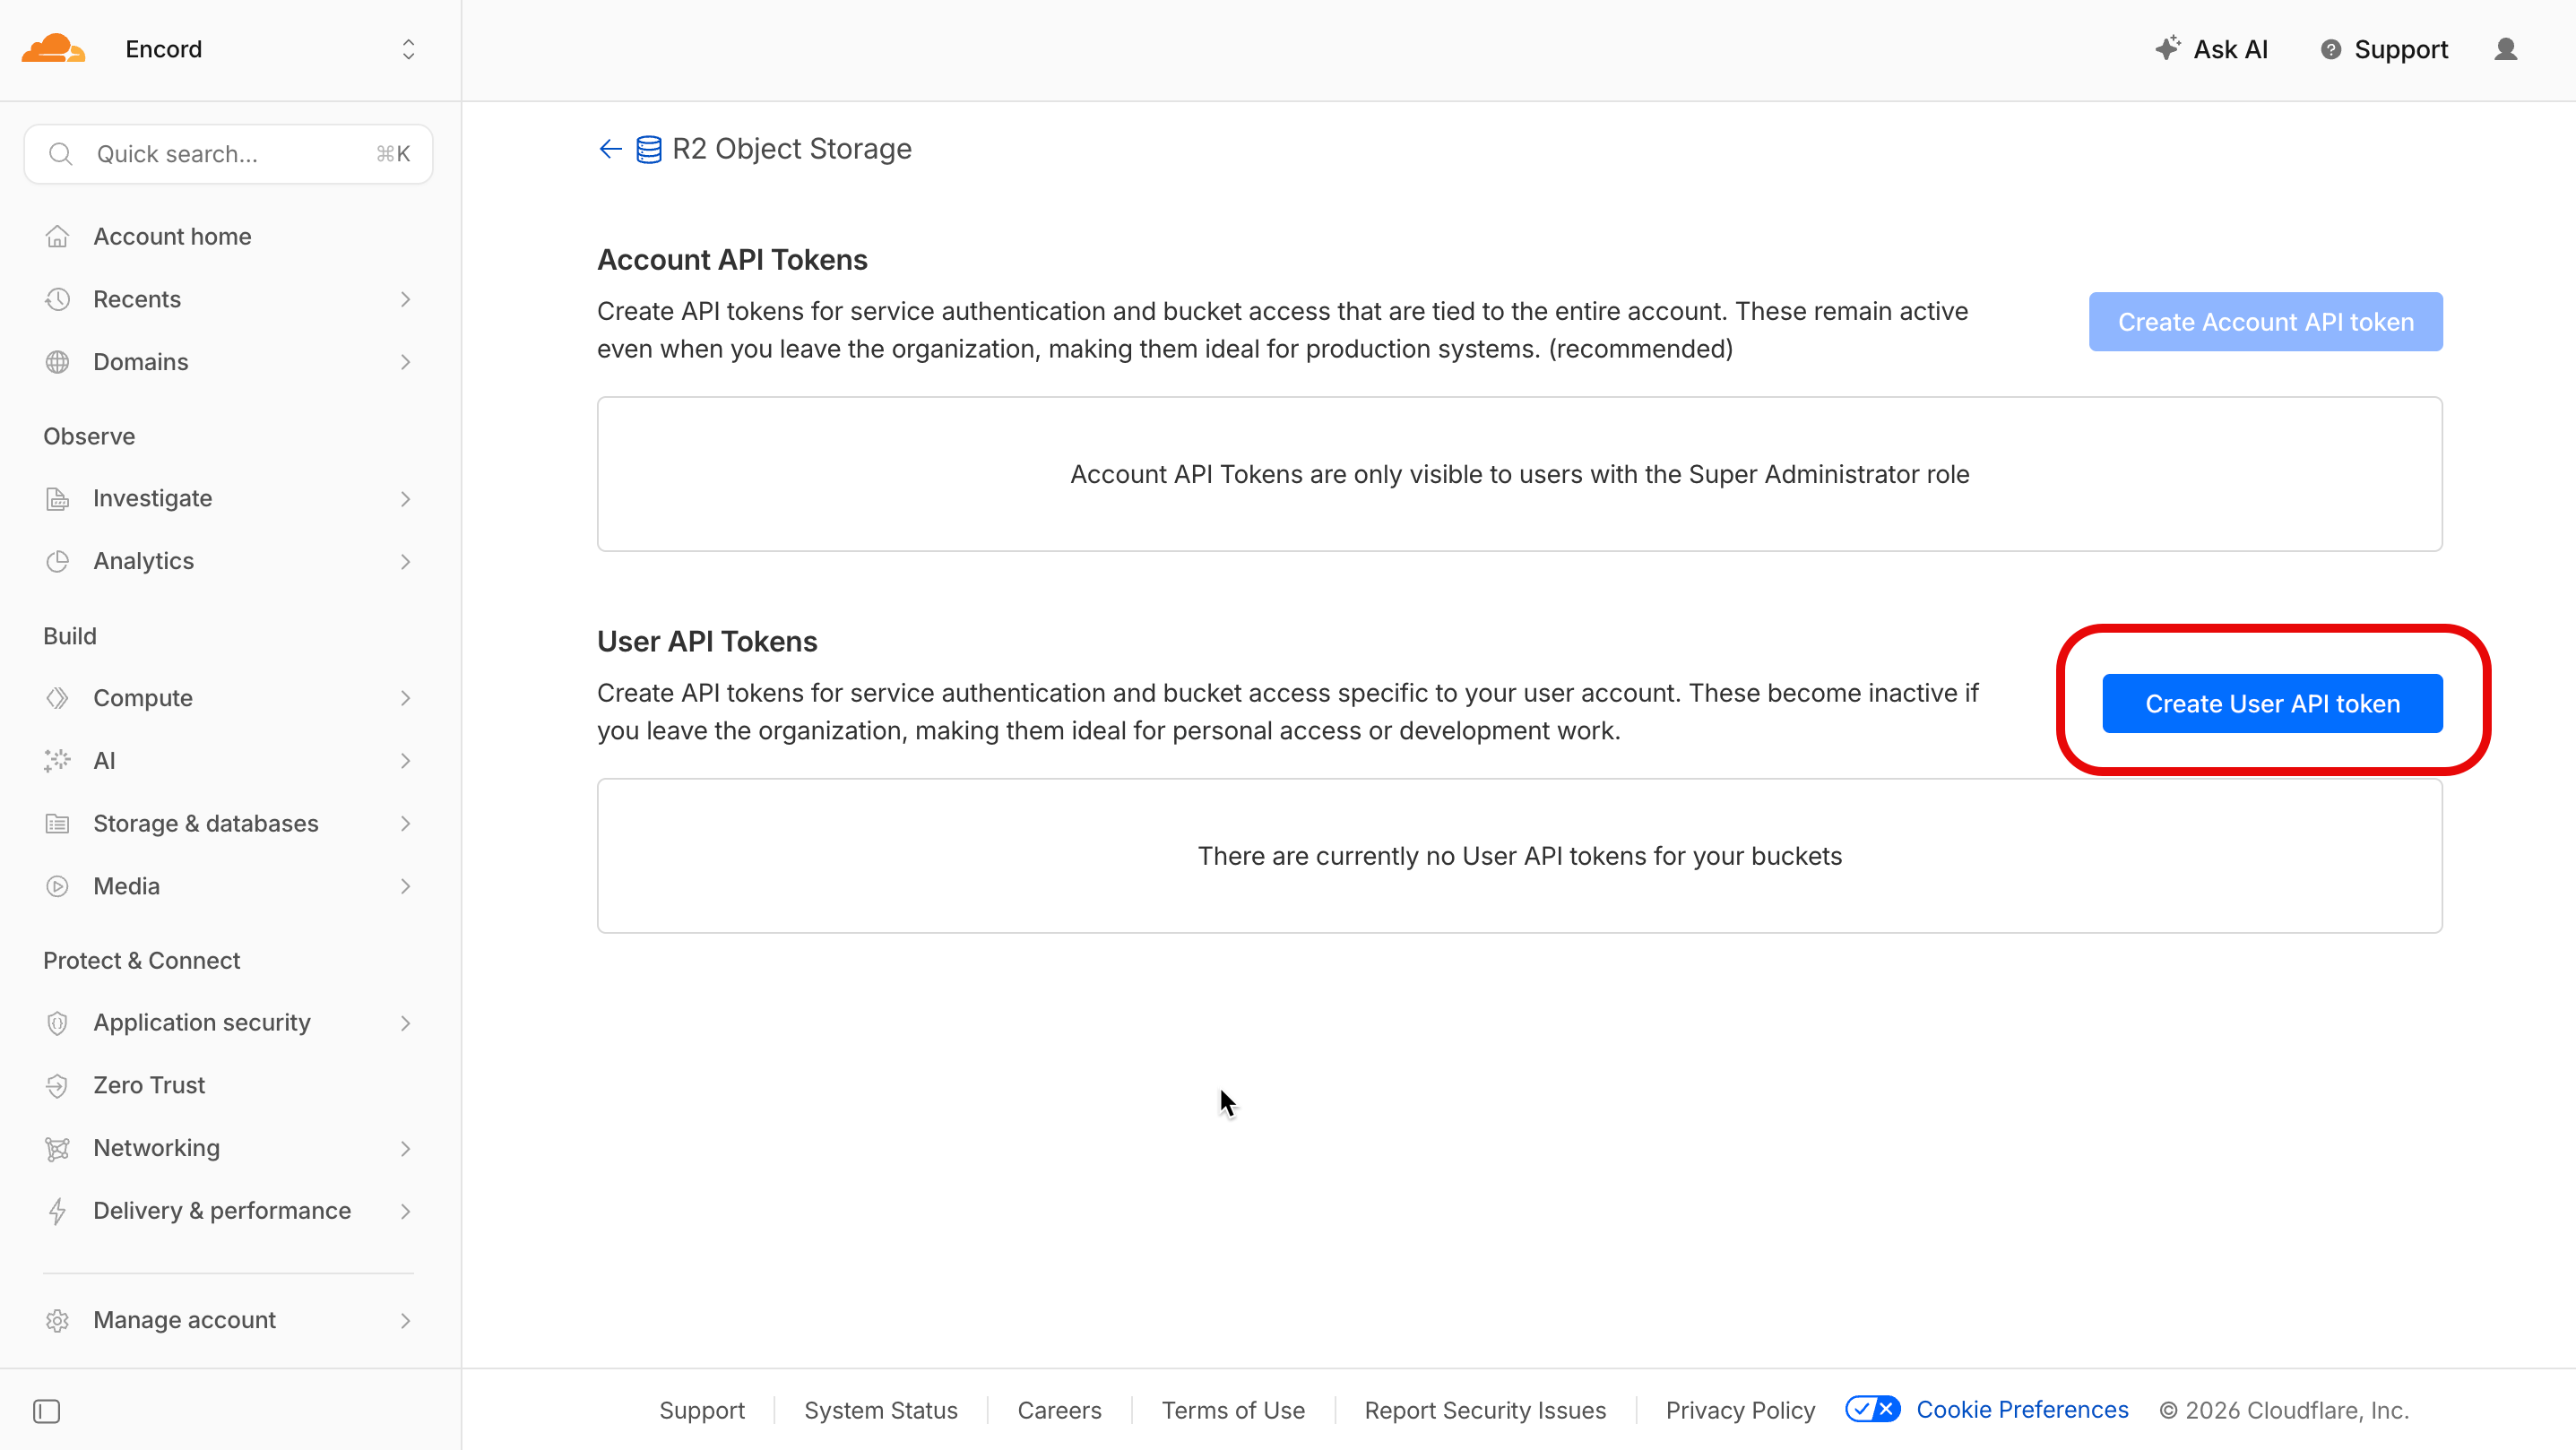
Click Create Account API token or Create User API token depending on your Cloudflare account privileges.
The Create User API Token page appears.
-
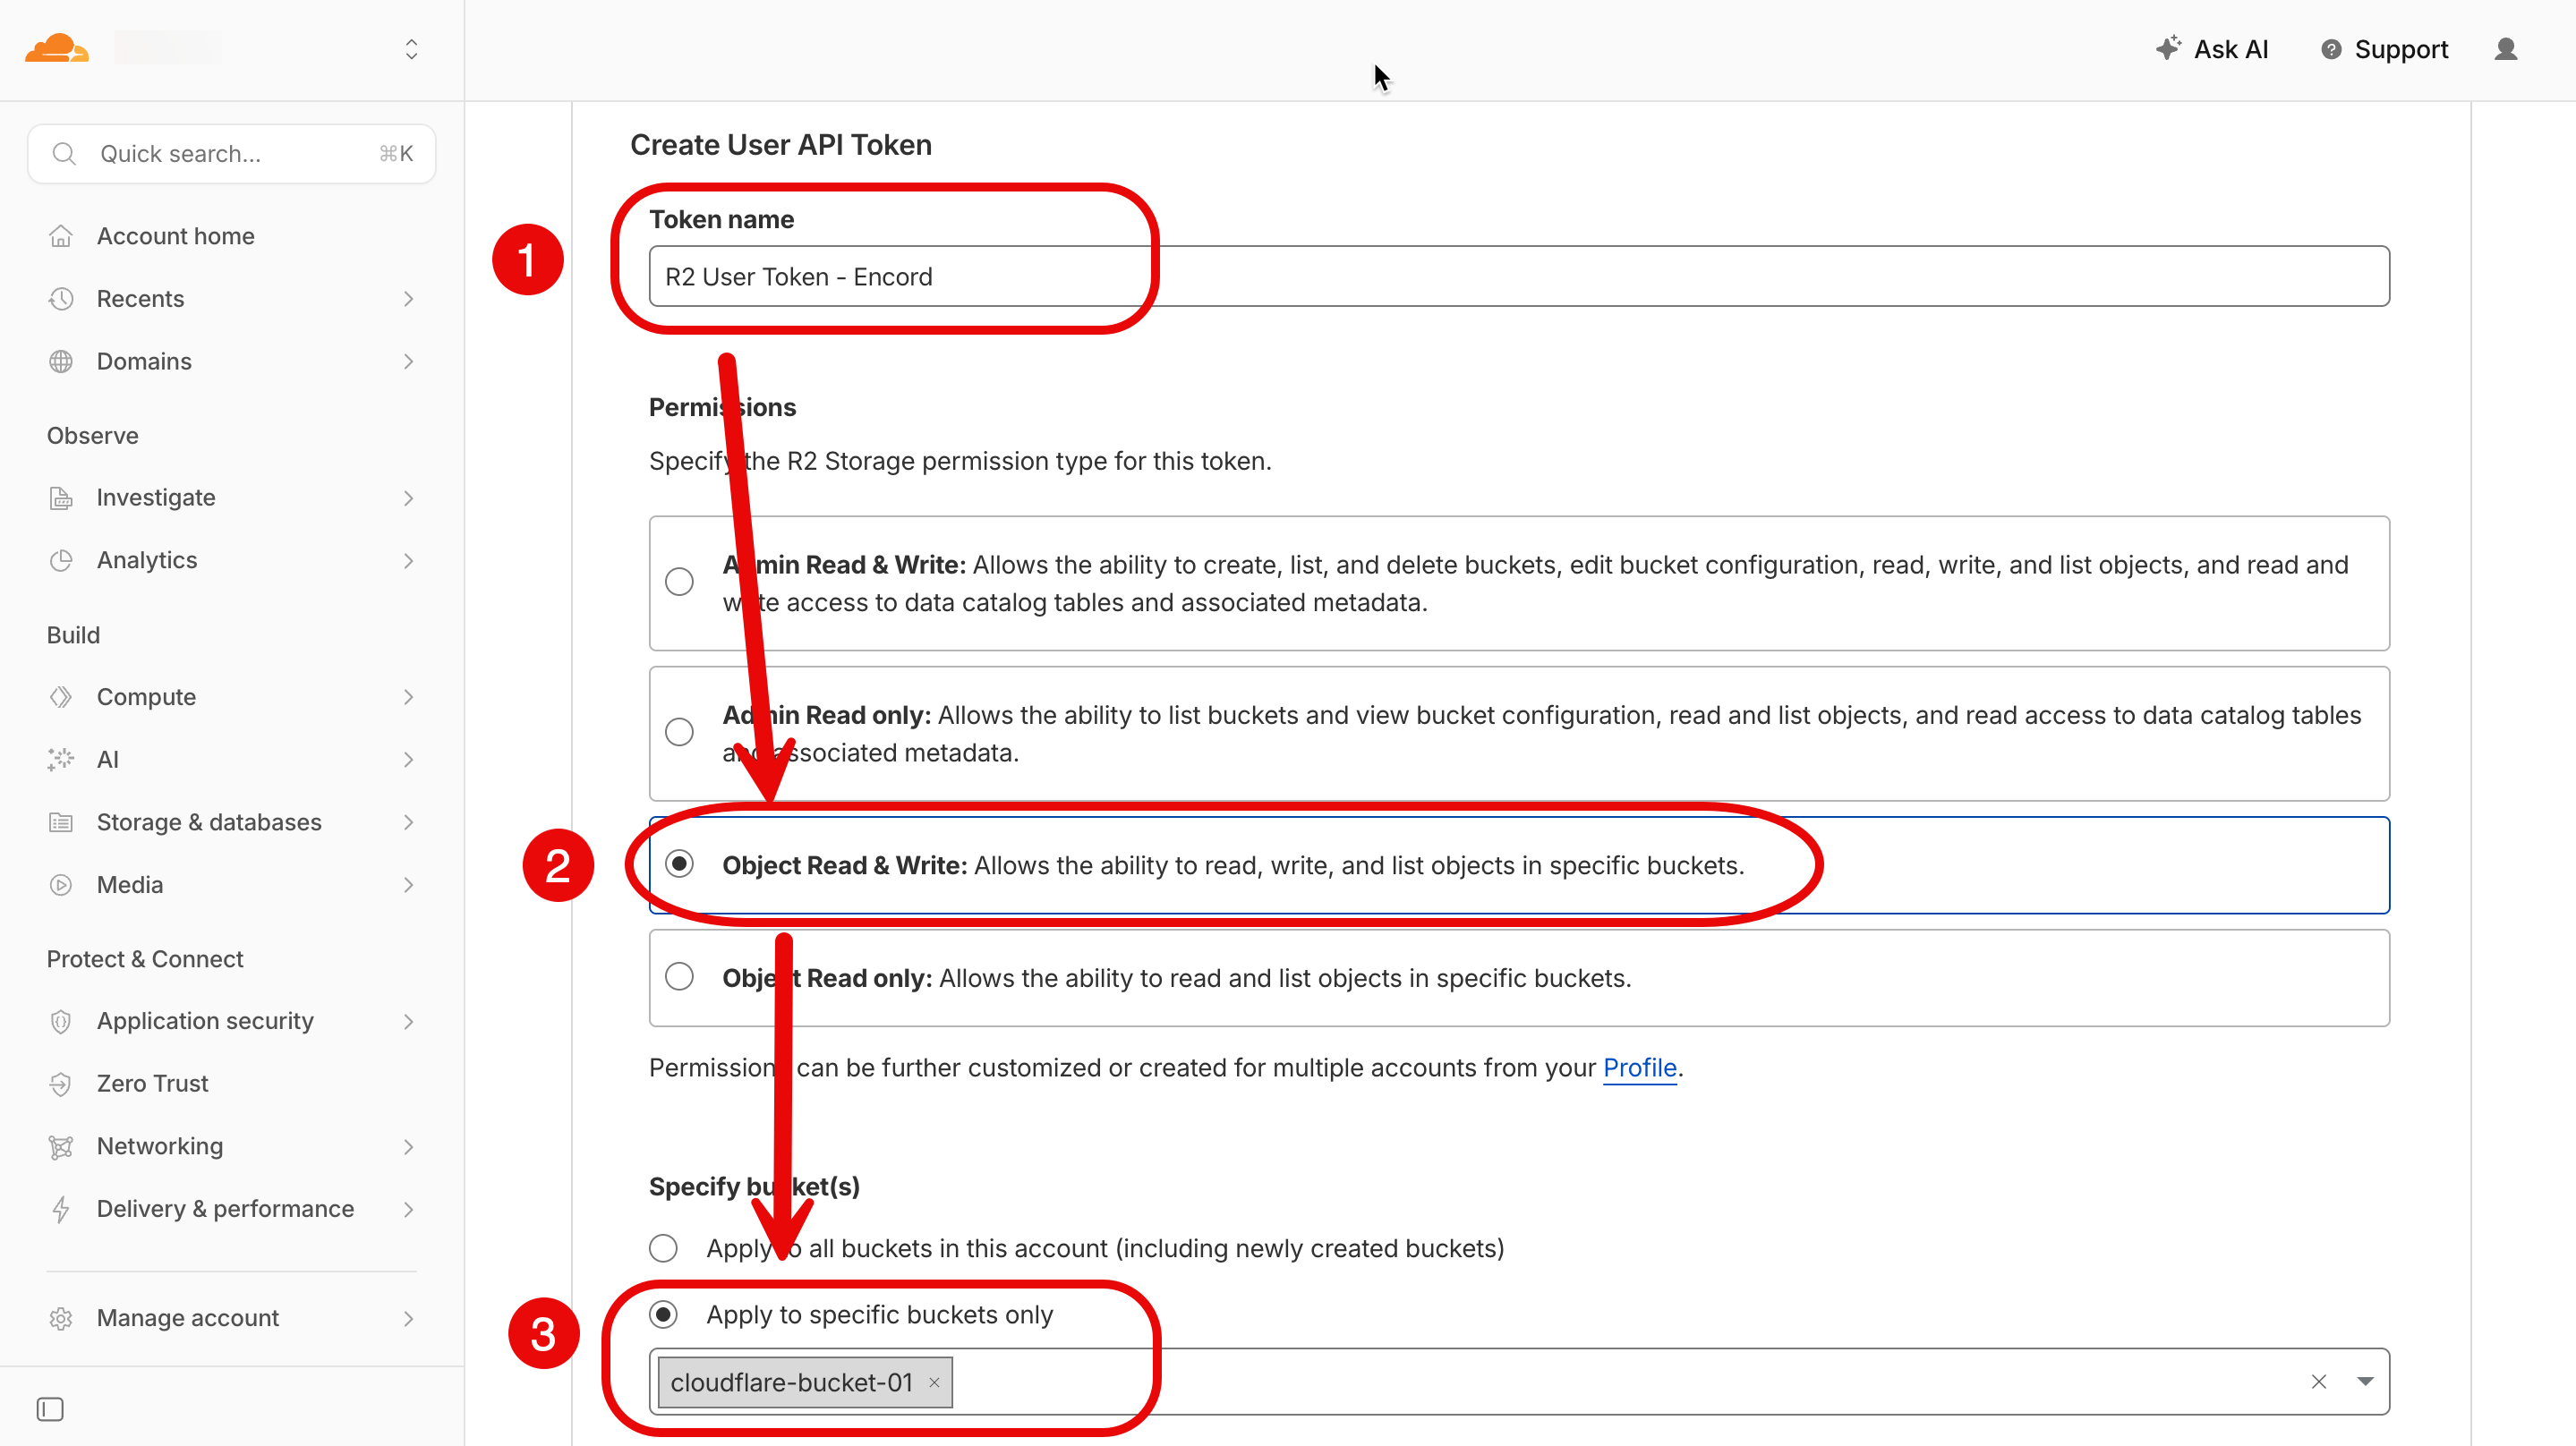
Specify permissions on one or more storage buckets:
-
Permissions:
- For functionality: Select Object Read & Write
- For limited functionality: Select Object Read only
-
Buckets
- For simplicity: Select Apply to all buckets in this account
- For Security: Select Apply to specific buckets only
-
Permissions:
- Click Create Account/User API token. The Summary page for the API token appears.
-
Record the
Access Key IDandSecret Access Key.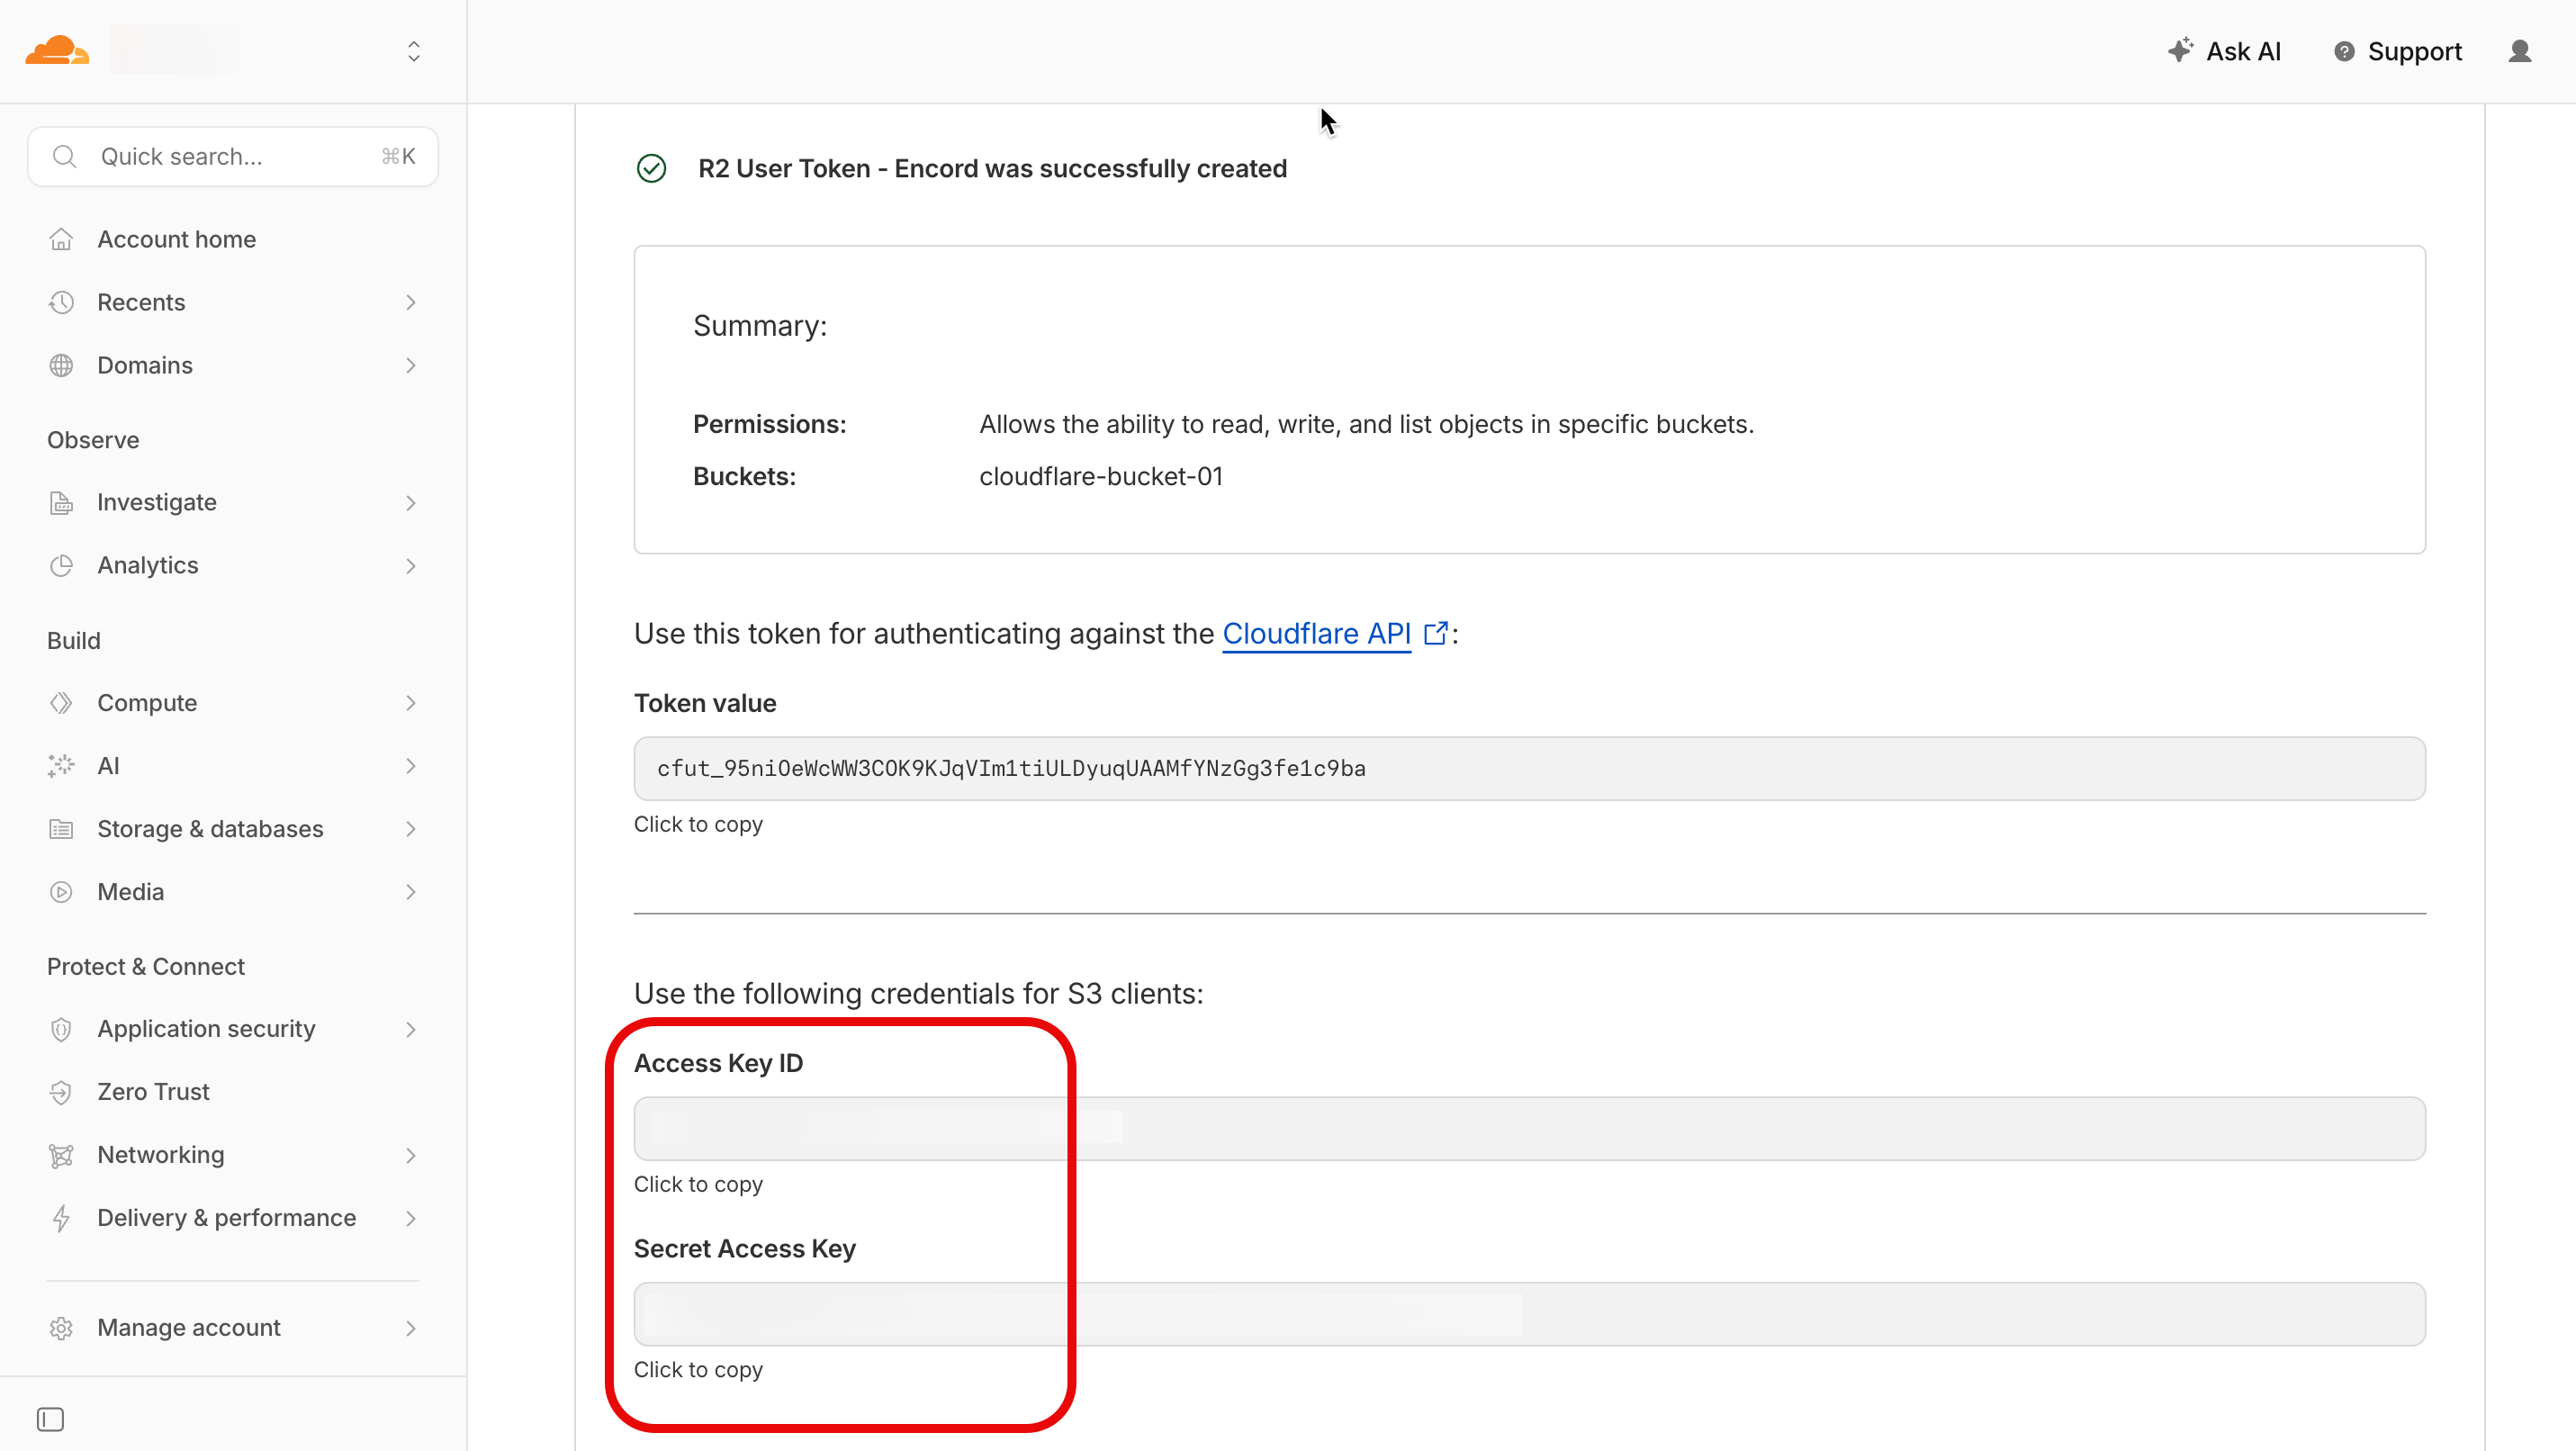
- Click Finish.
- Return to the R2 object storage Overview page.
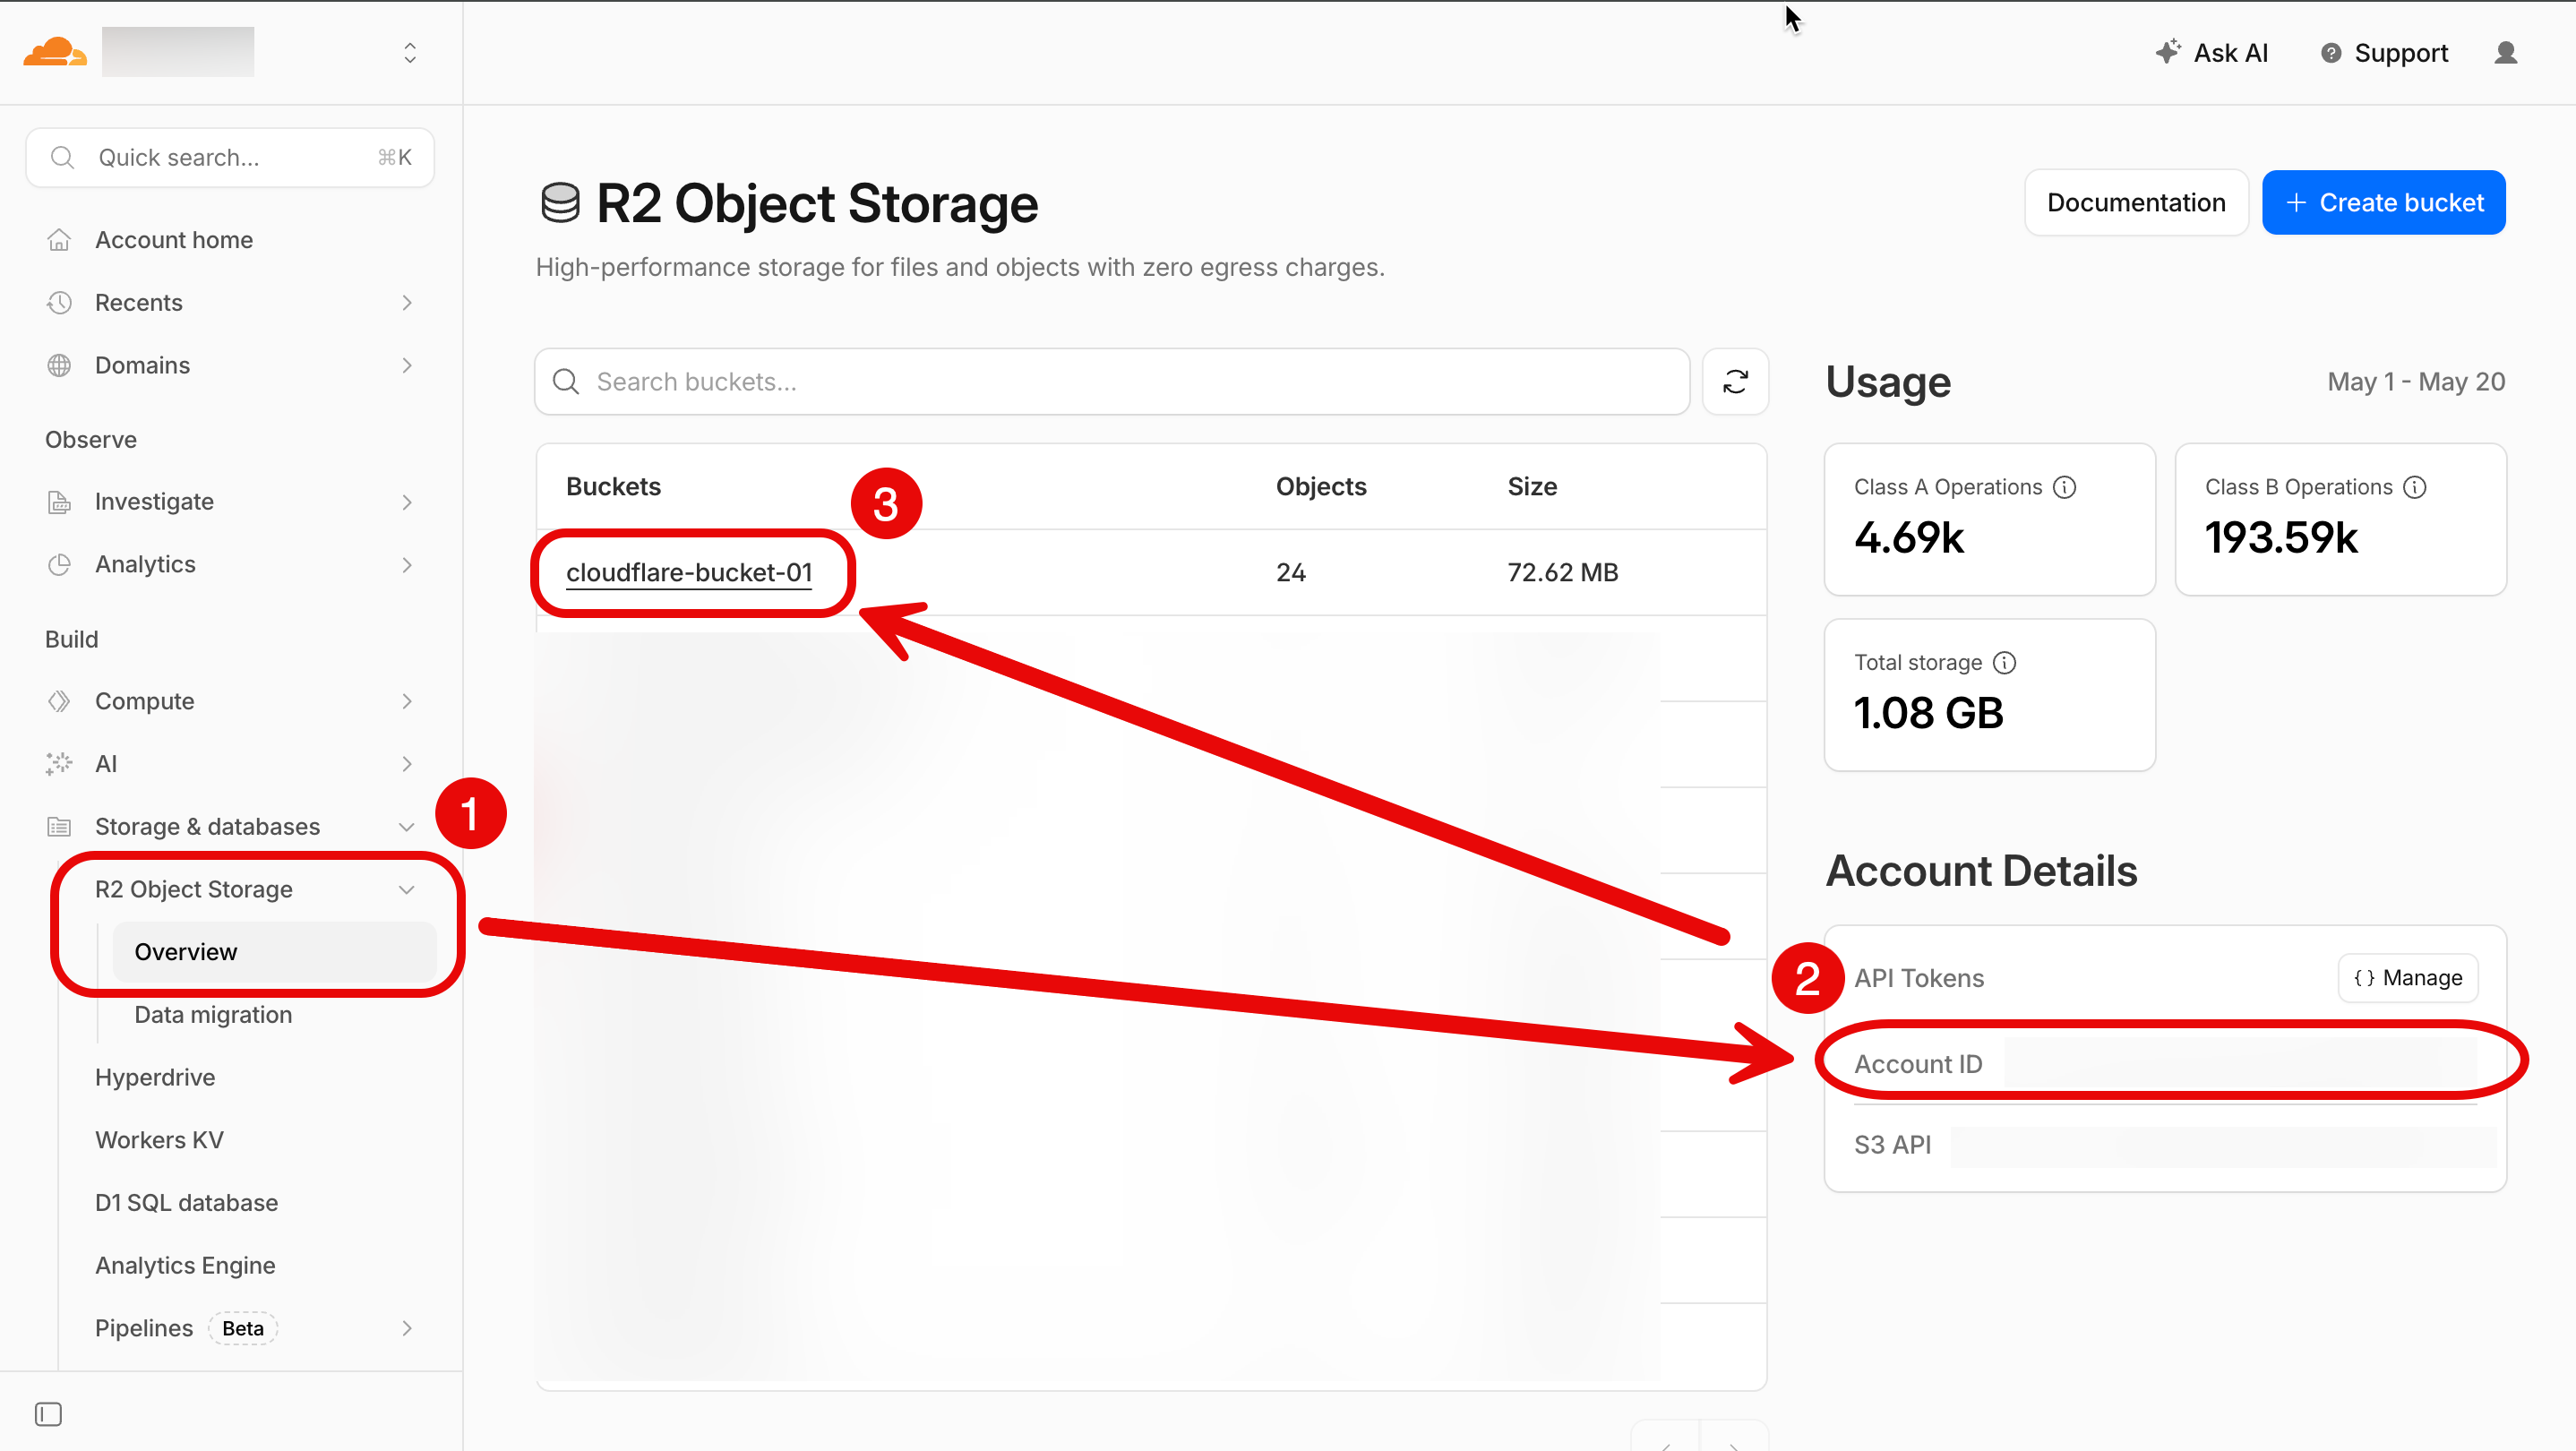
-
Record the
Account ID. -
(OPTIONAL: CORS Policy) Click the bucket the API token is applied to.
The Objects page for the bucket appears.
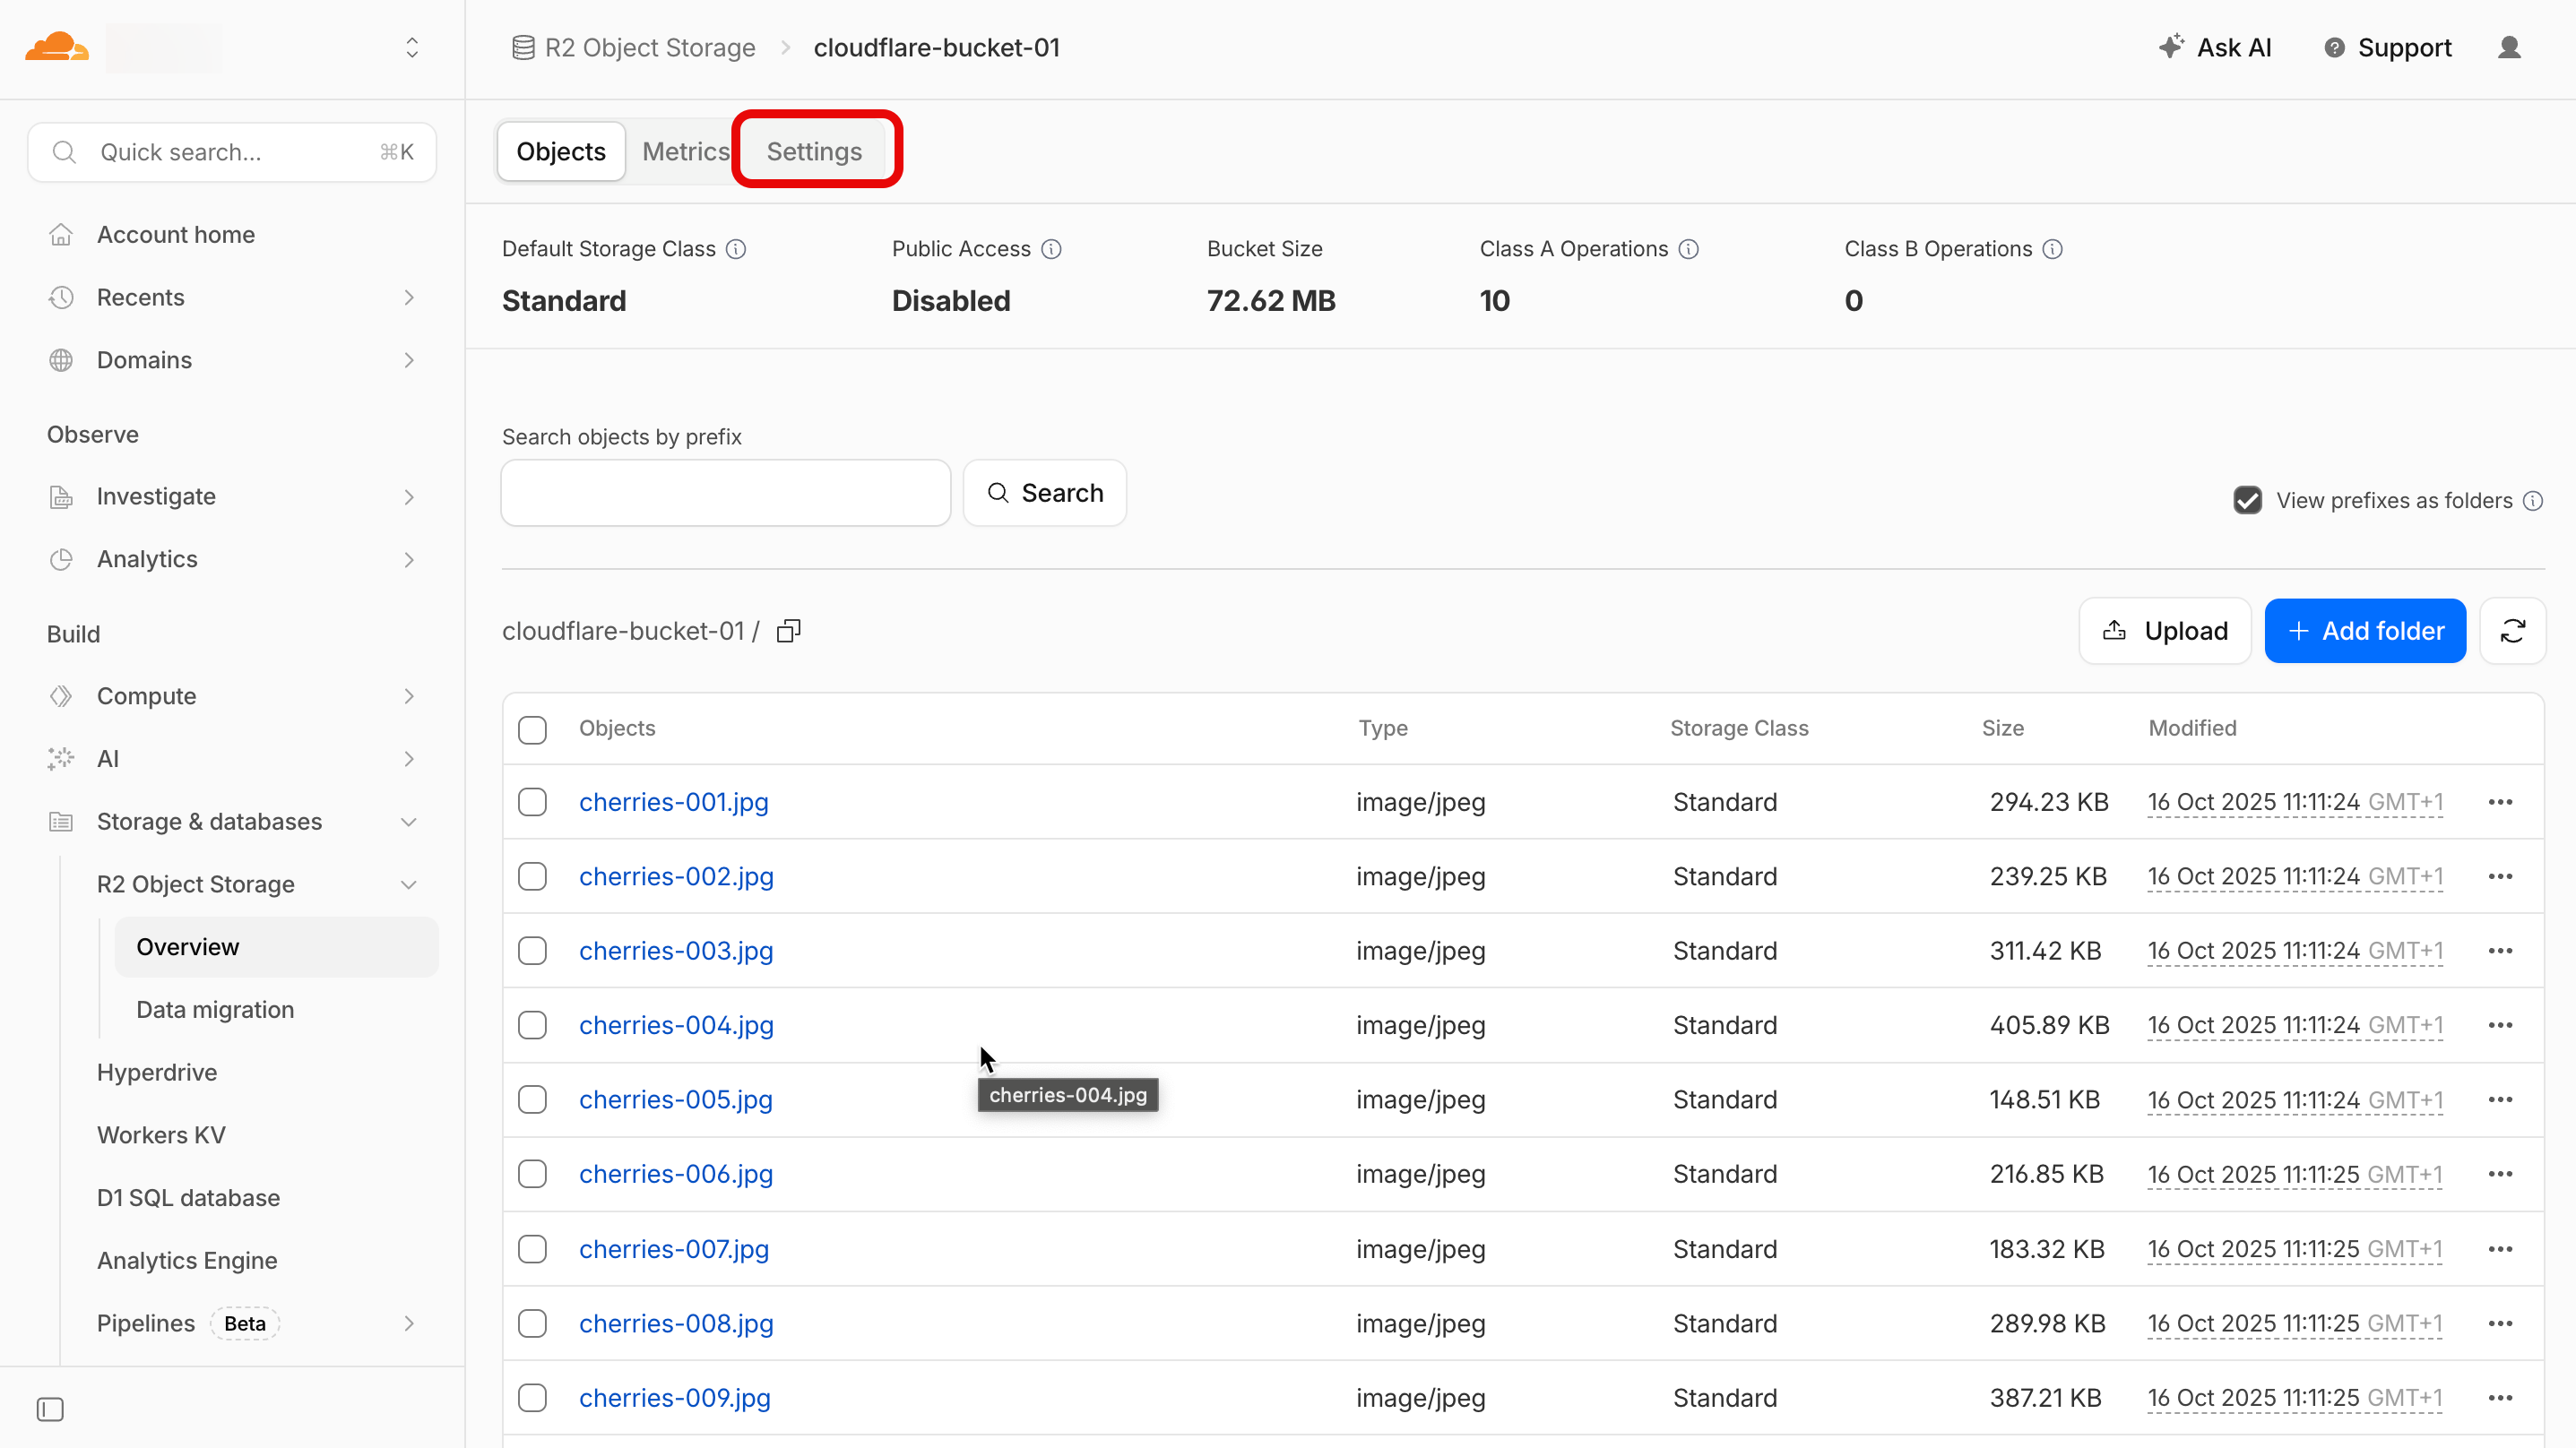
-
Click Settings.
The Settings page for the bucket appears.
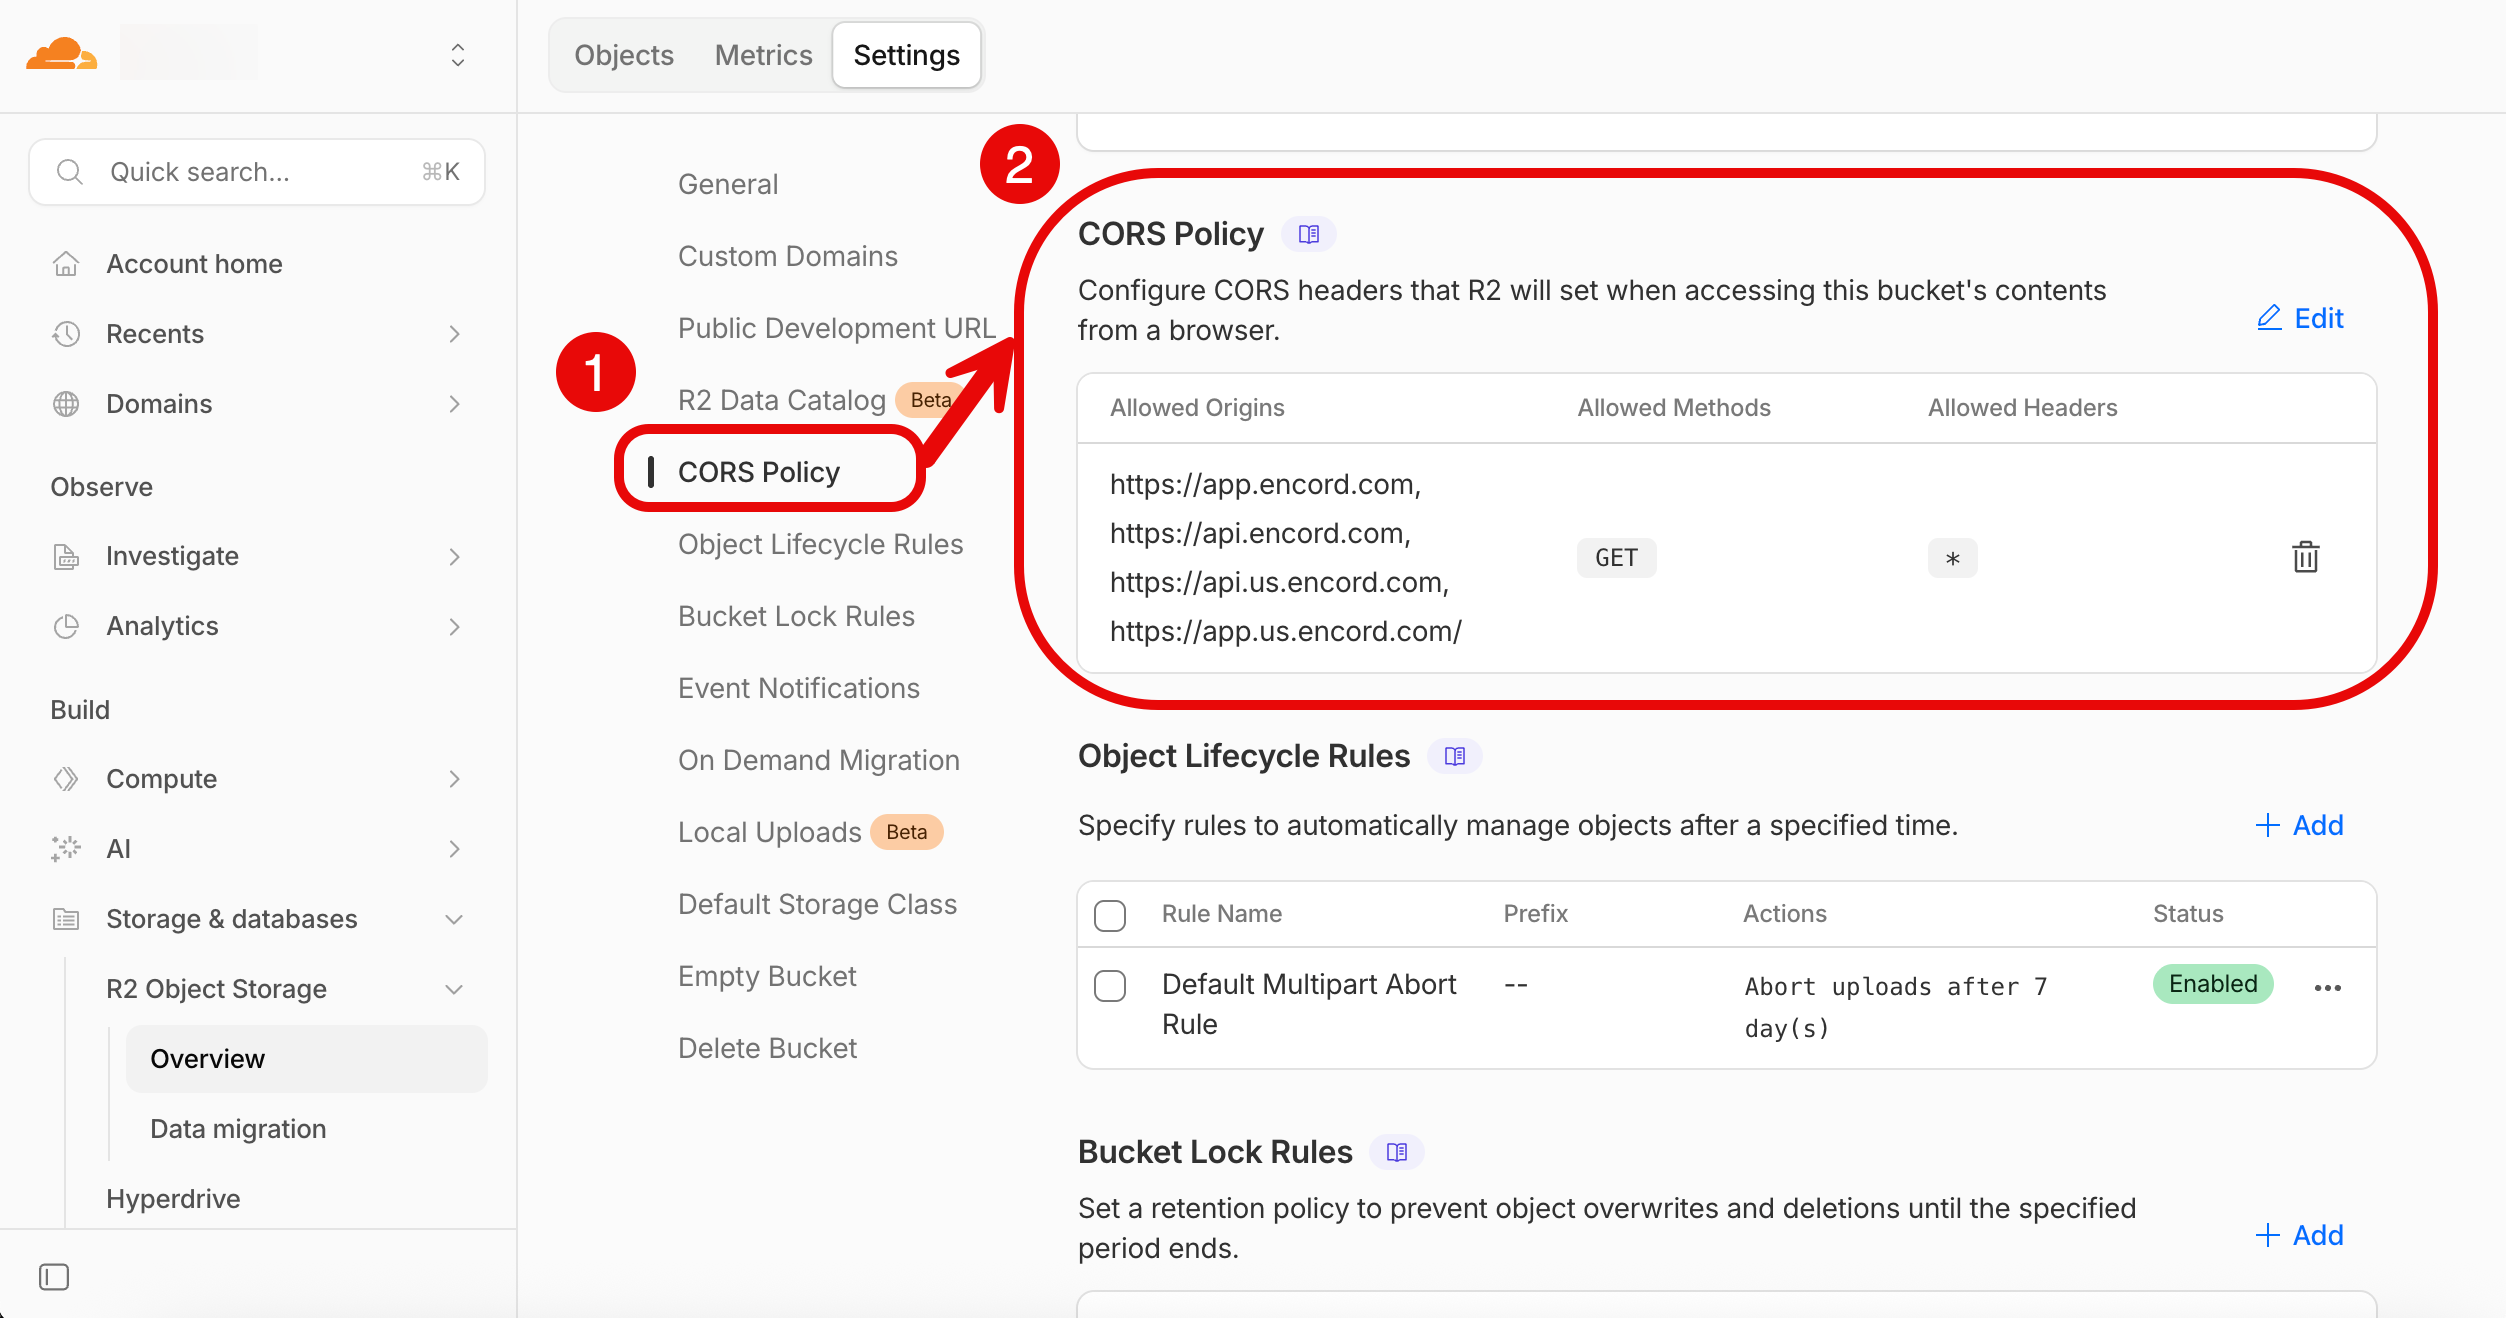
- Click CORS Policy. The Settings page moves to the CORS Policy section.
-
Click + Add.
The CORS Policy panel appears.
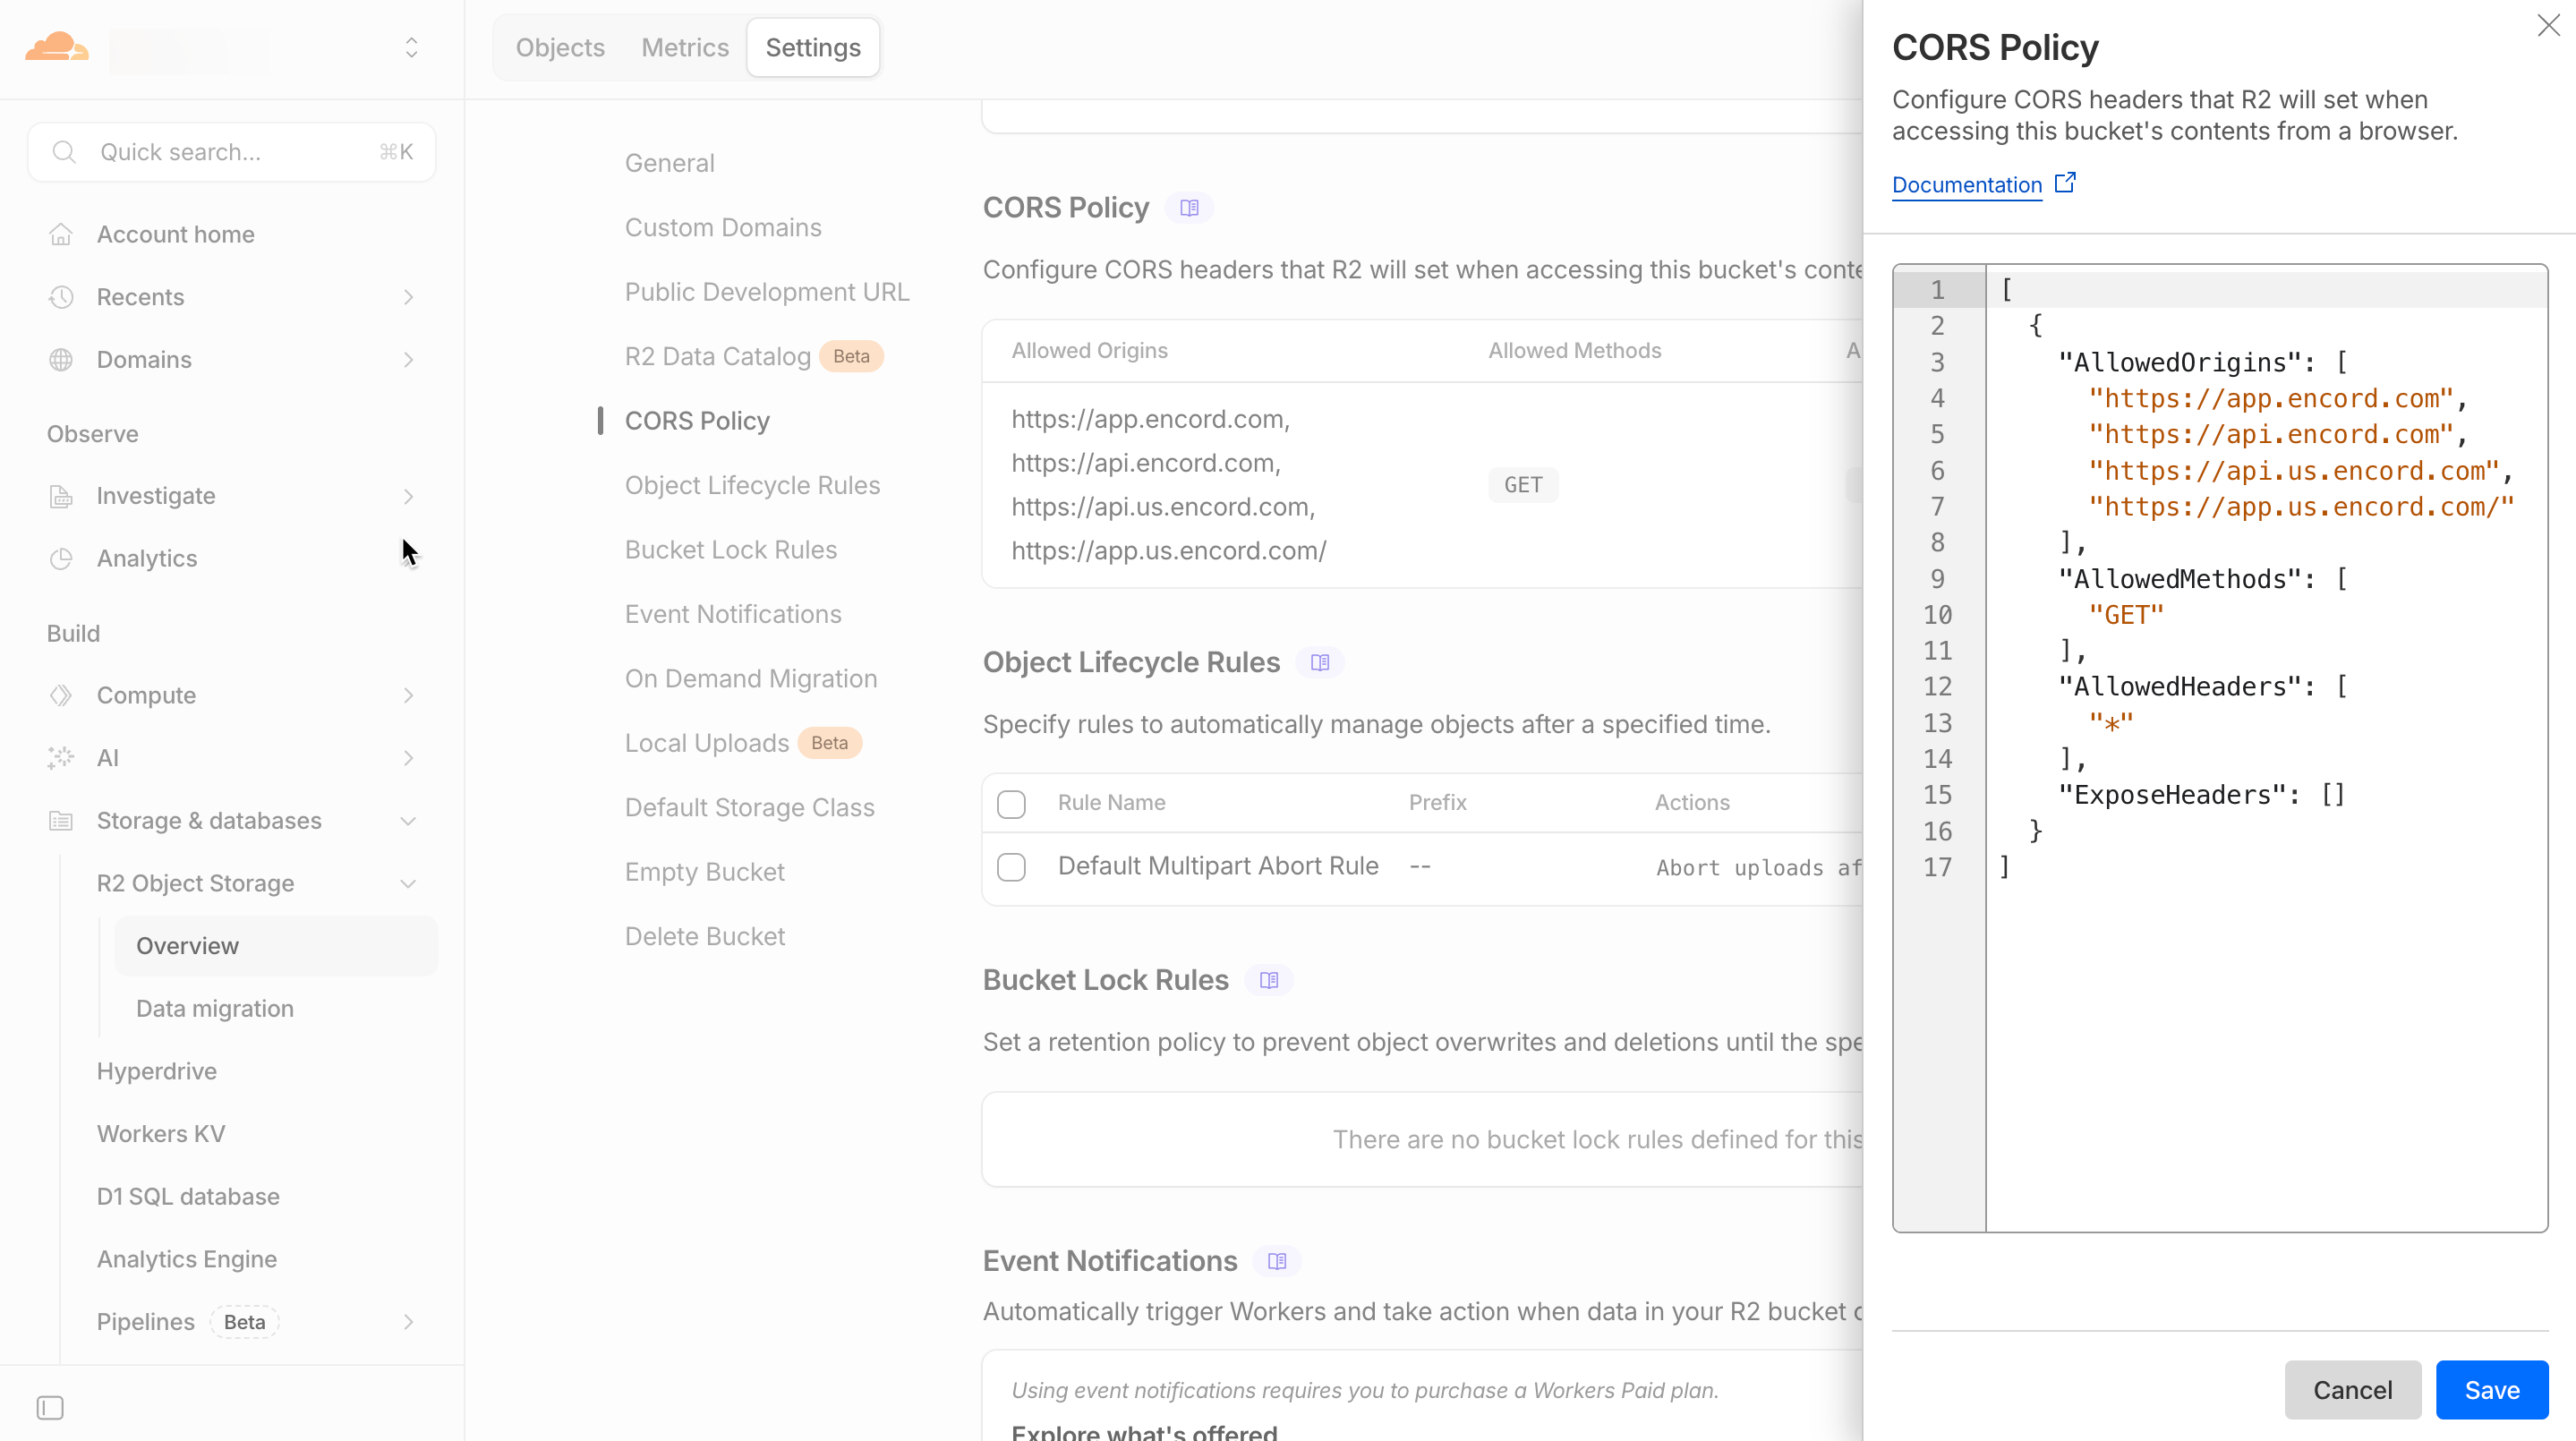
- Copy the following into the workspace:
- Click Save.
2. Encord Configuration
- Navigate to Workspace Settings > Cloud Buckets and click +New integration to create a new integration. The integration dialog appears.
-
Select Cloudflare in the integration dialog.

-
Provide a meaningful name for the integration.

-
Paste the following, from Cloudflare, into step 3:
Account IDAccess Key IDSecret Access Key

-
Specify Advanced settings for tighter security if required.

-
Click Create.
The integration appears in the Integrations list.
