Encord does not currently support Multi-Region Access Points for Azure.
- Create an Azure integration.
- Set up an Azure integration.
- Create a Cloud-synced folder to store your data in Encord.
- Sync data to the folder.
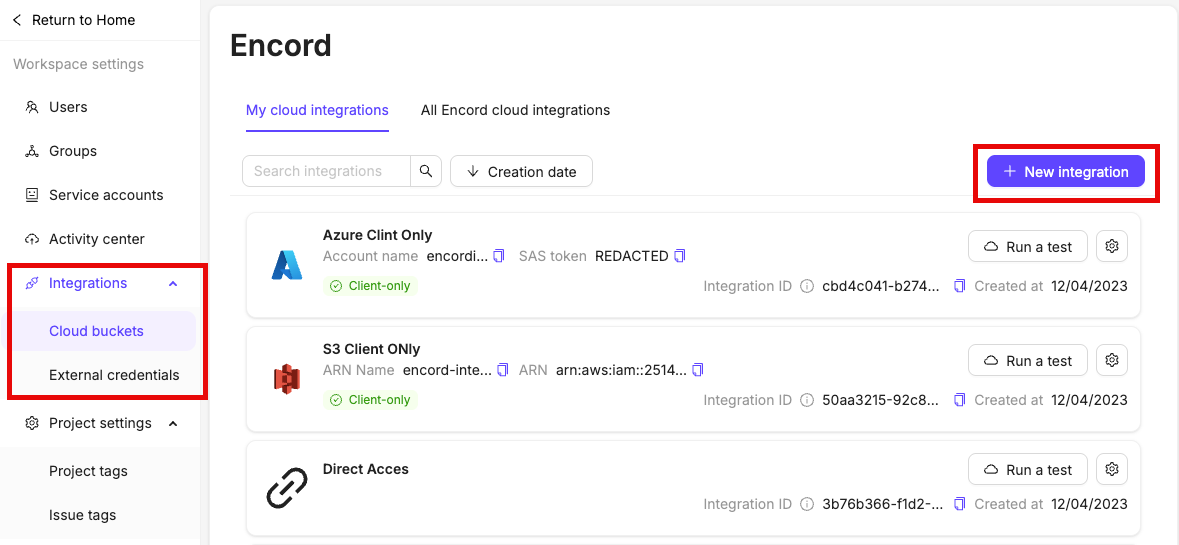
Step 1: Create Encord Integration
Before you can do anything with the Encord platform and cloud storage, you need to configure your cloud storage to work with Encord. Once the integration between Encord and your cloud storage is complete, you can then use your data in Encord. In order to integrate Azure with Encord you need to:- Create the integration with the Encord platform (https://app.encord.com/integrations or https://app.us.encord.com/integrations).
- Authenticate your storage account for integration on the Azure platform.
- Set up Cross-Origin Resource Sharing (CORS) on Azure.

- Shared access signature.
- (Legacy) Azure service principal.


Step 2: Setup Azure Integration
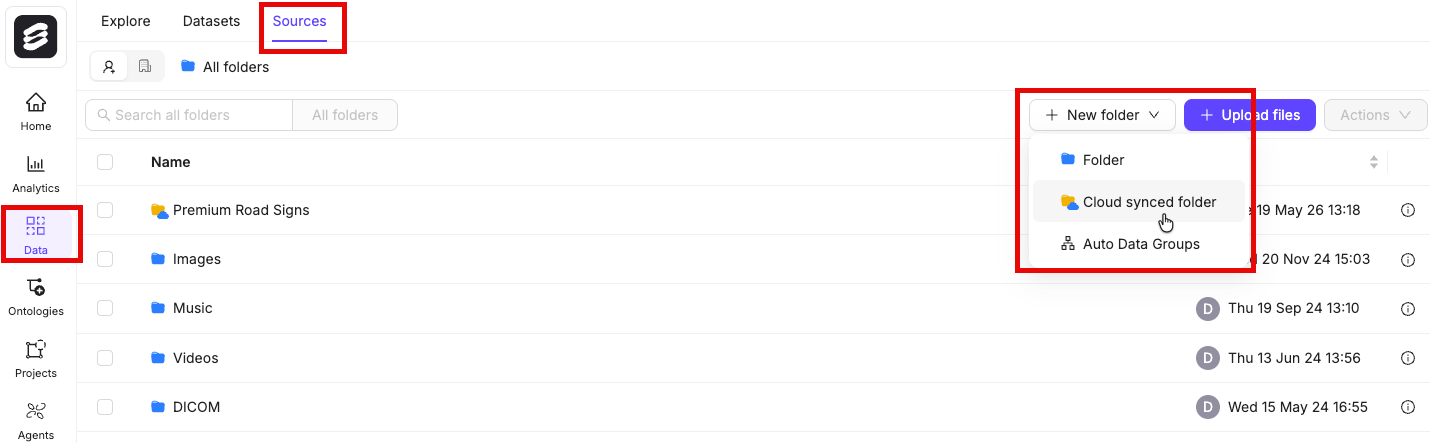
Step 3: Create a Cloud-synced Folder
- Go to Data > Files & Folders.
- Click New folder > Cloud-synced folder. The New Cloud-synced folder dialog appears.
-
Provide the following:
- Title: Provide a meaningful name for the Cloud-synced folder.
- Description: OPTIONAL - Provide a meaningful description for the Cloud-synced folder.
- Select your integration: Select the integration to use from the drop down.
- Storage path: Specify the storage/file path to your cloud storage. For example:
gs://encord-gcp-bucket/CloudSync/ors3://encord-aws-bucket/CloudSync. - Automatically sync data: Automatically syncs data from your cloud storage to Encord once every 24 hours.
- Metadata ingestion: Enable this toggle to import custom metadata files from your cloud storage. Set your sidecar suffix (default is
.metadata.json). Any file matching that suffix is treated as metadata for its paired data file and does not appear as a separate item in your folder.
- Click Create. The page for the new Cloud-synced folder appears.
Find Storage Path
Finding the Storage path for your folder or object varies across Cloud Storage platforms. AWS GCP
GCP
STEP 4: Sync Data Between Encord and Cloud Storage
-
Go to Data > Files & Folders.
The Cloud-synced folder page appears.
-
Click into your cloud-synced folder.
- Click Initiate sync. The sync between the folder and your cloud storage begins.
Azure using Workload Identity Federation
STEP 1: In Azure
- Create an app registration (no client secret required).
-
Add a Federated Identity Credential with scenario Other issuer:
- Issuer:
https://api.encord.com/v2/public/organisation/{org_id}/serviceintegrations - Subject identifier:
service-integration:{service_integration_uuid} - Audience:
api://AzureADTokenExchange
The exact and are shown in the Encord setup UI. - Issuer:
- Grant RBAC on the specific storage account. For example: Storage Blob Data Reader on the account, or a specific container.
-
Send Encord three non-secret strings:
tenant_id,account_name,client_app_id. - Record the app registration’s Application (client) ID.
STEP 2: In Encord
-
Encord-org admin creates a service integration in the Encord UI and specifies
ES256as the algorithm. This is what Microsoft Entra accepts. -
Encord-org admin creates an
Azurecloud integration with the service-integrationUUID,tenant id,account name, and the client app id supplied above. - Test the connectivity of Encord to your storage bucket. The first connectivity test signs an assertion JWT, exchanges it for an Azure access token, and lists the configured container as a smoke test.
No secret is exchanged in either direction.