Registering your cloud data with Encord only references the files. Your data is not stored on Encord servers.
- Set up an AWS integration.
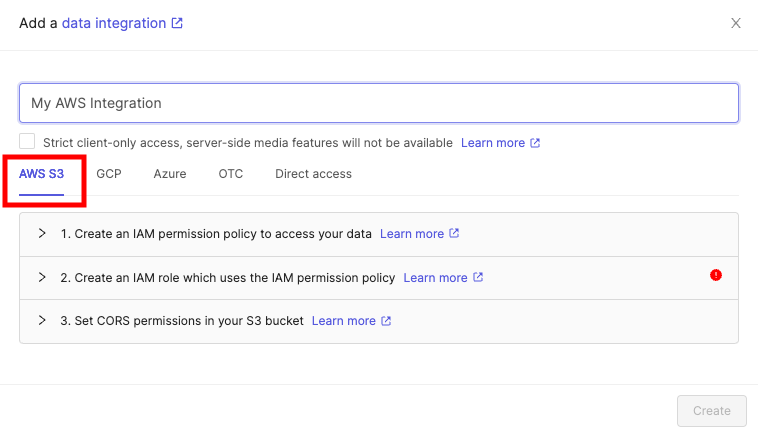
- Create an AWS integration in Encord.
- Create a Cloud-synced folder to store your data in Encord.
- Sync data to the folder.
Step 1: Set up AWS
Before you can do anything with the Encord platform and cloud storage, you need to configure your cloud storage to work with Encord. Once the integration between Encord and your cloud storage is complete, you can then use your data in Encord. In order to integrate with AWS S3, you need to:- Create a permission policy for your resources that allows appropriate access to Encord.
- Create a role for Encord and attach the policy so that Encord can access those resources.
- Activate Cross-origin resource sharing which allows Encord to access those resources from a web browser.
- Test the integration to make sure it works.
Step 2: Create AWS-Encord Integration
Create an S3 bucket to store your files if you haven’t already. Your S3 bucket permissions should be set to be blocking all public access.
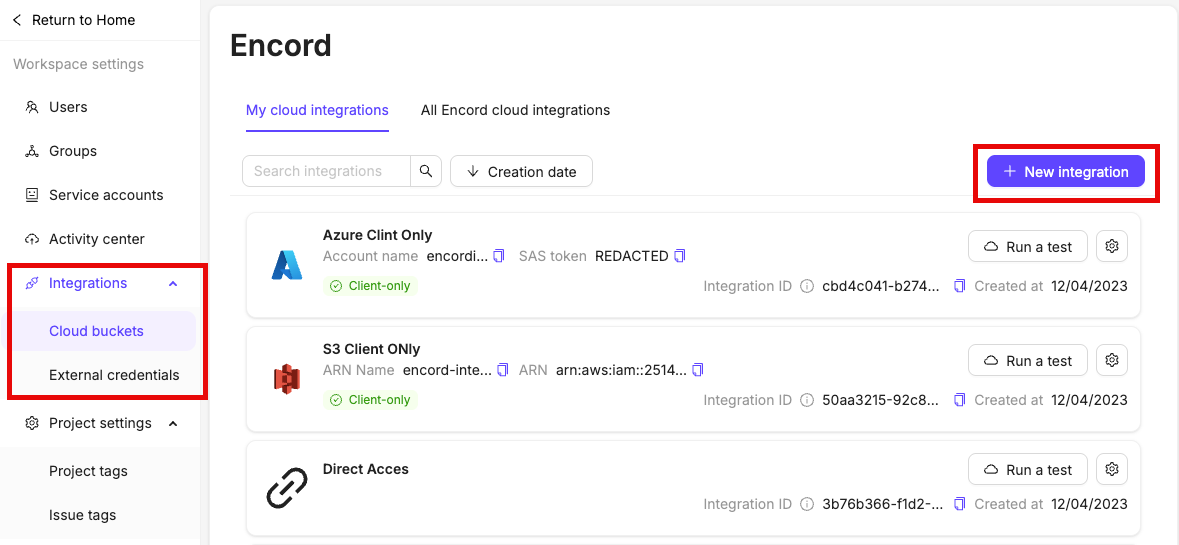
It is essential you do not close this tab or window until you have finished the whole integration process. If you use the AWS UI for integration, we advise opening the AWS console in a separate tab.
Step 3: Create a Cloud-synced Folder
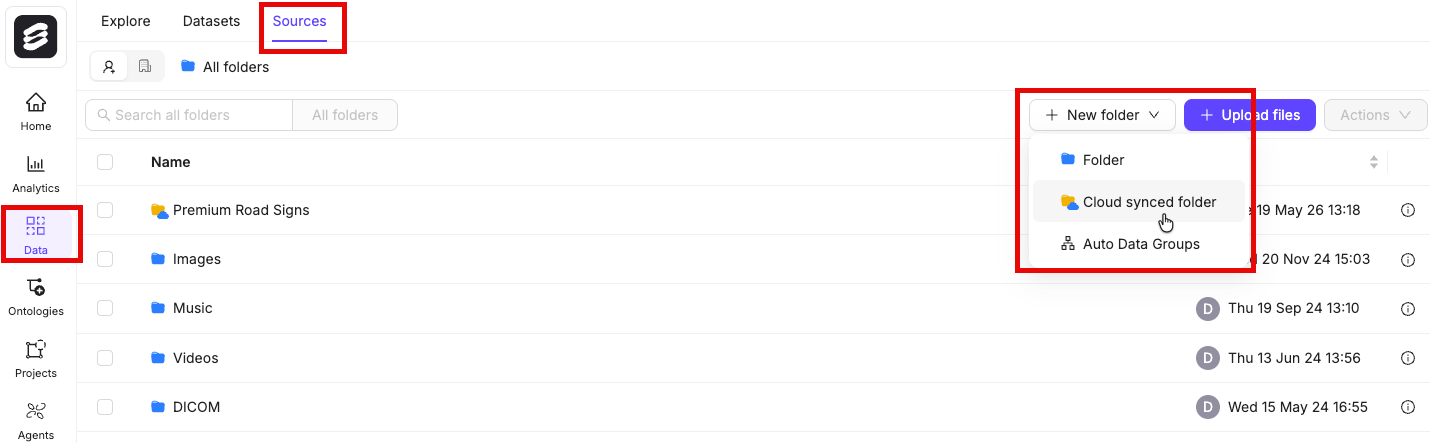
- Go to Data > Files & Folders.
- Click New folder > Cloud-synced folder. The New Cloud-synced folder dialog appears.
-
Provide the following:
- Title: Provide a meaningful name for the Cloud-synced folder.
- Description: OPTIONAL - Provide a meaningful description for the Cloud-synced folder.
- Select your integration: Select the integration to use from the drop down.
- Storage path: Specify the storage/file path to your cloud storage. For example:
gs://encord-gcp-bucket/CloudSync/ors3://encord-aws-bucket/CloudSync. - Automatically sync data: Automatically syncs data from your cloud storage to Encord once every 24 hours.
- Metadata ingestion: Enable this toggle to import custom metadata files from your cloud storage. Set your sidecar suffix (default is
.metadata.json). Any file matching that suffix is treated as metadata for its paired data file and does not appear as a separate item in your folder.
- Click Create. The page for the new Cloud-synced folder appears.
Find Storage Path
Finding the Storage path for your folder or object varies across Cloud Storage platforms. AWS GCP
GCP
STEP 4: Sync Data Between Encord and Cloud Storage
-
Go to Data > Files & Folders.
The Cloud-synced folder page appears.
-
Click into your cloud-synced folder.
- Click Initiate sync. The sync between the folder and your cloud storage begins.