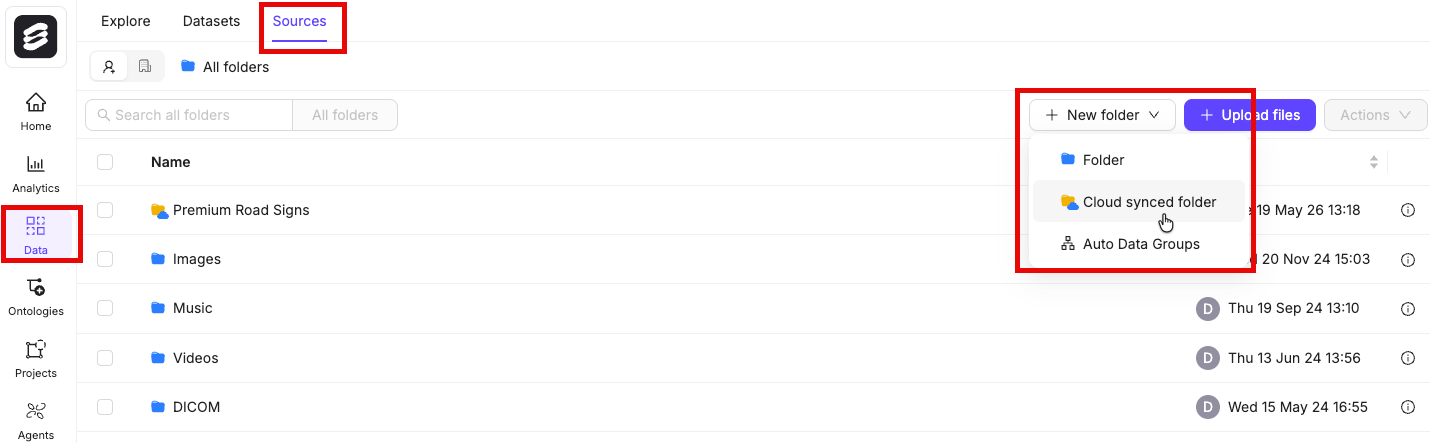
Your data is stored under Data > Sources, where it is organized into folders and sub-folders.
- Set up an OTC integration.
- Create an OTC integration in Encord.
- Create a Cloud-synced folder to store your data in Encord.
- Sync data to the folder.
Step 1: Setup OTC Integration
Before you can do anything with the Encord platform and cloud storage, you need to configure your cloud storage to work with Encord. Once the integration between Encord and your cloud storage is complete, you can then use your data in Encord.
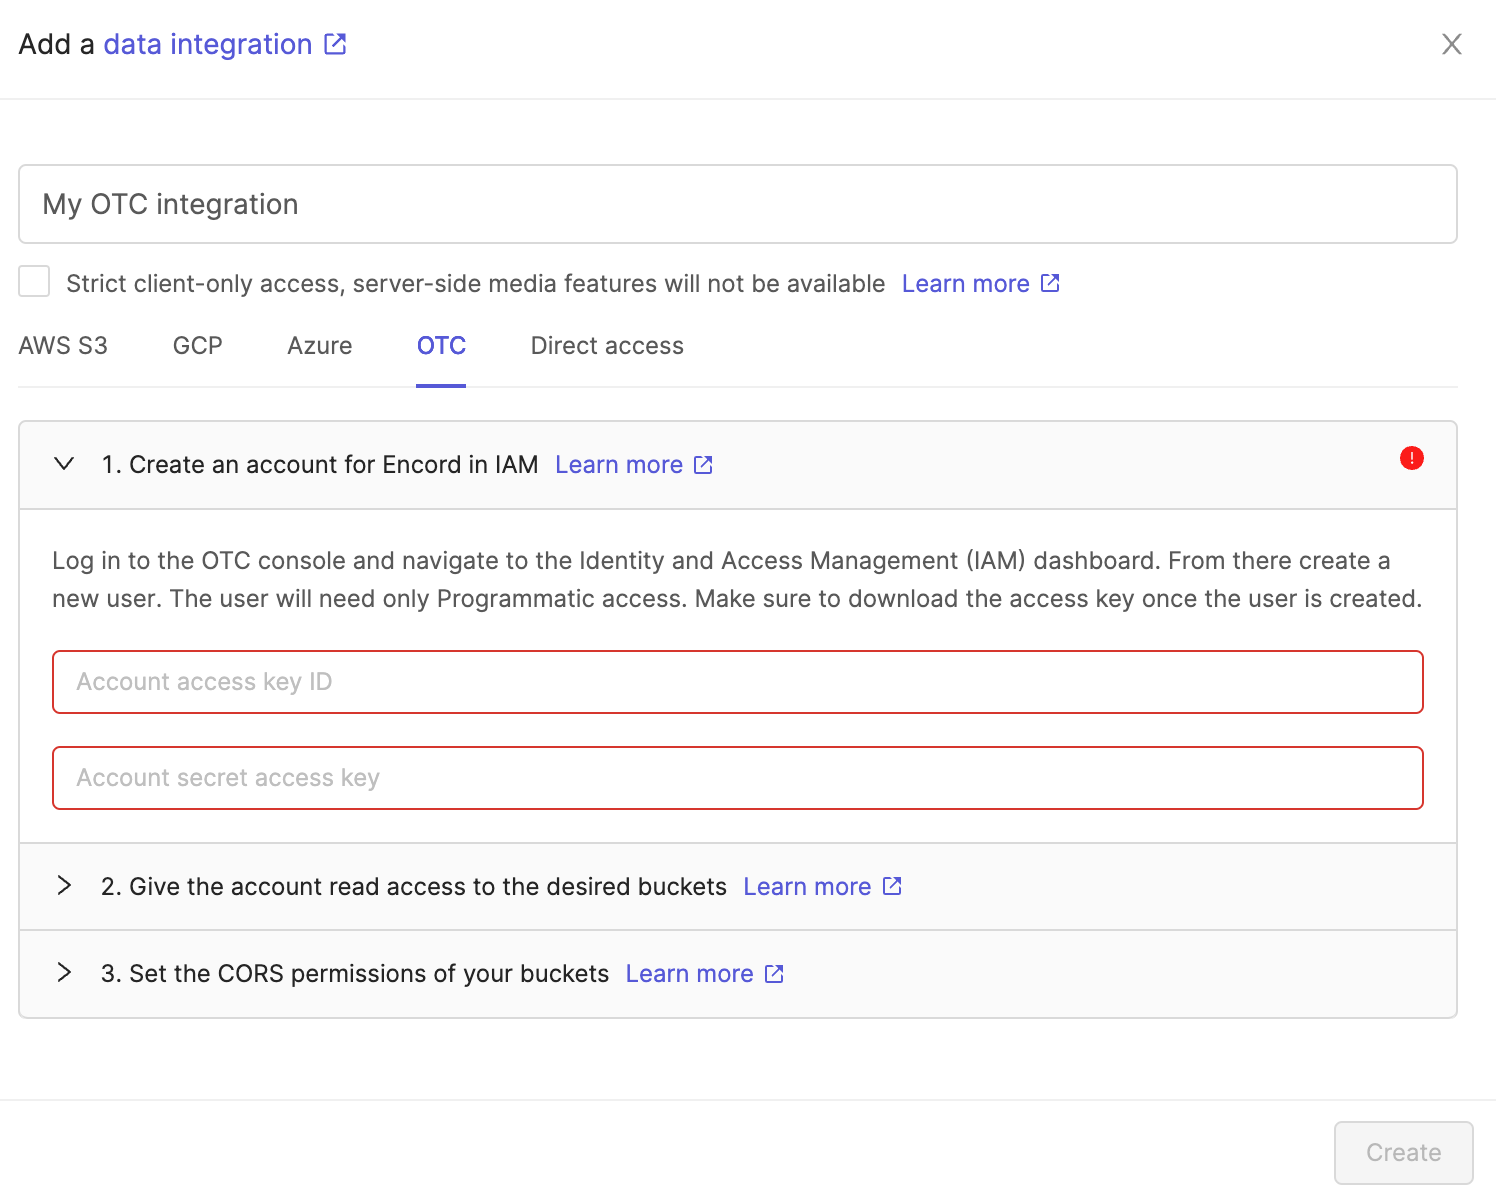
In order to integrate with Open Telecom Cloud, you need to:
- Create the account which accesses data in the Object Storage Service.
- Give the account read access to the desired buckets by:
- Creating a Custom Bucket Policy.
- (Optional) If you have Cross-origin resource sharing (CORS) configured on your buckets, make sure that
*.encord.com is given read access.
- Create the integration by giving Encord access to that account’s credentials.
Step 2: Create Encord Integration
On the Encord platform enter the Access key ID and Secret access key, which should be located in the access key file, generated with the creation of the user. (if the access key has been misplaced, a new one can be created from the IAM User menu).
 Optionally check the box to enable Strict client-only access, server-side media features will not be available if you would like Encord to sign URLs, but refrain from downloading any media files onto Encord servers. Read more about this feature here.
Finally, click the Create button at the bottom of the pop-up. The integration will now appear in the list of integrations in the ‘Integrations’ tab.
Optionally check the box to enable Strict client-only access, server-side media features will not be available if you would like Encord to sign URLs, but refrain from downloading any media files onto Encord servers. Read more about this feature here.
Finally, click the Create button at the bottom of the pop-up. The integration will now appear in the list of integrations in the ‘Integrations’ tab.
Step 3: Create a Cloud-synced Folder
You cannot change URI after folder creation.
-
Go to Data > Sources.
-
Click New folder > Cloud-synced folder.
The New Cloud-synced folder dialog appears.
-
Provide the following:
- Title: Provide a meaningful name for the Cloud-synced folder.
- Description: OPTIONAL - Provide a meaningful description for the Cloud-synced folder.
- Select your integration: Select the integration to use from the drop down.
- Storage path: Specify the storage/file path to your cloud storage. For example:
gs://encord-gcp-bucket/CloudSync/ or s3://encord-aws-bucket/CloudSync.
- Automatically sync data: Automatically syncs data from your cloud storage to Encord once every 24 hours.
- Metadata ingestion: Enable this toggle to import custom metadata files from your cloud storage. Set your sidecar suffix (default is
.metadata.json). Any file matching that suffix is treated as metadata for its paired data file and does not appear as a separate item in your folder.
-
Click Create.
The page for the new Cloud-synced folder appears.
Find Storage Path
Finding the Storage path for your folder or object varies across Cloud Storage platforms.
AWS
 GCP
GCP
STEP 4: Sync Data Between Encord and Cloud Storage
-
Go to Data > Sources.
The Cloud-synced folder page appears.
-
Click into your cloud-synced folder.
-
Click Initiate sync.
The sync between the folder and your cloud storage begins.