

Visual Data Curation
Filter and Sort
Some basic filers are available always available, but more advanced filters must be calculated by upgrading your folder and computing metrics & embeddings. See Compute Metrics & Embeddings for details.
video/mp4.
Storage location: The location where your images/videos reside. Examples include AWS, GCP, Local.
Uploaded at: The date and time that the image/video uploaded.
To filter data:
- Navigate to Data > Explore and select a folder.
-
Click the Filter dropdown or press F.
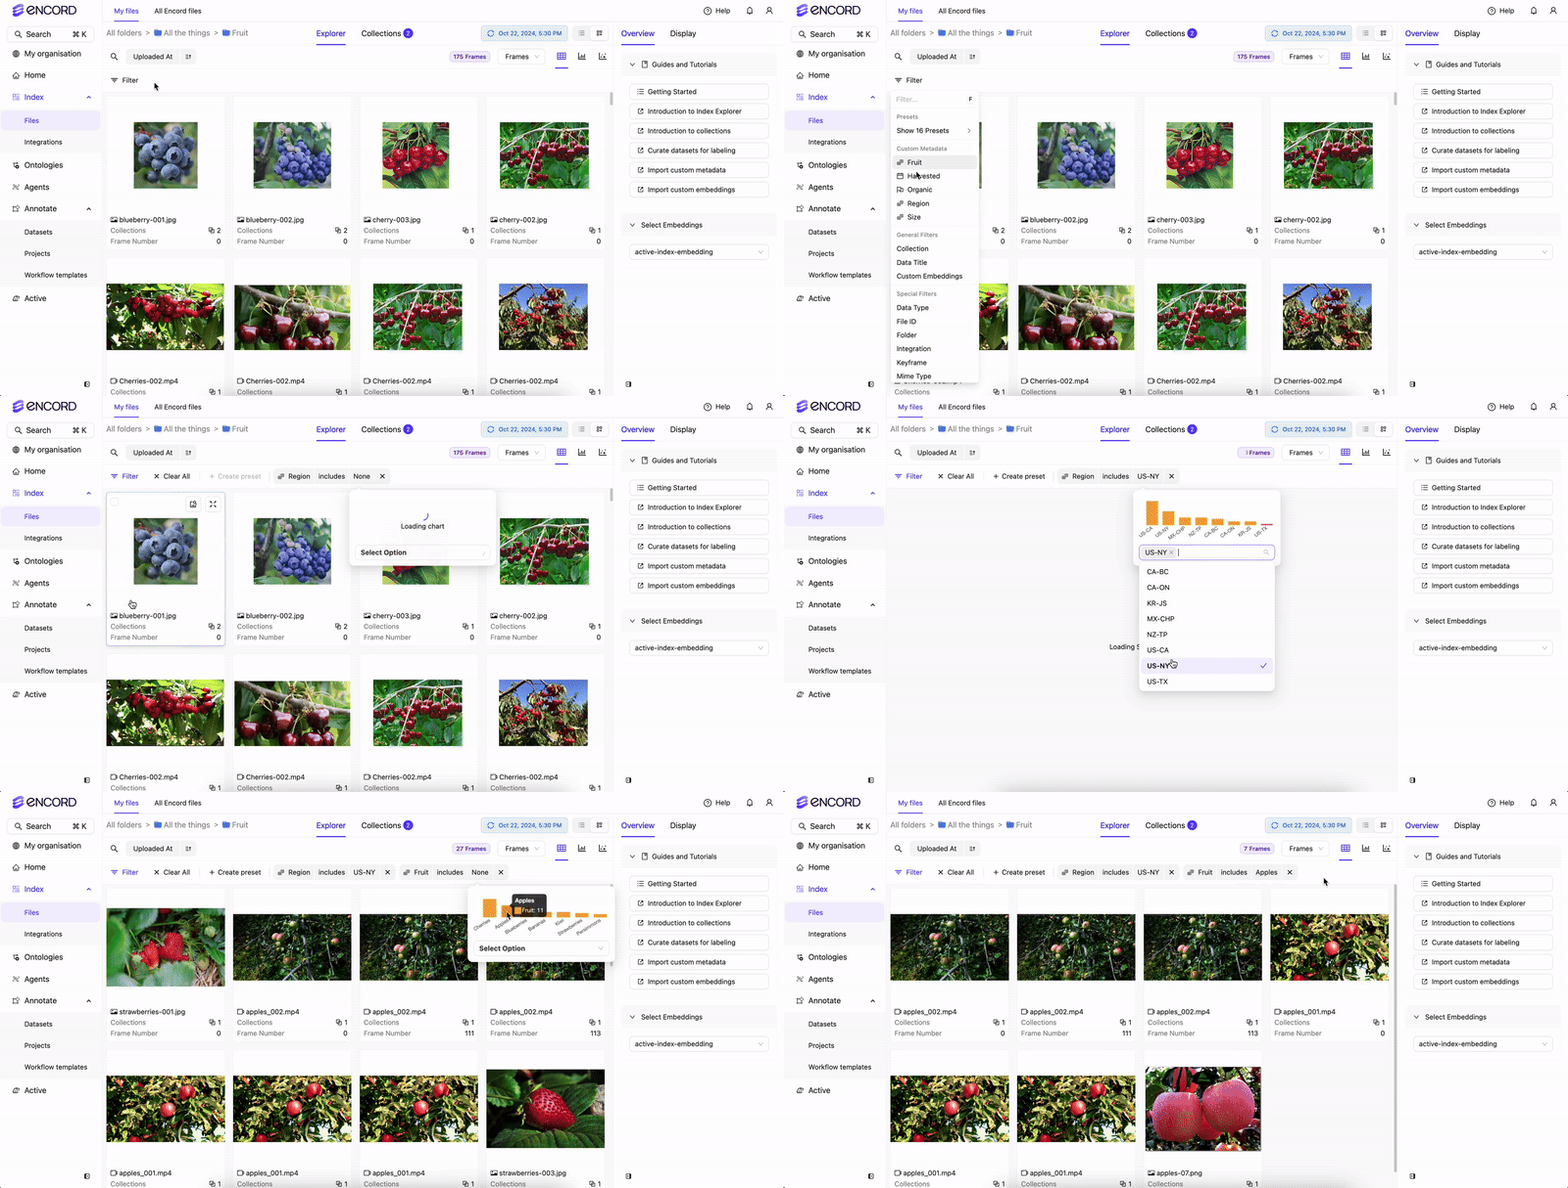
- Add and configure the filters you need.
- Click Search to update the results.
Preset Filters
Presets are only available to customers with the Curation package.
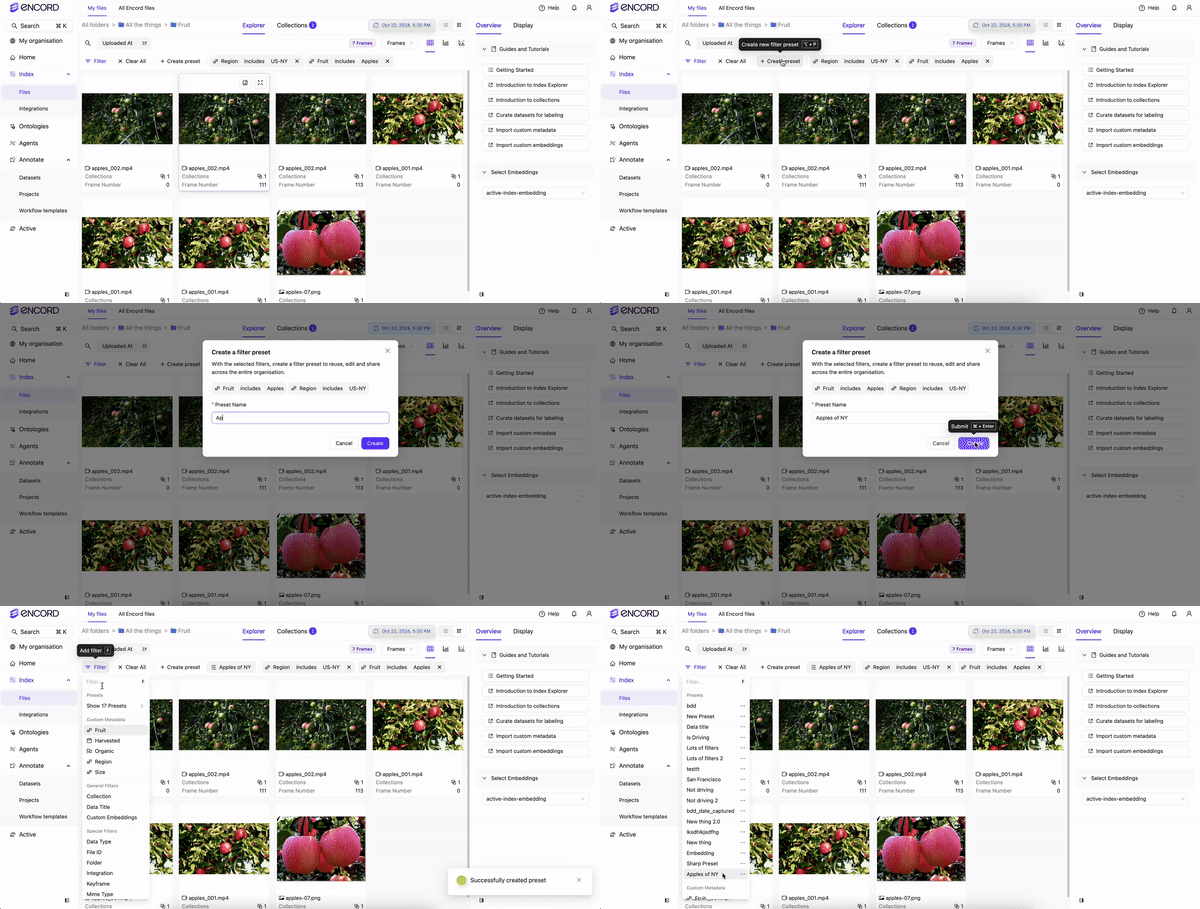
- Navigate to Data > Explore and select a folder.
- Click the Filter dropdown or press F.
-
Add and configure the filters you need.
- Click +Create preset and give the preset a name.
-
Click Create to finish creating the preset.
- Navigate to Data > Explore and select a folder.
- Click the Filter dropdown or press F.
- Select the Preset you want to use from the dropdown. All presets are listed at the top of the list oif filters.
- Click Search to update the results.
Global filters apply to any Folder, but Local filters only apply on the Folder where the Preset was created.
Sorting
Sort your data, in ascending or descending order, using filters and quality metrics. To sort your data:- Navigate to Data > Explore and select a folder.
-
Select the metric to sort the data.
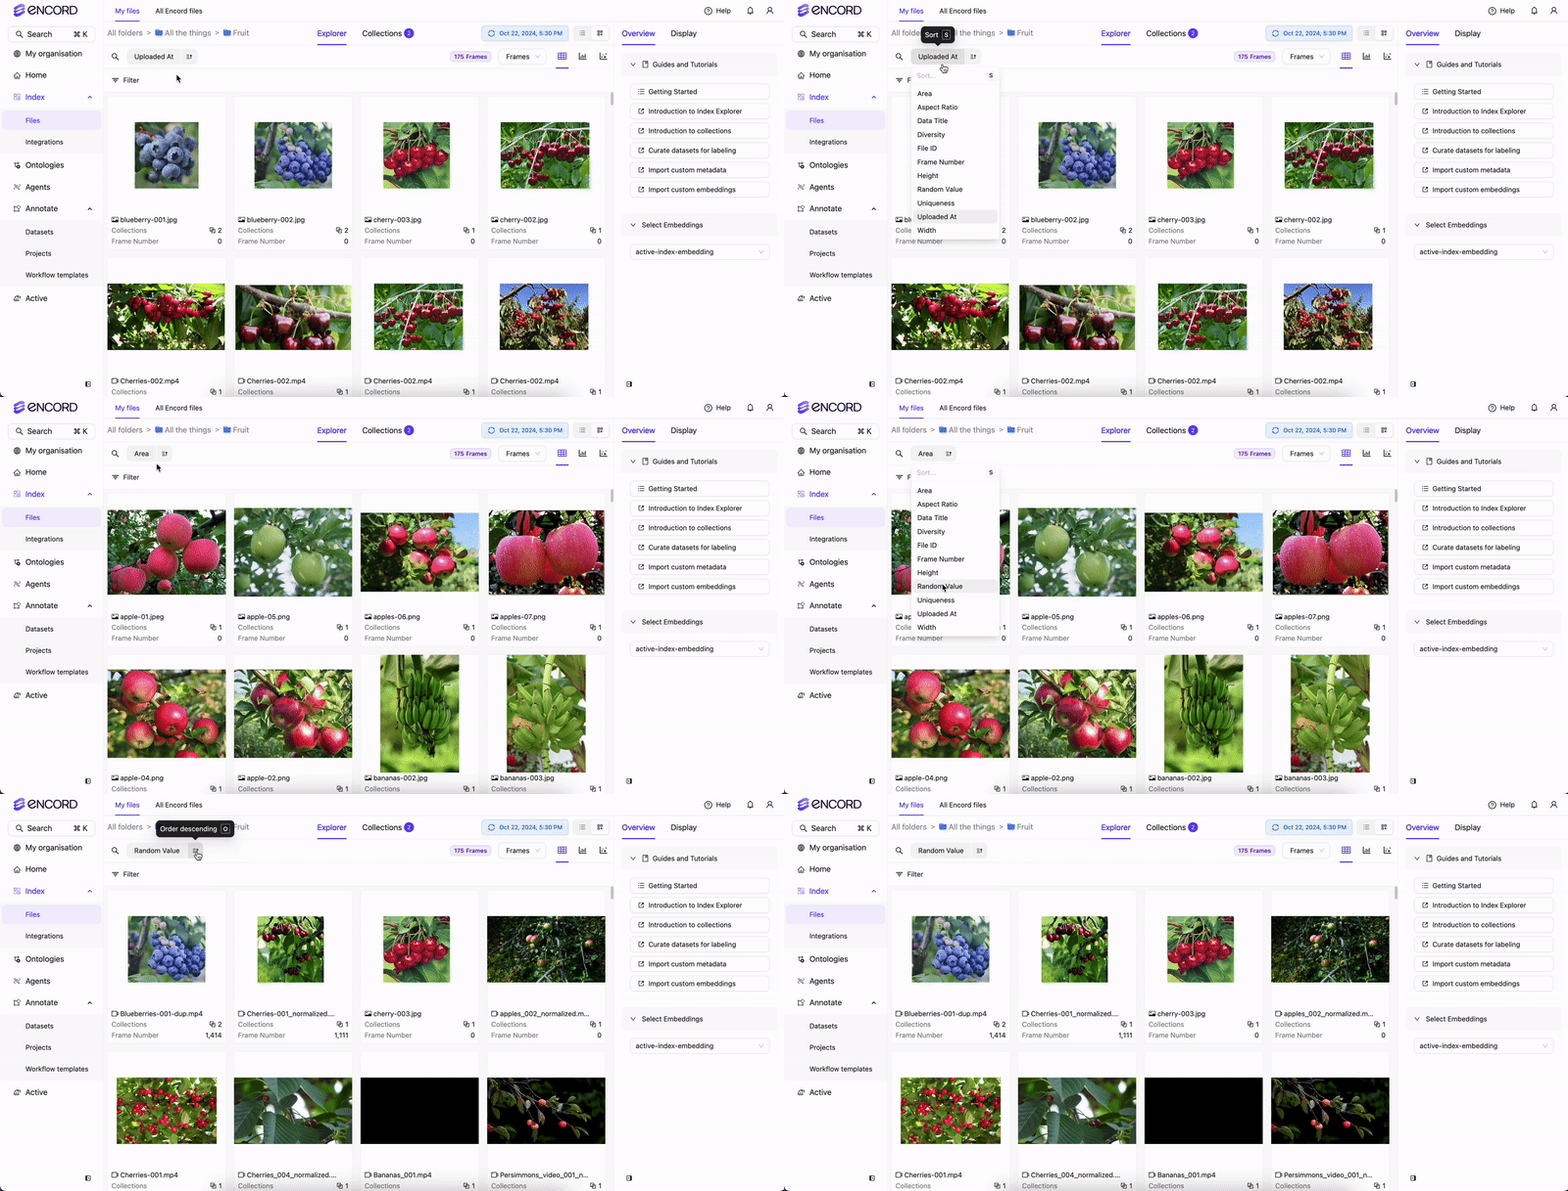
- Specify ascending or descending order.
Quality Metrics
Quality Metrics are only available to customers with the Curation package.
If you add a large amount of new data to a folder, existing uniqueness and diversity scores may no longer reflect the full dataset. You can recompute these metrics at any time to bring them up to date.
Frame Quality Metrics
Frame Quality Metrics
Label Quality Metrics
Label Quality Metrics
Label Quality Metrics are used for sorting data, filtering data, and data analytics.
Video Quality Metrics
Video Quality Metrics
Model Quality Metrics
Model Quality Metrics
Model quality metrics help you evaluate your data and labels based on a trained model and imported model predictions.Acquisition FunctionsAcquisition functions are a special type of model quality metric, primarily used in active learning to score data samples according to how informative they are for the model, enabling smart labeling of unannotated data.
Natural Language Search
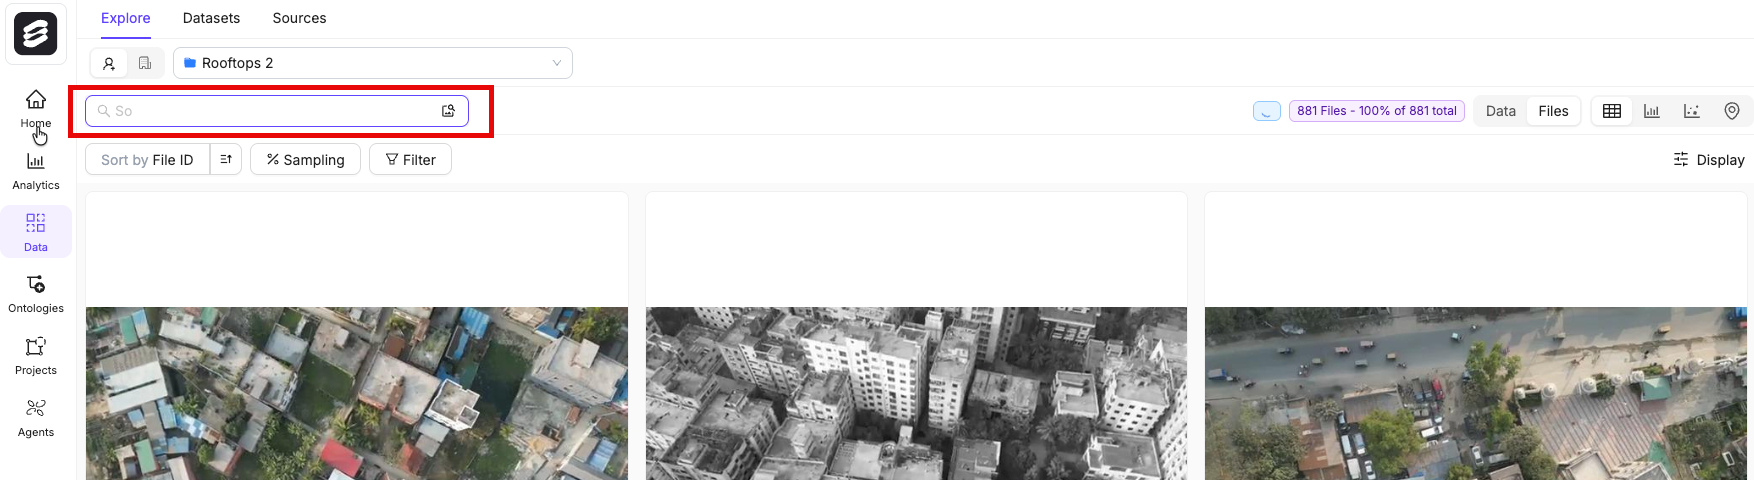
To use natural language or image search:- Navigate to Data > Explore and select a folder.
- Type a search query or upload an image.
Collections
Collections are only available to customers with the Curation package.
Video Curation
You have to compute Metrics and Embeddings for your videos before you can explore them in Data > Explore or Project > Explore. See Compute Metrics & Embeddings for details.
| Project > Explore | Data > Explore |
|---|---|
 |  |
Video frames are sampled for metric and embedding calculation at 1 FPS starting from the first frame. Using
keyframes and custom metadata you can specify the frames you want imported. Contact us to discuss changing the sampling frame rate how to indicate specific frames.Filter and Sort Videos
You can filter and sort video frames the same way you filter and sort images. See Filter and Sort Images for details.
- Hover to preview: Hovering over a card automatically plays a muted, looping preview of the video, so you can screen footage without opening it. Labels are not currently overlaid on this preview.
- Select a video: Hover over a card to reveal a selection checkbox, along with quick actions such as similarity search.
- Expand a video: Click + N frames on a card to expand that video in place into a full-width frame-strip row. The row appears at the video’s current sort position, and the other cards flow around it.
Collections are shown on video cards. Selecting and adding videos to a Collection selects the whole video, not individual frames.
Inspect Video Frames
Expanding a video replaces its card with a full-width row showing its sampled frames. The row header consolidates the controls previously spread across the view:- A frame-metric selector, for sorting or coloring frames by a specific quality metric.
- The Show only Keyframes toggle — see Keyframes.
- An Analytics button that opens a frame-level analytics chart. This requires the
explore_analyticsfeature to be enabled on your organization. - A Collapse (or Hide frames) button that folds the video back into the card grid. Collapsing a video also closes its analytics chart.
Display Settings for Videos
Click Display to configure how video cards appear in the grid:- Card details: Choose the title, Collections, and selected metric shown on each video card, the same Card details control used for other data types.
- Grid density: The grid-count slider controls the height of an expanded video’s frame-strip row. It does not change the width of unexpanded video cards, which stays fixed.