READ ME FIRST
The annotation landscape is vast. Encord provides an incredible amount of flexibility in how to create an Ontology. Your Ontology is a product of your needs. Here are a few things to keep in mind when building your Ontology.Rating Scales/Rubrics
Rating Scales/Rubrics
Rating Scales or Rubrics are used for quality assessment or standardized evaluations of labels/classifications or data.
- Scale rating: Balance simplicity and granularity in your rating. We recommend using a rating system of 0 to 5 or 0 to 7. This should provide enough accuracy while not overwhelming your annotators/reviewers.
- Object/classification description: Keep Ontology option descriptions to 7 words or less, and use Annotation instructions for anything more detailed (30 words or less). Aim for a 9th grade reading level — plain language helps annotators work faster.
- Guidance: Be concise while providing meaningful distinction between the scale rating options. Keep the guidance to a maximum of 3 words. 1 word is best.
Object labeling
Object labeling
You have a number of options when labeling objects: bounding boxes, polygons, bitmasks, and rotatable bounding boxes. Which label type depends on what you need to label and on the accuracy your use case requires. For example if you are annotating objects that are clustered together, using polygons or bitmasks provides more precise labeling. If objects are rarely close to each other or if you data displays only a single item at a time, bounding boxes could be used.
Primitives/Skeletons
Primitives/Skeletons
Use primitives to label objects in cases where you need to break down a complex object into smaller parts or when you need to define a basic outline for complex structures. An example of this would be annotating people in poses or motion.
Create Ontologies
We recommend learning about Ontology structure in Encord before creating Ontologies.
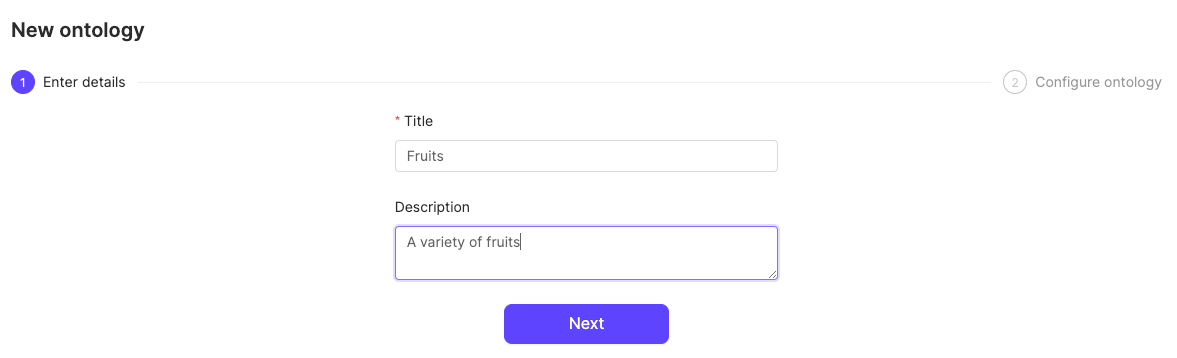
- Click the New ontology button in the Ontologies section to create a new Ontology.

- Give your Ontology a meaningful title and description. A clear title and description keeps your Ontologies organized.
- Click Next to continue.
- Define your Ontology structure. See our documentation on Ontology structure for more information on the various types of objects, classifications, and attributes.
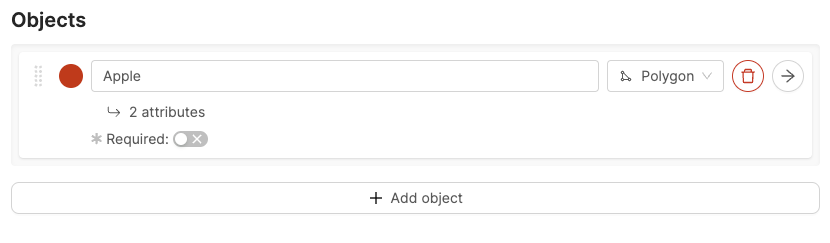
- Click the Add object button.
-
Do one of the following:
- Select a Shared class
- Click New Object
Shared classes cannot be edited while creating an Ontology. To edit a shared class go to the Ontologies > Shared classes page. - To create a new object, give the object a name. For example “Apple”.
- Select a shape for the object. For example polygon.
- Optionally, enable the Required toggle to mark the object as Required.
- Optionally, add attributes to the object.
- Repeat these steps for as many objects as necessary.

- Click the arrow icon next to an object to add attributes to the object.
- Give the attribute a name. For example “Color”.
- Click the attribute type to change the attribute type. The default attribute type is a text field.
- Click Add option to add an option, if you have chosen a radio button or checklist attribute.
- Enter a name for the attribute option. For example, the attribute “Color” can have the options “Red”, “Green”, and “Yellow”.
- Click the Back to parent button to return the Ontology creation view.
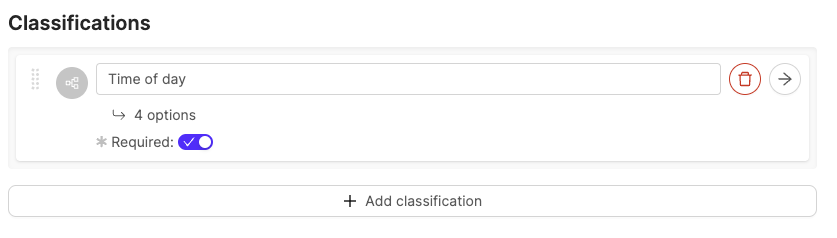
- Click Add classification.
-
Do one of the following:
- Select a Shared class
- Click New classification
Shared classes cannot be edited while creating an Ontology. To edit a shared class go to the Ontologies > Shared classes page. - For a new classification, give the classification a name. For example, “Time of day”.
- Optionally, configure the classification. The default classification type is a text field.
- Optionally, enable the Required toggle to mark the object as Required.
- Repeat these steps for as many classifications as necessary.
- Click the arrow icon next to an object to configure the classification.

- Click the classification type to change the classification type. The default classification type is a text field.
- Click Add option to add an option if you have selected a radio button or check list classification.
- Enter a name for the classification option. For example, the classification “Time of day” can have the options “Night” and “Day”.
- Click the Back to parent button to return the Ontology creation view.
Add Description
To give annotators clearer guidance on what to include and exclude, you can add descriptions to each element in your Ontology. This helps reduce confusion and leads to more accurate labels.- Adding Description
- What Annotators See


JSON Ontology Structure
You can preview a JSON of your Ontology structure when you are setting up or editing your Ontology. Preview the JSON by enabling the Display JSON toggle.
Ontology Best Practices
Creating an Ontology is a crucial step in developing effective machine learning applications. Keep the following considerations in mind when designing your Ontologies:- The Problem Domain: Ensure your Ontology is exhaustive, with a class or representation for all important concepts. Consider the appropriate level of detail. For example, an application recognizing various animals might have top-level classes like “cat” and “dog,” while one focused on dog breeds might use “German Shepherd” and “Border Collie” as top-level classes.
- The Team: Use terminology that is clear and communicable across your entire team, including annotators, reviewers, project managers, algorithm developers, and other stakeholders.
- The Workflow: Annotation can be difficult and time-consuming. Design your Ontology to represent classes and their attributes appropriately, but also aim for efficiency. Ensuring objects and scenes can be labeled both accurately and quickly will lead to a more efficient labeling process.