

The order of data units (tasks) with the same priority in the Task Queue ranges from oldest to newest.
Queue Layout by Role
The Queue tab adapts based on the logged-in user’s role.Queue (Admin, Team Manager)
Queue (Admin, Team Manager)
Queue (Admin, Team Manager)

- A — The list of Workflow stages shows the number of data units currently in each stage. Click a stage to view its task queue.
- B — Shows the task’s priority number. Tasks are listed in descending order of priority by default.
- C — Search, sort, and filter the list of data units by Dataset, Assignee, Data Type, Status, or Issue Status.
- D — Shows the task’s Status (New, Reopened, Skipped). For tasks that have moved through previous stages, an info icon appears next to the status badge. Hover over the icon to see details about the previous stage, including the stage name, who performed the action, and when it occurred.
- E — Task Actions. Assign or release selected tasks, adjust priority, or move tasks to a different Workflow stage.
- F — Switch between List and Explorer view.
- G — Use the Start task button to begin labeling or reviewing a task.
- H — Click the Initiate button to open a specific task in the Label Editor.
Queue (Annotator)
Queue (Annotator)
Queue (Annotator)
Annotators only see tasks in the Annotate stage that are assigned to them. They cannot view tasks in the Review stage or tasks assigned to other users.Queue (Reviewer)
Queue (Reviewer)
Queue (Reviewer)
Reviewers only see tasks in the Review stage that are assigned to them. They cannot view tasks in the Annotate stage or tasks assigned to other users.Queue (Annotator + Reviewer)
Queue (Annotator + Reviewer)
Queue (Annotator + Reviewer)
Users with the Annotator + Reviewer role can see both the Annotate and Review tabs in the Queue. They are limited to tasks assigned to them in each respective stage.Paused Agent Indicator
When any Agent stage in your Workflow is paused, the Queue tab displays an information icon next to its name. This indicator alerts you that tasks in paused Agent stages do not execute automatically until the Agents are unpaused.Agent Stages
When viewing an Agent stage, the Queue displays additional controls and status information for Workflow agents. Agent Status Banner For Agent stages, a status banner appears above the task list showing the agent name and icon (click to view detailed agent configuration), a status indicator showing whether the agent is Live (green) or Paused (orange), and control buttons that Admins and Team Managers can use to pause/resume agents or view agent settings. Agent ControlsOnly Workspace and Project Admins and Team Managers can control agent execution.
Agent Execution Status
For Projects using Agents in their Workflow, tasks display execution status badges showing the current state of automated processing:
Retry Failed Tasks
You can retry tasks that failed or timed out by selecting one or more affected tasks in the Queue, then clicking Retry failed to re-run the agent on those tasks. The system will attempt to execute the Agent again on the selected tasks.
The Retry failed button is only available for Agent stages with catalog agents and only appears when you have selected tasks that failed or timed out.
Queue View Options
The Queue offers different view modes to help you work with tasks more effectively:- List view — The default tabular view showing tasks in a structured list format
- Grid view — A visual grid layout for browsing tasks and labels
- Visual Queue — An enhanced visual interface for task management (when available)
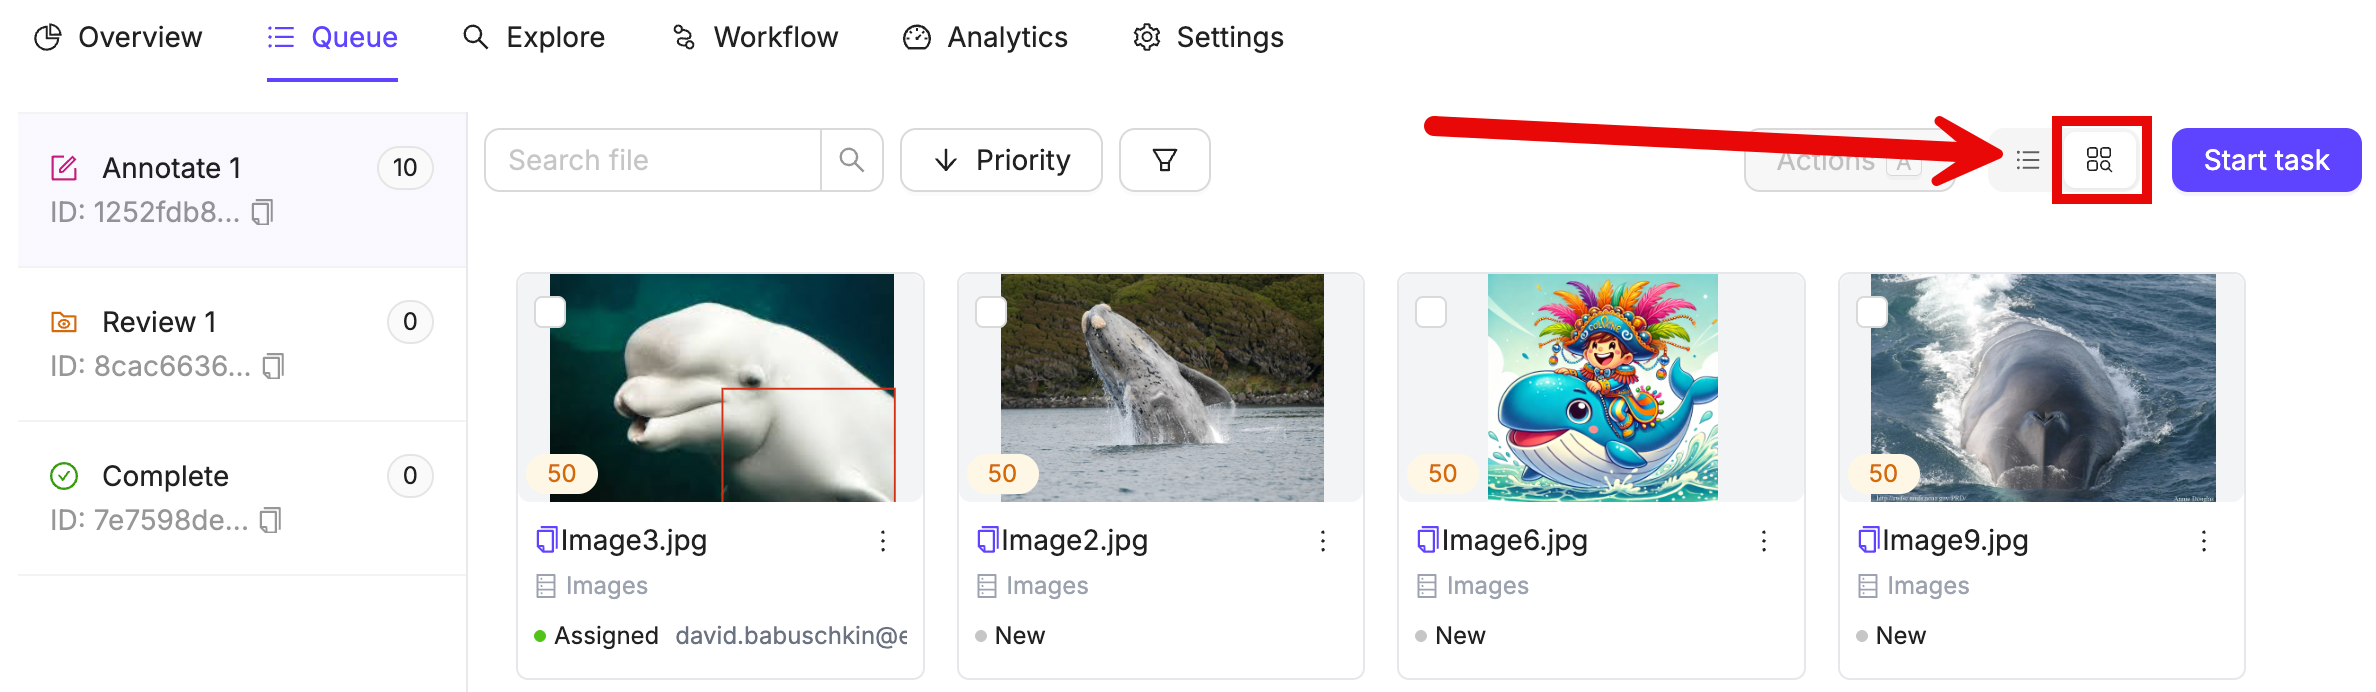
Visual Queue availability varies based on your Project settings and enabled features. Some Projects may only show the List and Grid view options.
Filters and Sorting
Filters
Click Assigned to me (the person icon beside Filter) to show only tasks assigned to you. Click it again to clear the Assignee filter. Selecting this shortcut replaces any existing Assignee selection. It is available in stages that support the Assignee filter when you are an assignable Project member.
Sort by
Click Sort by next to the filter button to sort the queue by:
- Task priority, or alphabetically by data unit name
- Object count (when available)
- Ascending or descending order
Object count filtering and sorting are available based on your organization’s feature access.
Task Status
The task Status indicates what actions have previously been taken on a task. For tasks that have moved through previous Workflow stages, an info icon appears next to the status badge. Hover over the icon to see details about the previous stage, including the stage name, who performed the action, and when it occurred.Review Status
In Review stages, the queue includes a Review Status column that shows each task’s current status in the review lifecycle. You can sort by this column and filter on it using the Review Status filter to focus on tasks at a particular point in review.The Review Status column and filter appear only in Review stages. Review tasks reuse the same lifecycle statuses as annotation tasks while they are in the queue.
Task Actions
Per-Row Task Actions
Every task row in the Queue has a three-dot (⋯) menu that gives you quick access to actions for that individual task without selecting it first.Assign, Release, Change priority, and Move to stage are only available to Workspace and Project Admins and Team Managers. View, Activity log, and API details are available to all users who can see the queue row.
Bulk Task Actions
The Actions button lets you perform operations on multiple selected tasks at once. The button appears only after you select one or more tasks:- List and Grid views — The Actions button appears inside the floating selection toolbar at the bottom of the screen.
- Explorer view — The Actions button appears in the top action bar alongside other controls.
View a Task
You can open any task from the Queue in view-only mode without assigning it to yourself.
- View Mode
- Edit Mode


Assign Tasks
Only Workspace and Project Admins and Team Managers can assign tasks.
- Per-row — Click the ⋯ menu on any task row and select Assign, then choose a project member from the submenu.
- Bulk — Select one or more tasks and use the Actions menu to assign them to a specific annotator or reviewer.
Move Tasks
Only Workspace and Project Admins and Team Managers can move tasks.
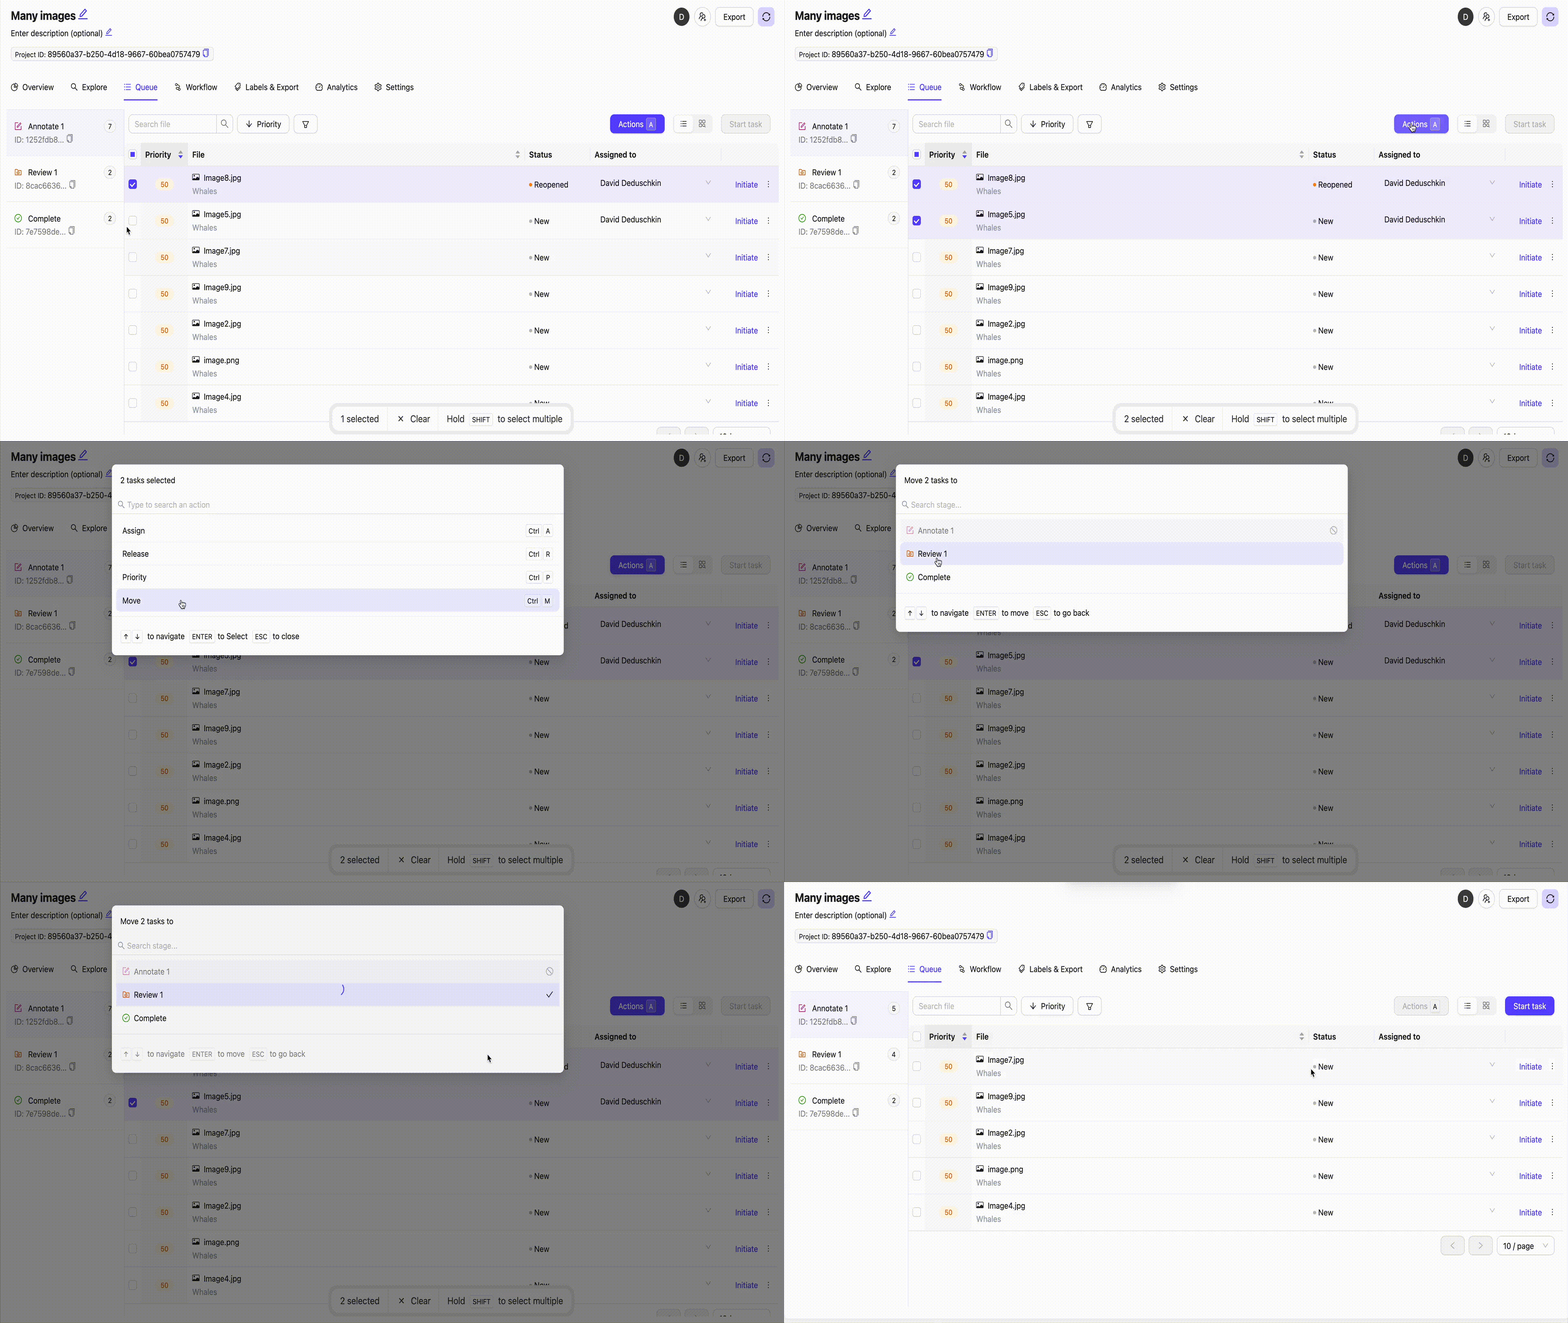
- Per-row — Click the ⋯ menu on any task row, select Move to stage, then choose the target stage from the submenu.
- Bulk — Select one or more tasks and use the Actions menu to move them to a different stage.
Set Task Priority
Only Workspace and Project Admins and Team Managers can set task priority.
- Per-row — Click the ⋯ menu on any task row and select Change priority. Enter a new priority value in the modal that appears and confirm.
- Bulk — Select tasks in the Queue and use the Actions menu to assign a priority number.
Consensus Annotation Subtasks
In a Consensus Annotation stage, each task expands to show individual subtask rows — one per annotator assigned to that consensus group. Each subtask row has its own Initiate button.Peer Annotation Gating
When the Show peer annotations setting is enabled on a Consensus Annotation Workflow node, Encord gates peer annotators from starting their subtask until the first annotator completes theirs.This gating applies only to consensus annotation stages where Show peer annotations is enabled. Consensus stages without this setting are unaffected.
- The first annotator’s Initiate button is always available immediately.
- The Initiate button for all other peer annotators (every subtask after the first) is disabled until the first annotator completes their subtask.
- When a peer annotator hovers over their disabled Initiate button, a tooltip displays: “The first annotation must be completed before peer annotations can be initiated.”
- Once the first annotator completes their subtask, the Initiate button becomes enabled for all remaining peer annotators.
Agent Configuration Protection
If you need to modify an agent configuration for a stage that has tasks:- Navigate to the Queue and select the stage containing the tasks
- Move the tasks to another stage using the ⋯ row menu or the Actions menu
- Return to the Workflow editor to modify the agent configuration
- Move the tasks back to the stage if needed
Starting Annotation or Review
To begin working on tasks directly from the Queue:- Navigate to the relevant Workflow stage using the stage list on the left.
- Click Start task to pick up the next available task, or click Initiate next to a specific task to open it directly.
- The task opens in the Label Editor.