

Triggering Custom Agents
The Agent is triggered:- In the Label Editor: On demand by the Tasker while annotating or reviewing a task. See here for more information.
- From your Workflow: On tasks that pass through the Agent Workflow stage. Custom agents in your Workflow can be triggered automatically or manually.
Manual Trigger
If your agent should be triggered manually, open the Advanced tab in the Agent node configuration, and add decision pathways. Tasks in this Agent stage do not proceed through the Workflow unless the agent is triggered by an ad-hoc script.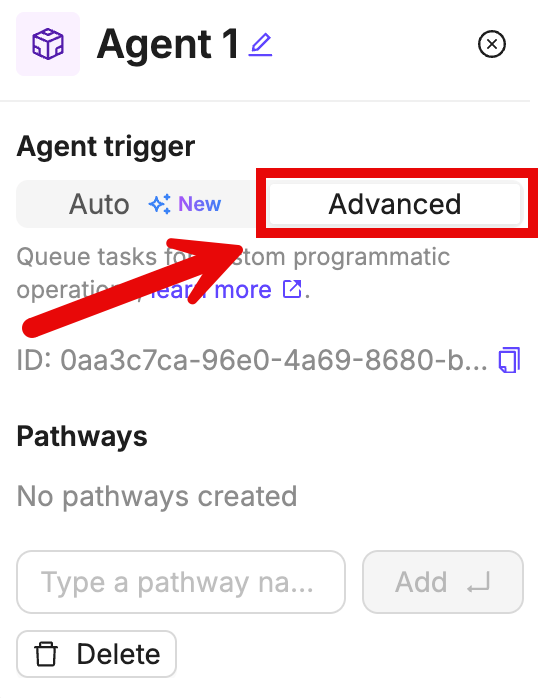
Webhook Trigger Batching
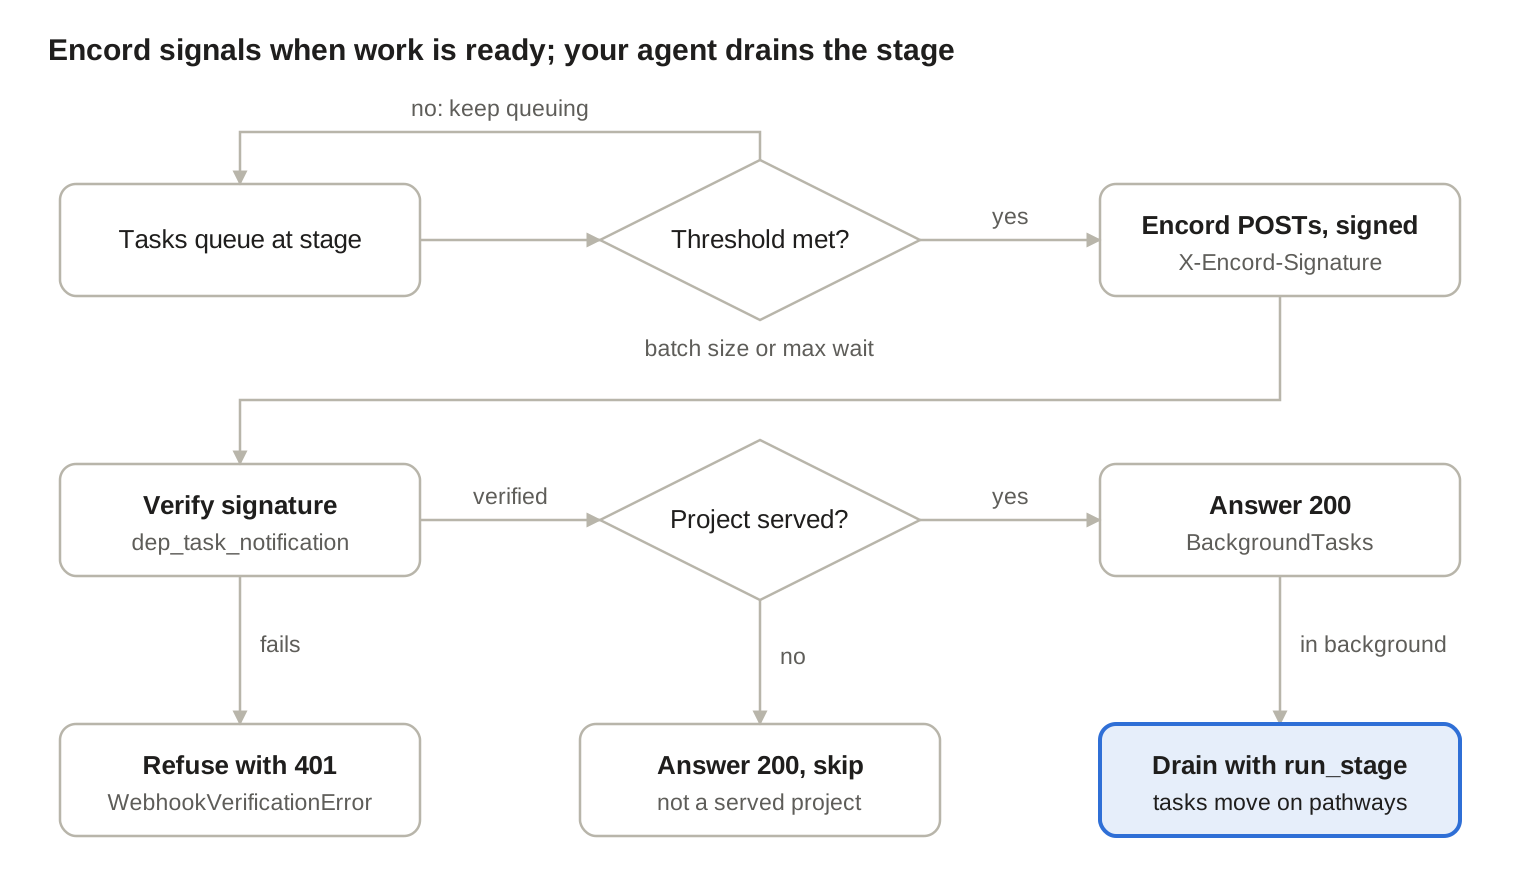
You can add a webhook to an Advanced Agent stage so your service can learn when tasks are waiting without continuously polling Encord. The signed notification contains no task data; after receiving it, fetch the Agent stage queue with the SDK.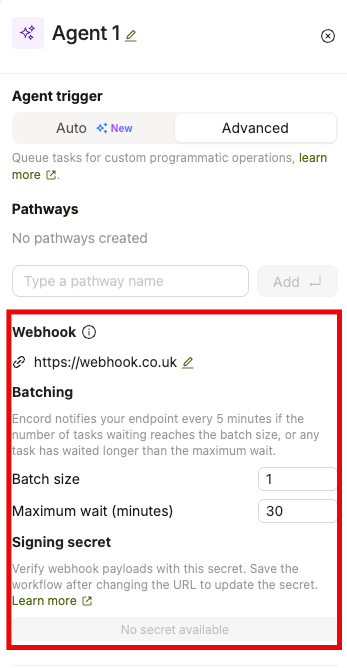
- In the Workflow, select the Agent stage and choose Advanced.
- Under Webhook, click the edit icon, enter your endpoint URL, and press Enter.
- Under Batching, set the Batch size and Maximum wait (minutes).
- Save the Workflow. You can use the generated Signing secret to verify webhook signatures.
Removing the webhook URL also removes its batching settings. Switching the Agent stage to Auto removes the webhook configuration.
- The batch size is met when the number of queued tasks reaches the set size.
- The maximum wait is met when the oldest queued task has been waiting longer than the set limit.
Webhook SDK support for Agents documentation is available here.
Examples
Use the Encord SDK to configure your Advanced Custom Agent. The Agent executes the configured SDK script for all tasks that are routed through the Agent stage in your Workflow.General Example
General Example
The General Example script shows how to configure a Workflow Agent with the name
Agent 1 and with a pathway called continue to Review.Ensure that you:- Replace
<private_key_path>with the path to your private key. - Replace
<project_hash>with the hash of your Project. - Insert your custom logic where the comment instructs you to do so.
General Example
Pre-Classification of Images Using GPT 4o
Pre-Classification of Images Using GPT 4o
See our end-to-end guide for Pre-Classification using GPT 4o for more detailed information.

- Replace
<private_key_path>with the hash of your private key. - Replace
<project_hash>with the hash of your Project. - Replace
Agent 1with the name of your Agent stage.
Pre-Labeling Videos Using a Mock Model
Pre-Labeling Videos Using a Mock Model
The Pre-Labeling Script selects a random class from the Ontology, generates random bounding box labels, and applies random confidence scores for video frames before advancing the videos to the annotation stage ( In the following script:
Annotate 1). Below is an example of a Workflow where the Pre-Labeling agent can be effectively utilized.- Replace
<project_hash>with the hash of your Project. - Replace the mock model with your own model, and adapt the rest of the script according to your needs.
- If you choose to give your python file a different name, ensure you replace all references to
prelabel_video.pywith your new file name.
prelabel_video.py