

You have to compute Metrics and Embeddings for your videos before you can explore them in Data > Explore or Project > Explore. See Compute Metrics & Embeddings for details.
| Project > Explore | Data > Explore |
|---|---|
 |  |
Video frames are sampled for metric and embedding calculation at 1 FPS starting from the first frame. Using
keyframes and custom metadata you can specify the frames you want imported. Contact us to discuss changing the sampling frame rate how to indicate specific frames.Filter and Sort Videos
You can filter and sort video frames the same way you filter and sort images. See Filter and Sort Images for details.
- Hover to preview: Hovering over a card automatically plays a muted, looping preview of the video, so you can screen footage without opening it. Labels are not currently overlaid on this preview.
- Select a video: Hover over a card to reveal a selection checkbox, along with quick actions such as similarity search.
- Expand a video: Click + N frames on a card to expand that video in place into a full-width frame-strip row. The row appears at the video’s current sort position, and the other cards flow around it.
Collections are shown on video cards. Selecting and adding videos to a Collection selects the whole video, not individual frames.
Inspect Video Frames
Expanding a video replaces its card with a full-width row showing its sampled frames. The row header consolidates the controls previously spread across the view:- A frame-metric selector, for sorting or coloring frames by a specific quality metric.
- The Show only Keyframes toggle — see Keyframes.
- An Analytics button that opens a frame-level analytics chart. This requires the
explore_analyticsfeature to be enabled on your organization. - A Collapse (or Hide frames) button that folds the video back into the card grid. Collapsing a video also closes its analytics chart.
Display Settings for Videos
Click Display to configure how video cards appear in the grid:- Card details: Choose the title, Collections, and selected metric shown on each video card, the same Card details control used for other data types.
- Grid density: The grid-count slider controls the height of an expanded video’s frame-strip row. It does not change the width of unexpanded video cards, which stays fixed.
Find Broken Tracks
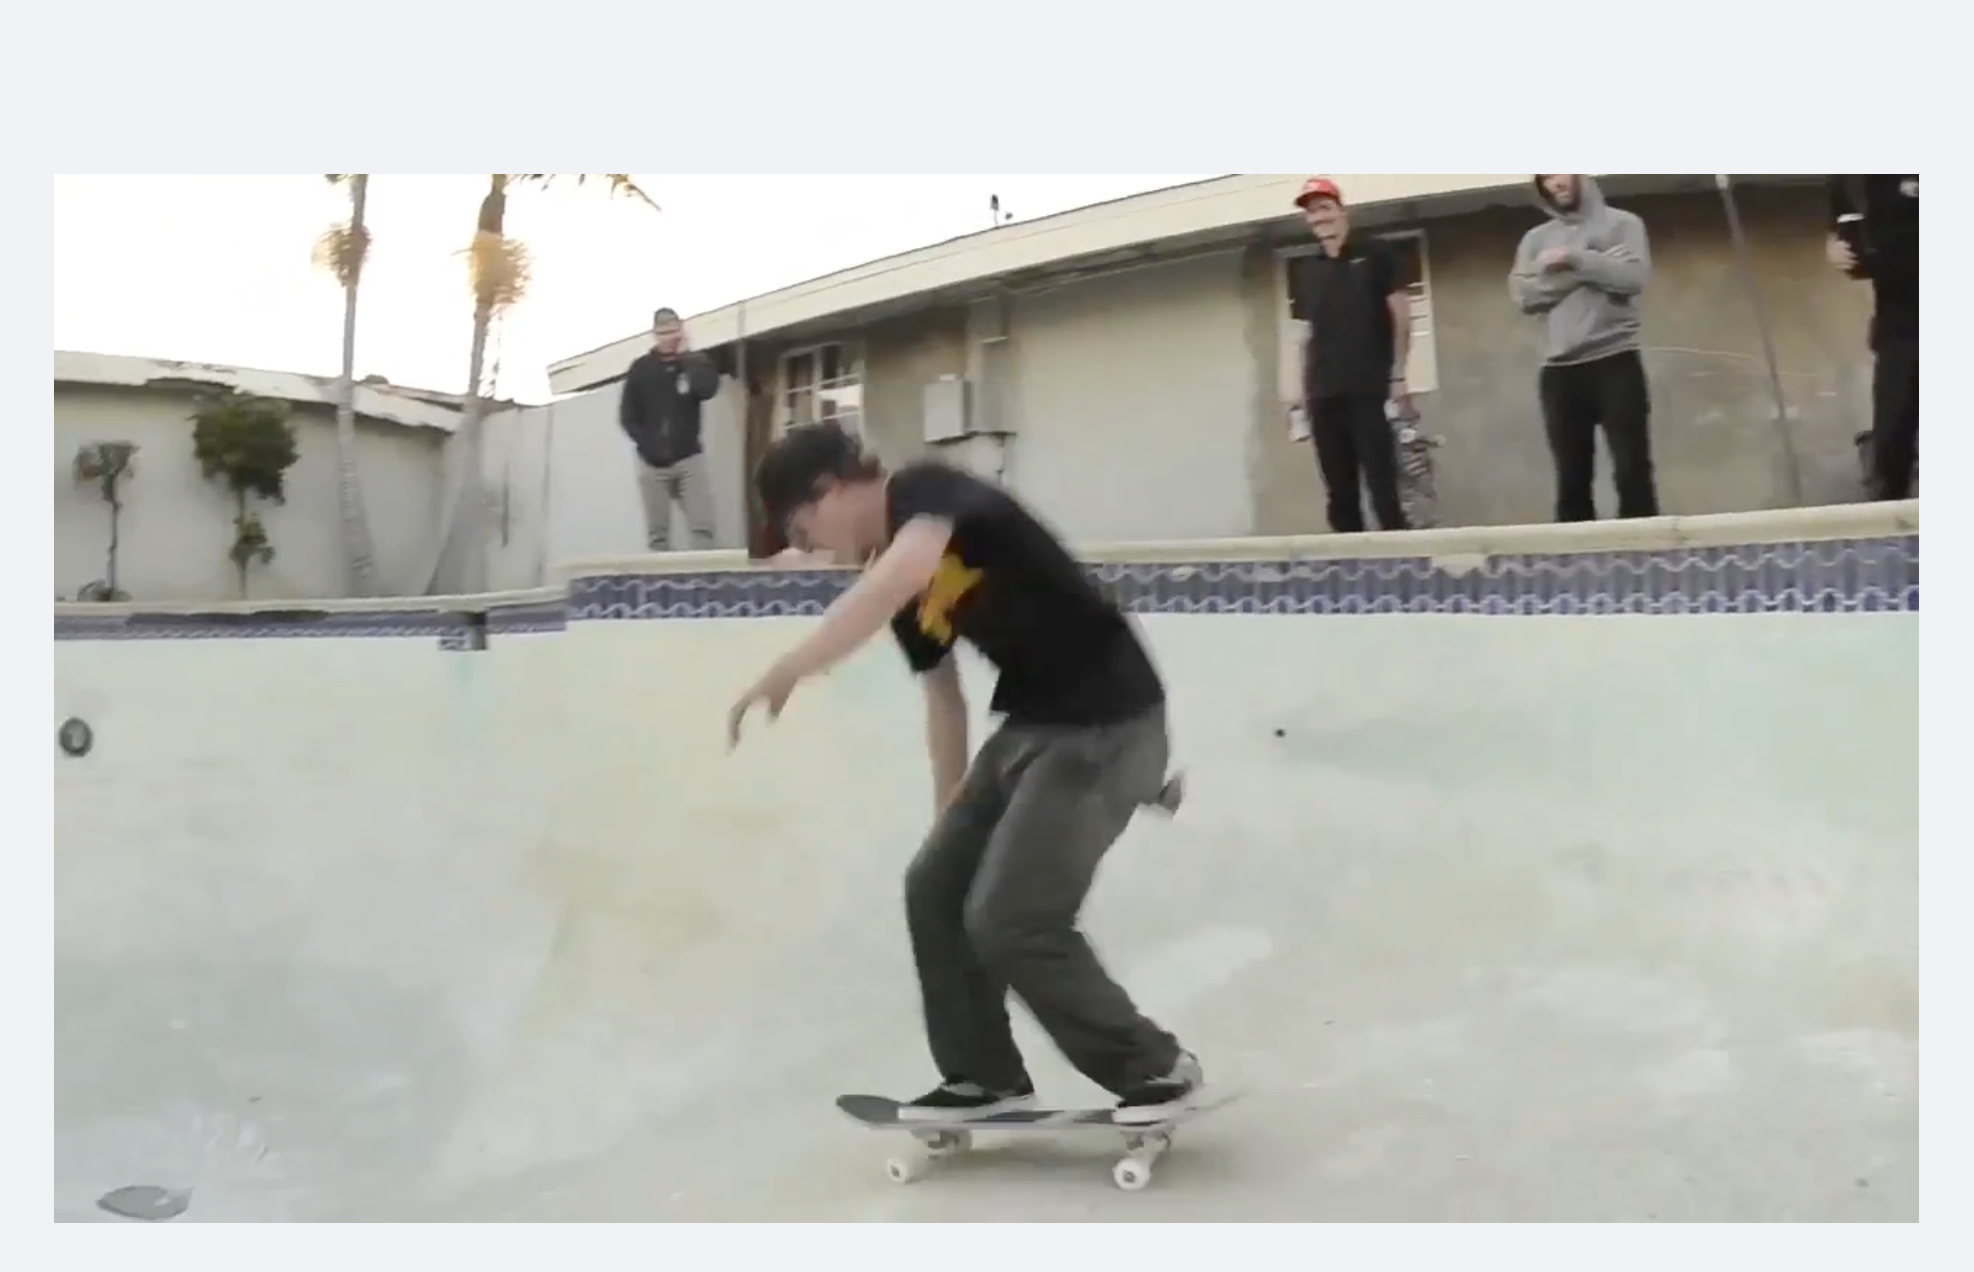
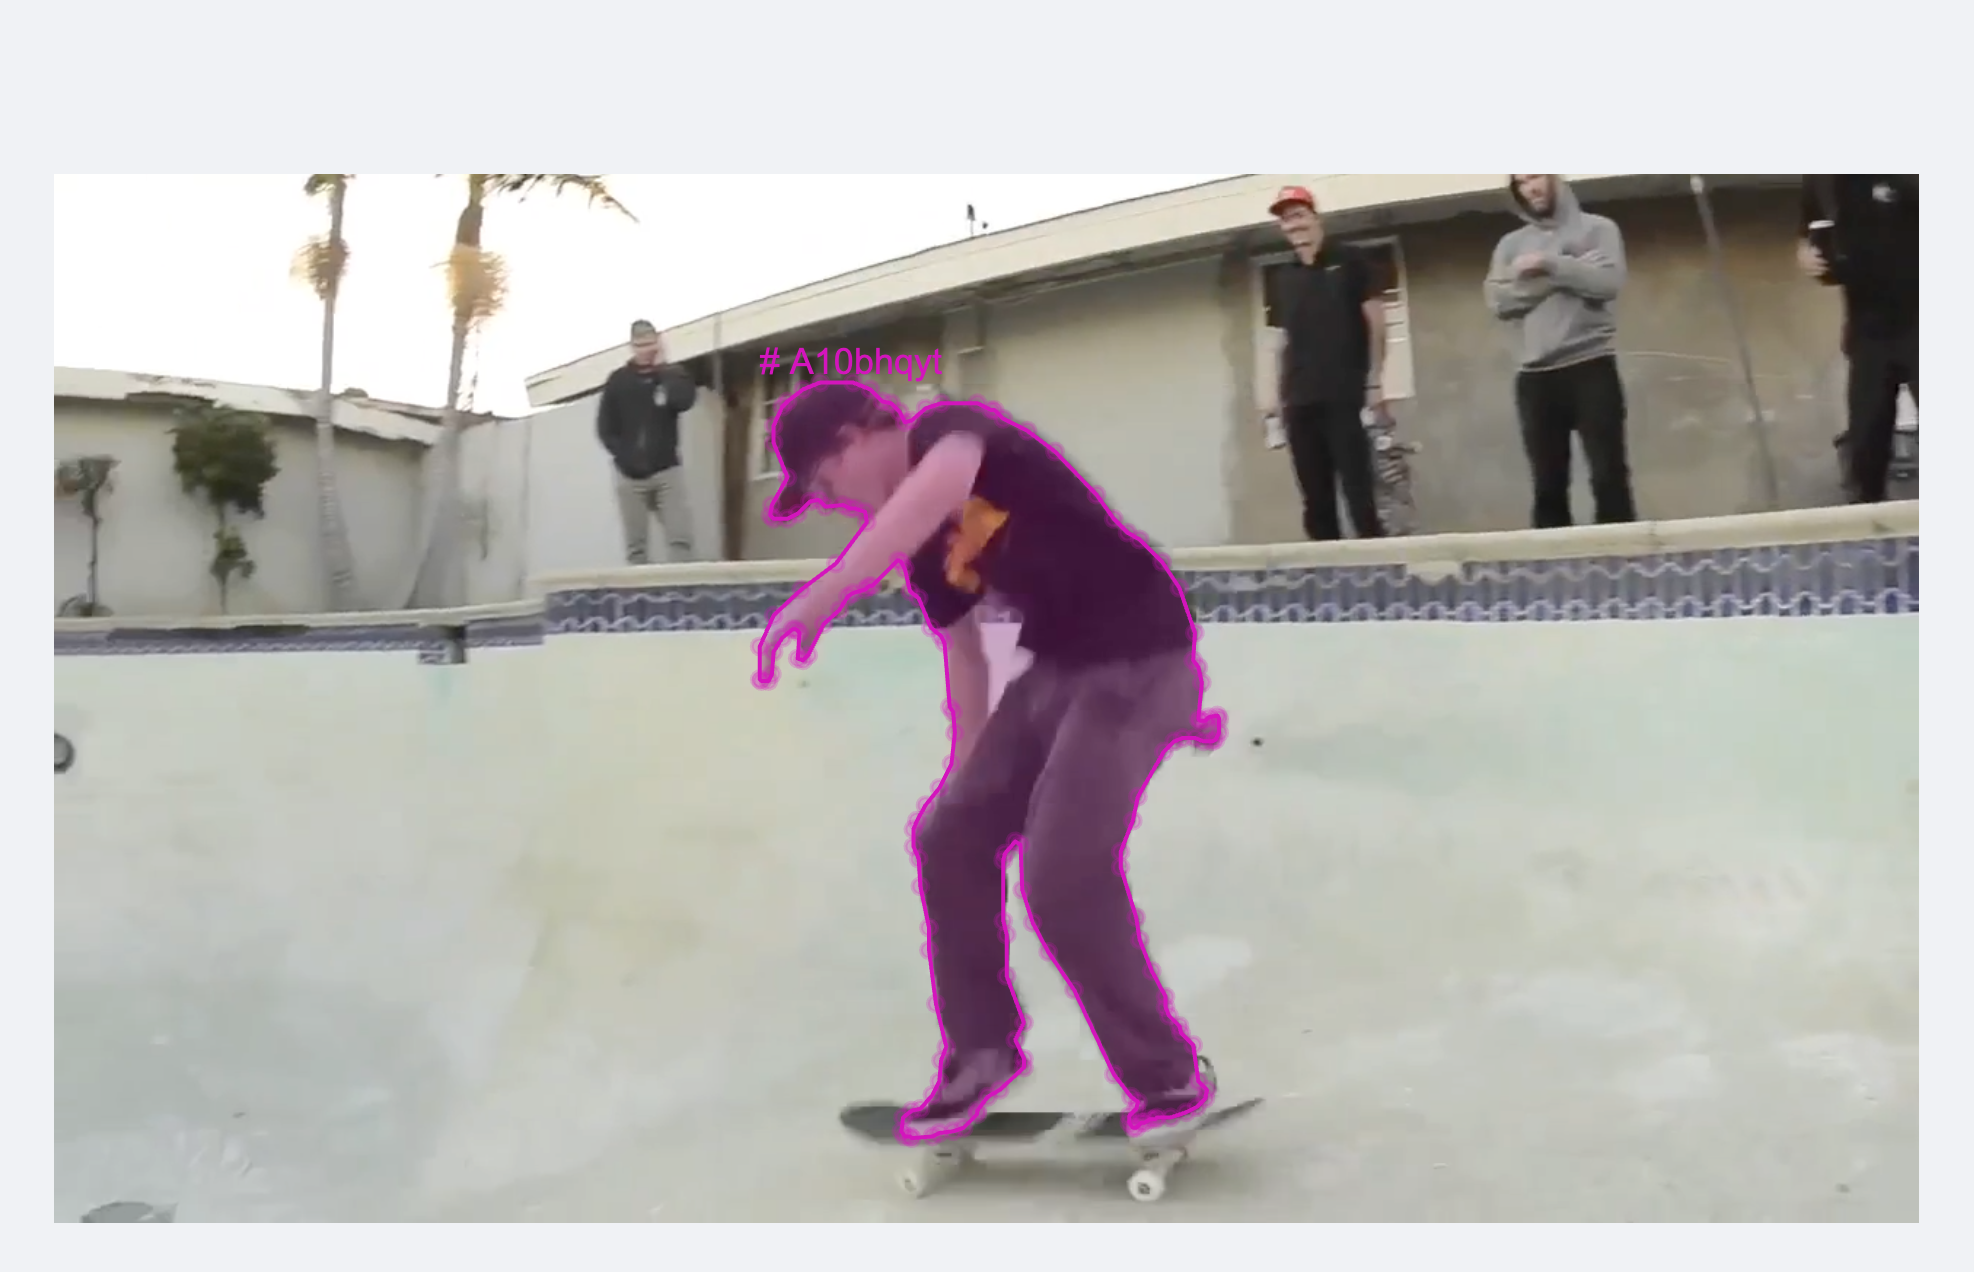
“Broken tracks” are cases where an object is being tracked (labeled) across a range of frames, but one or more frames in the range are missing labels. Hence, the tracking of the object across the video is broken. Apply the Annotation Label Quality metric Broken Track to filter the video for broken tracking of an object.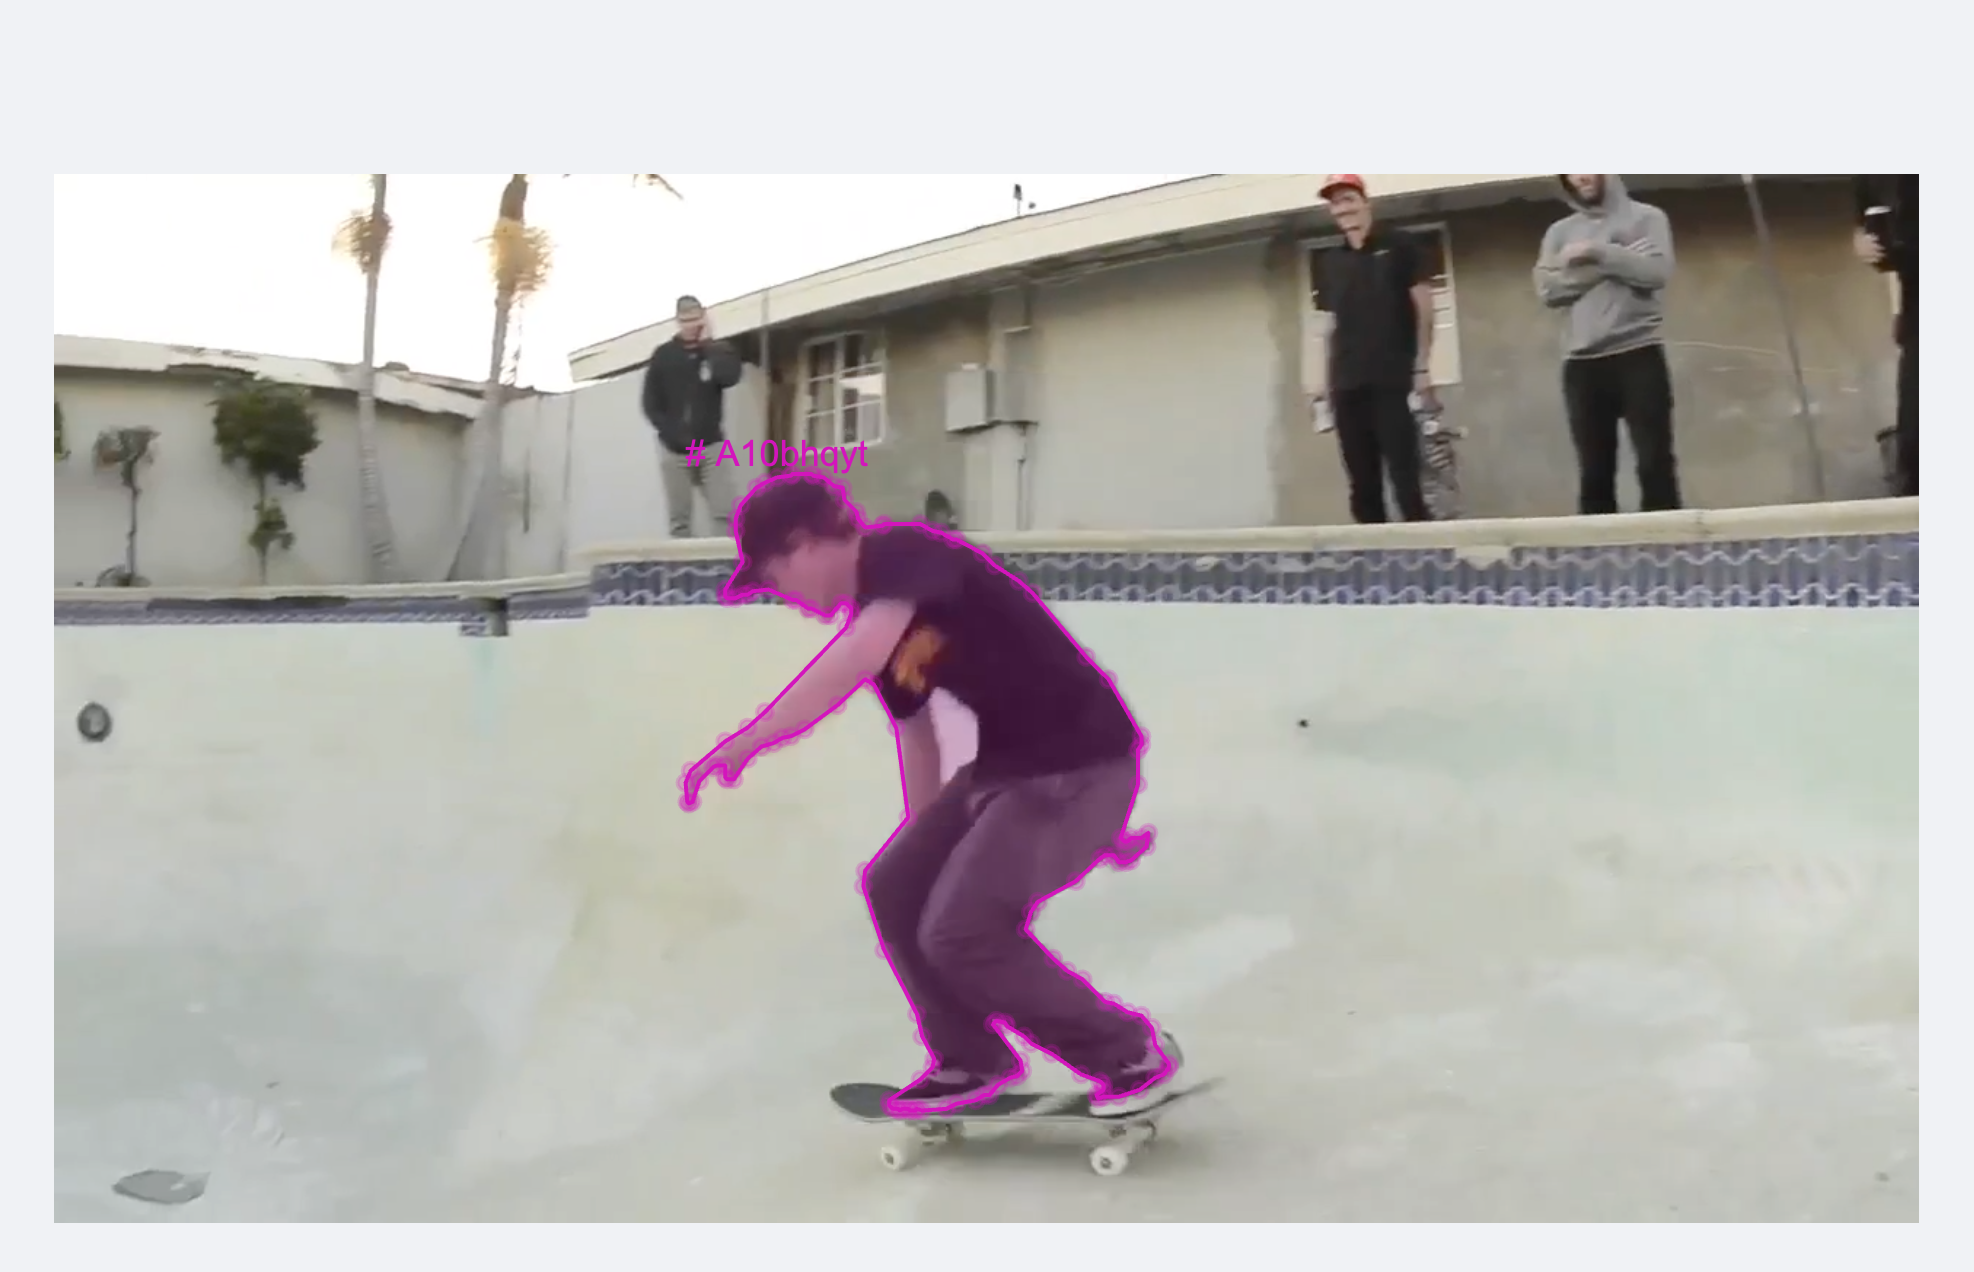
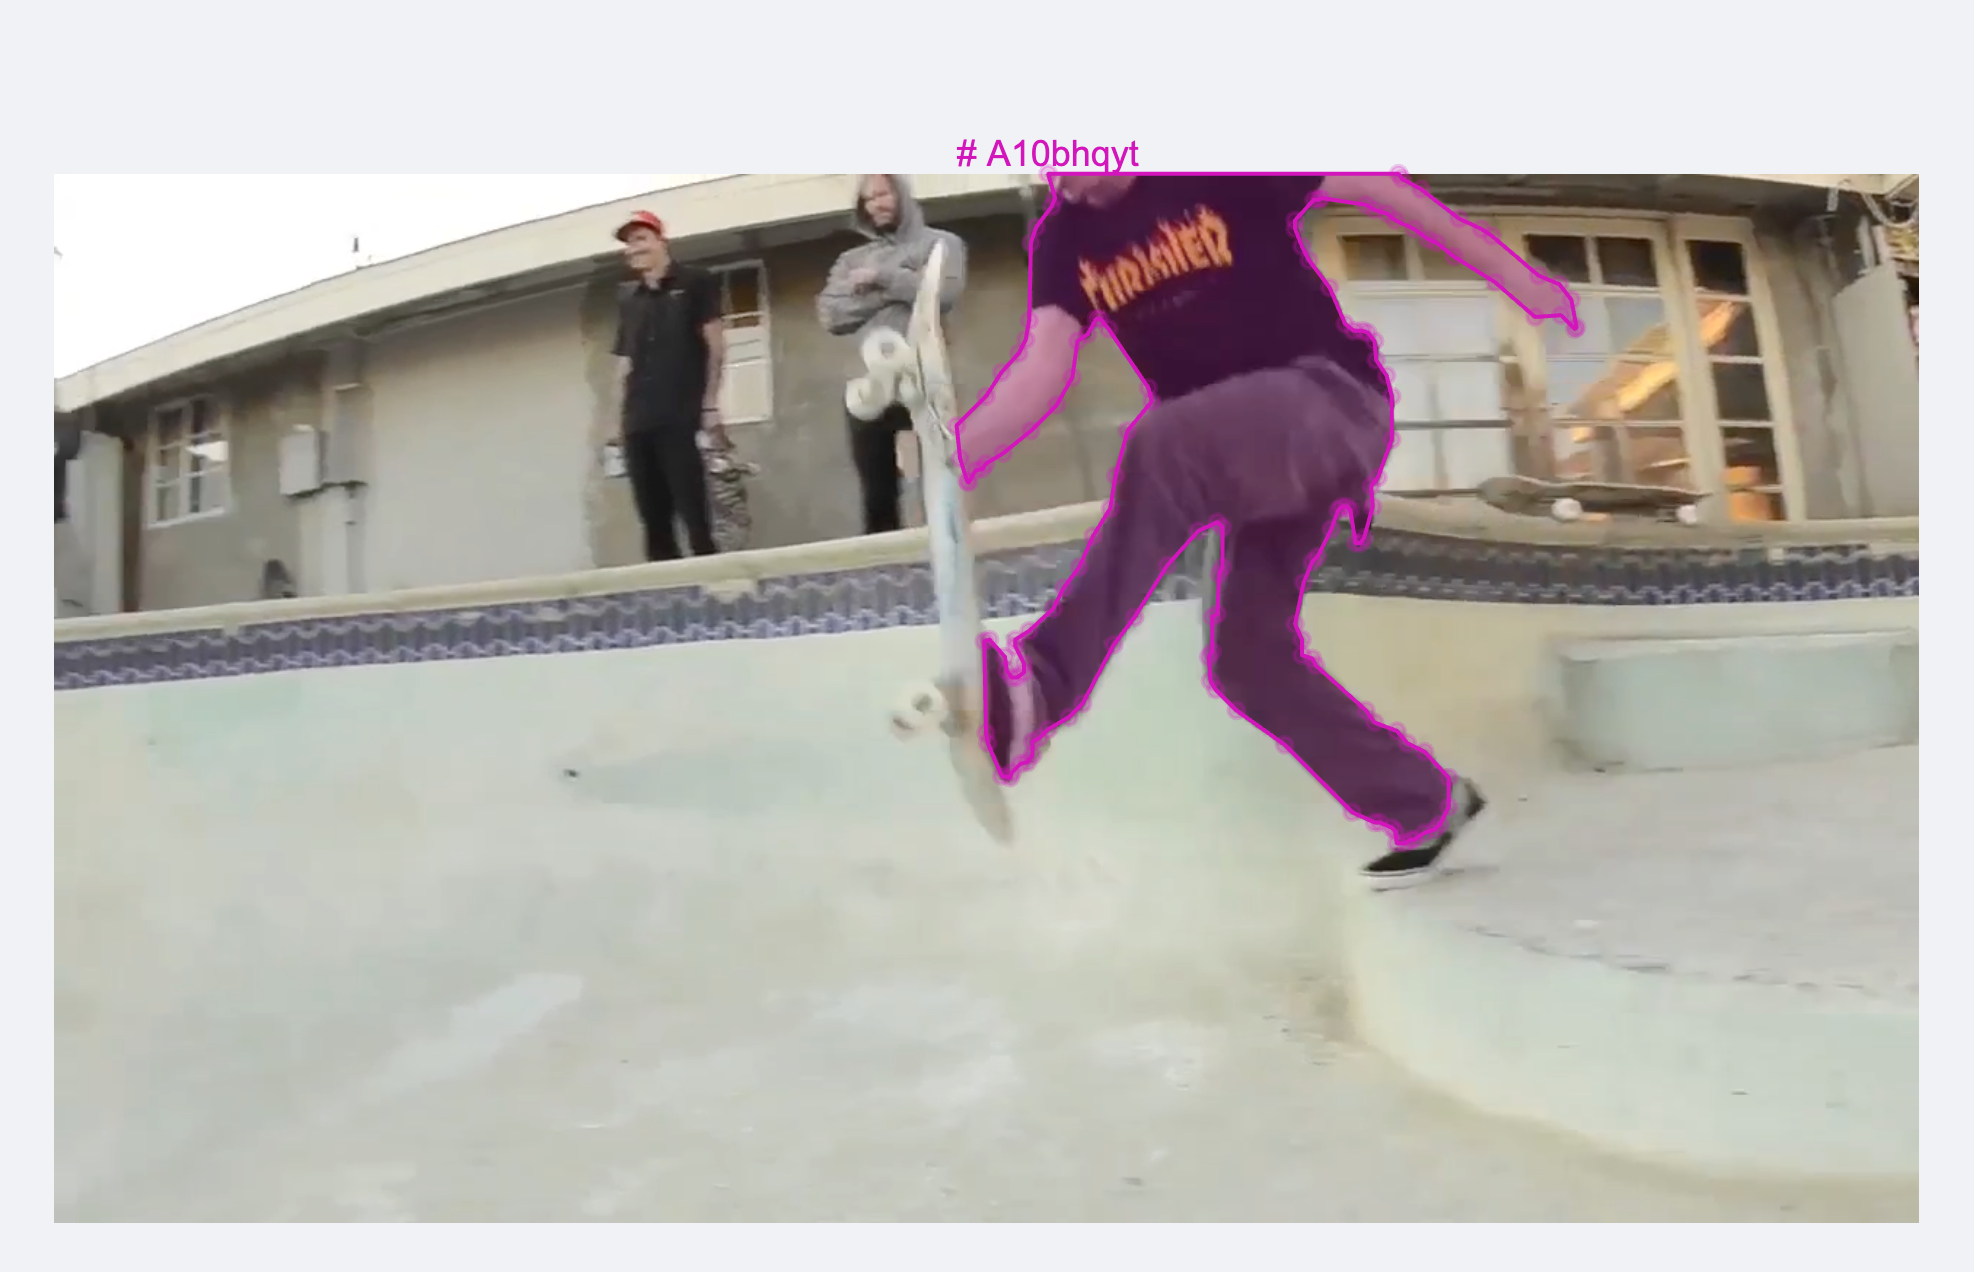
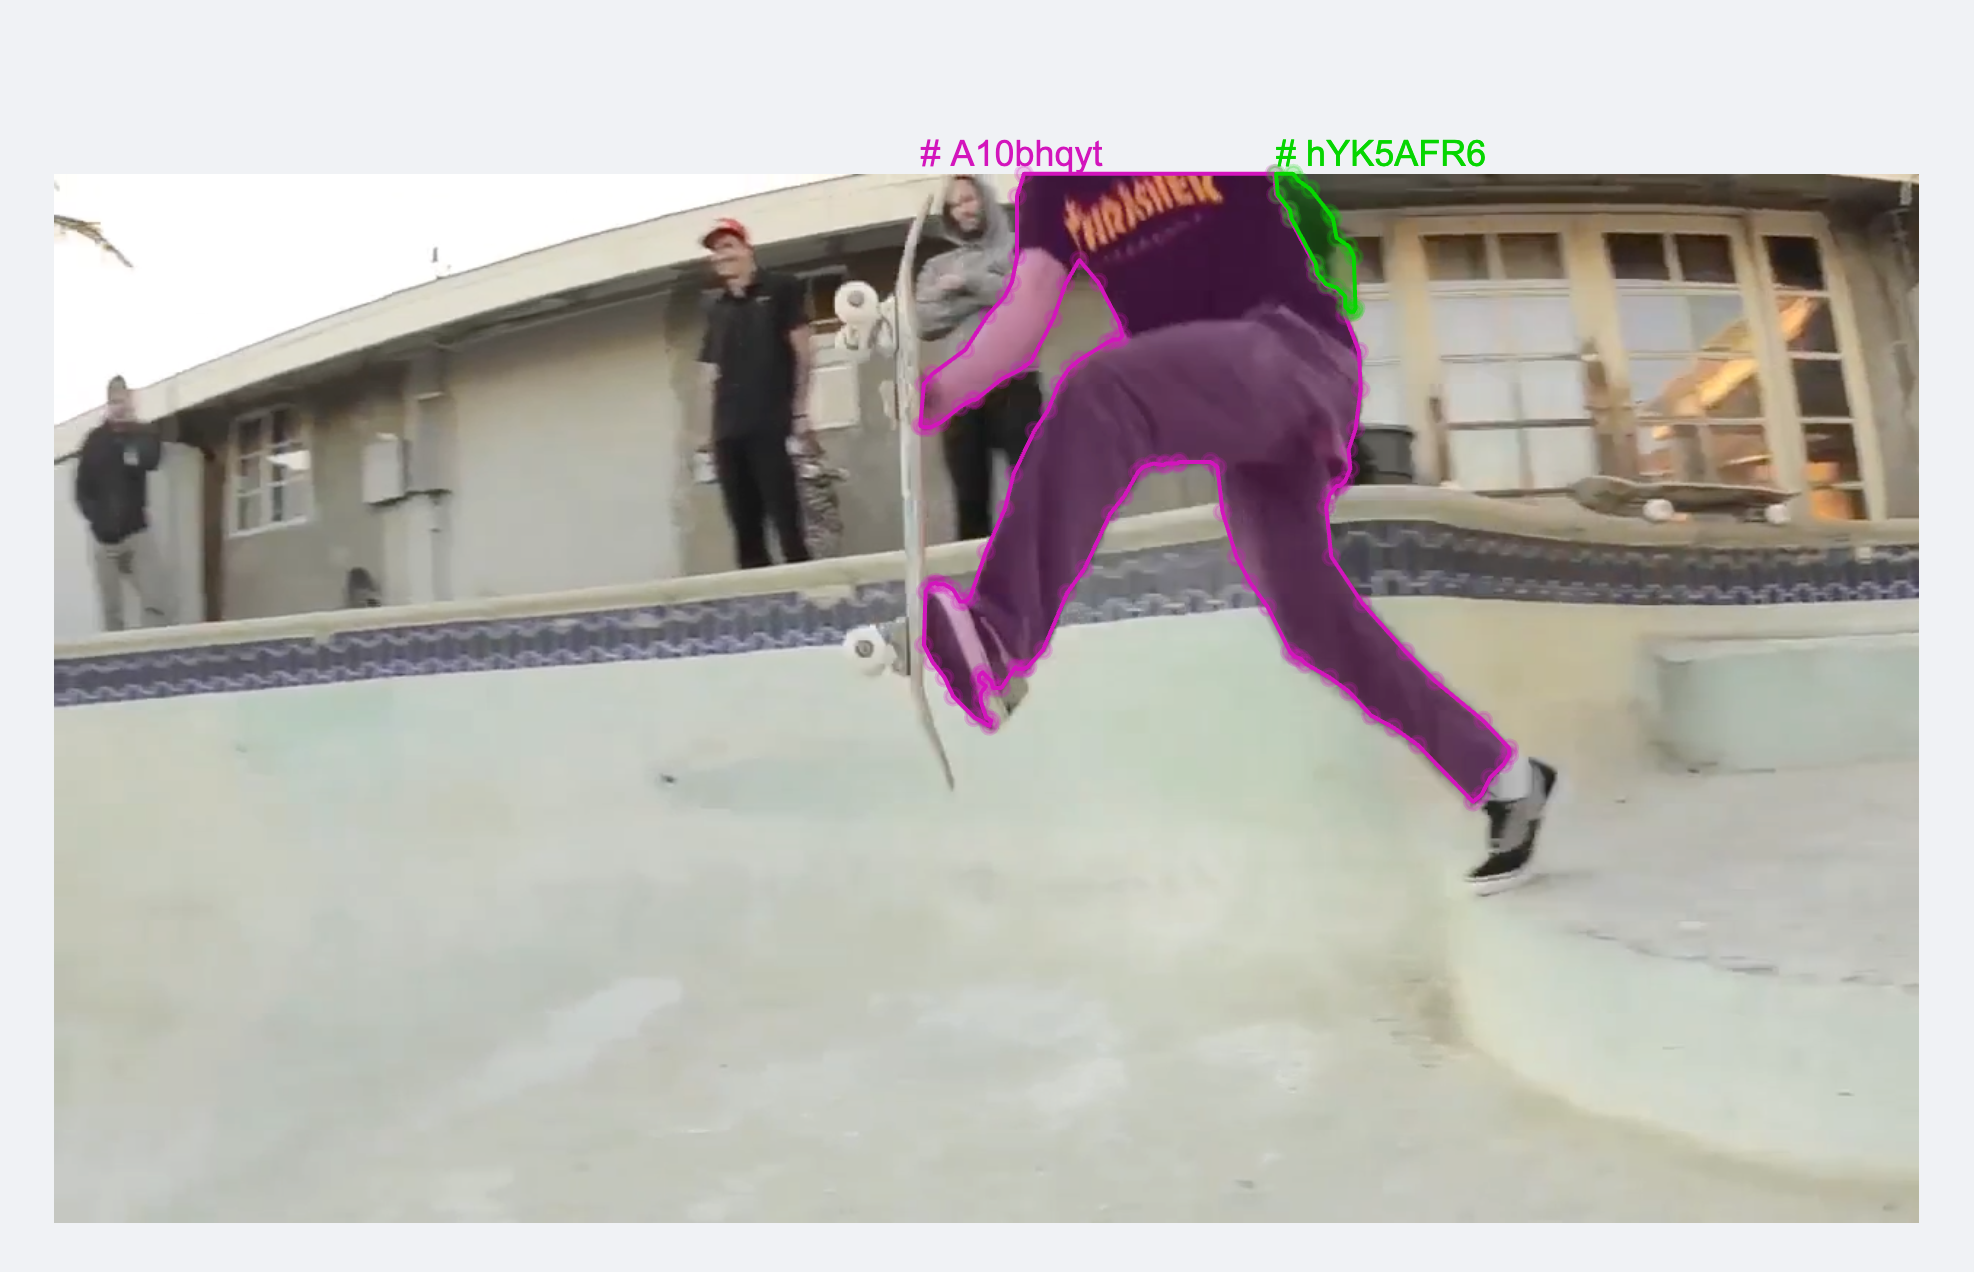
Find Inconsistent Tracks
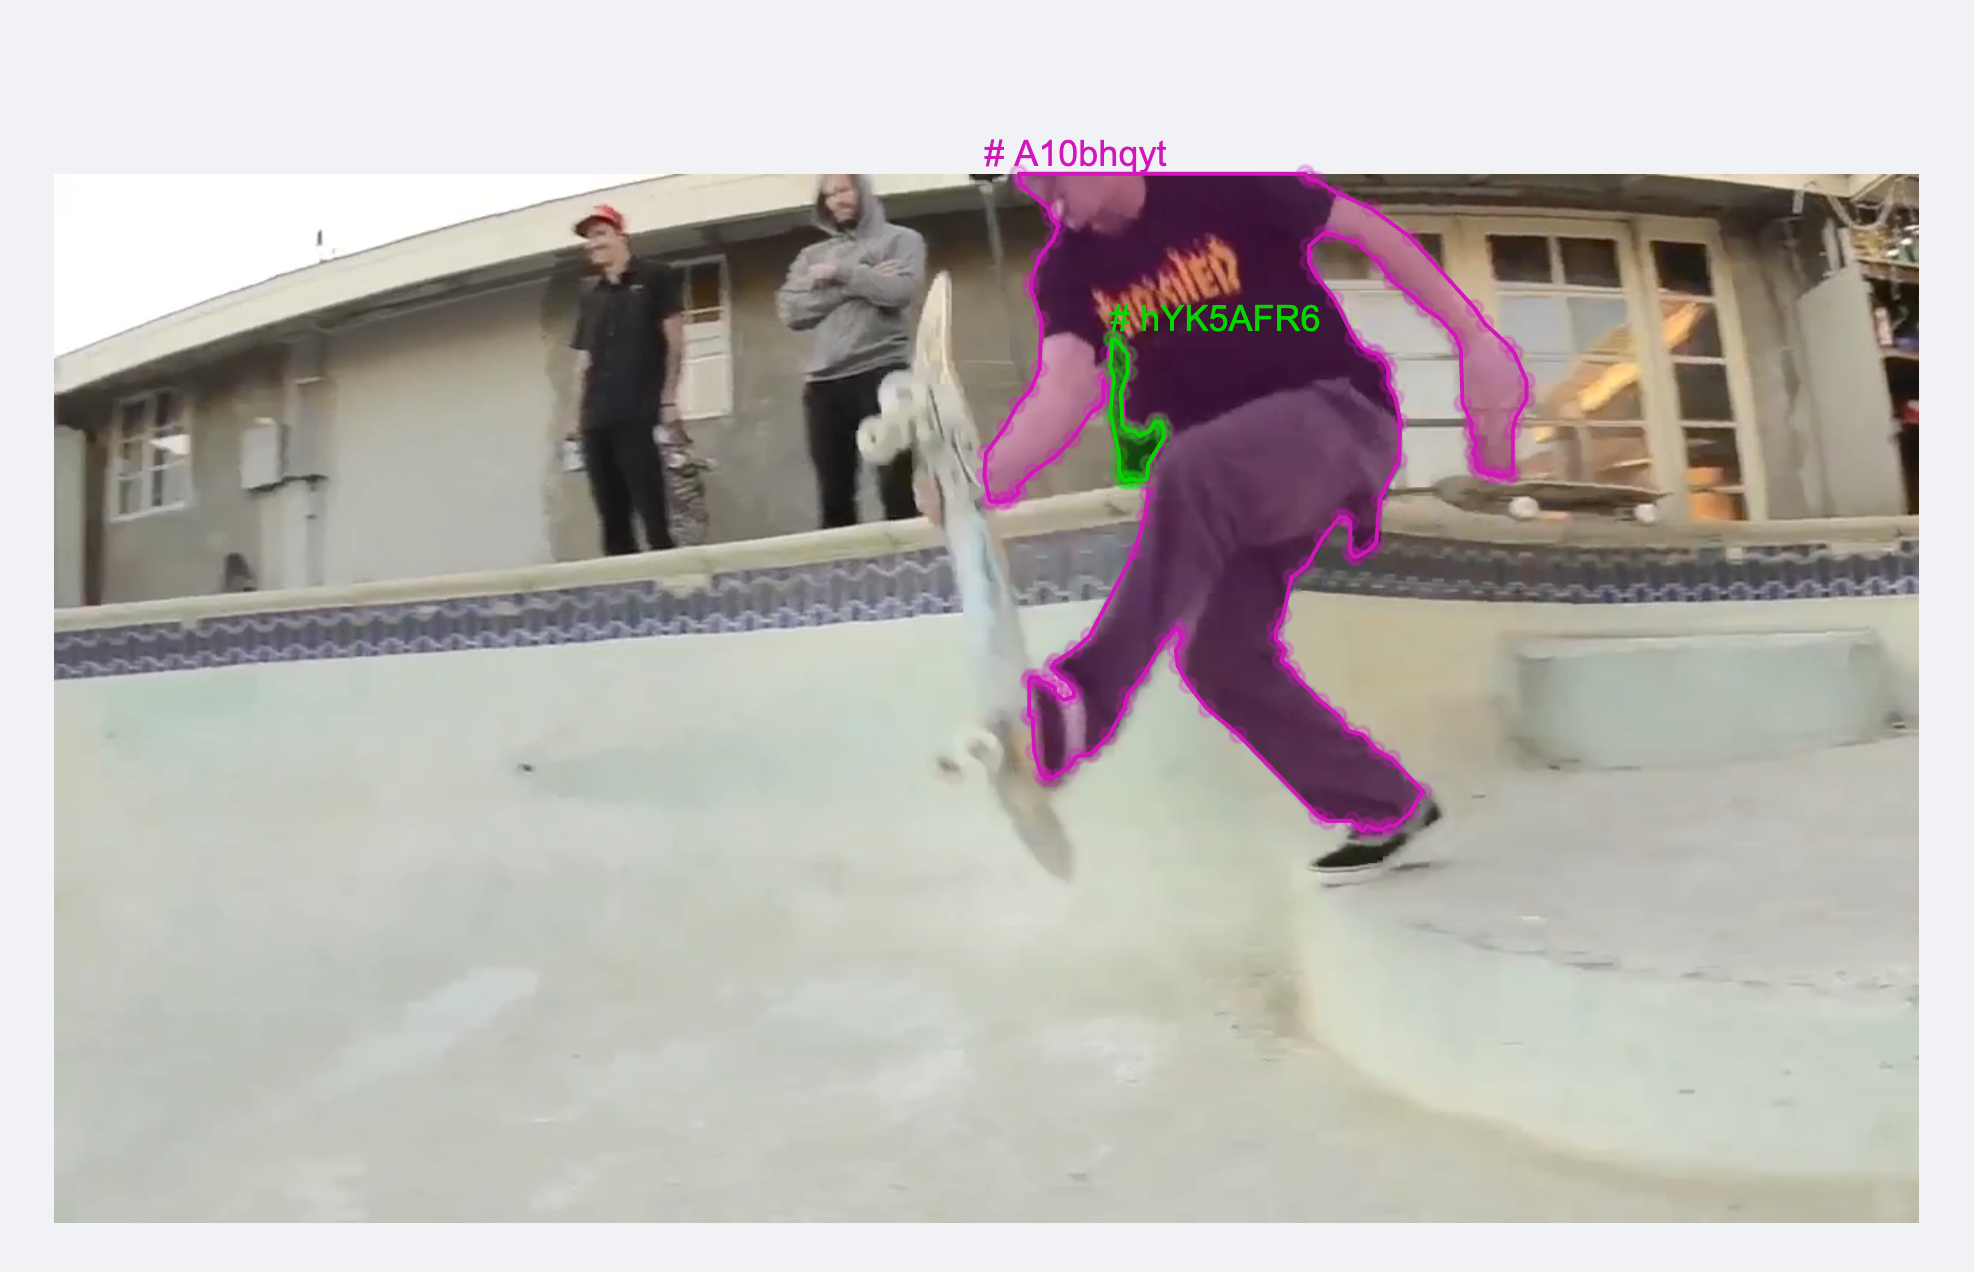
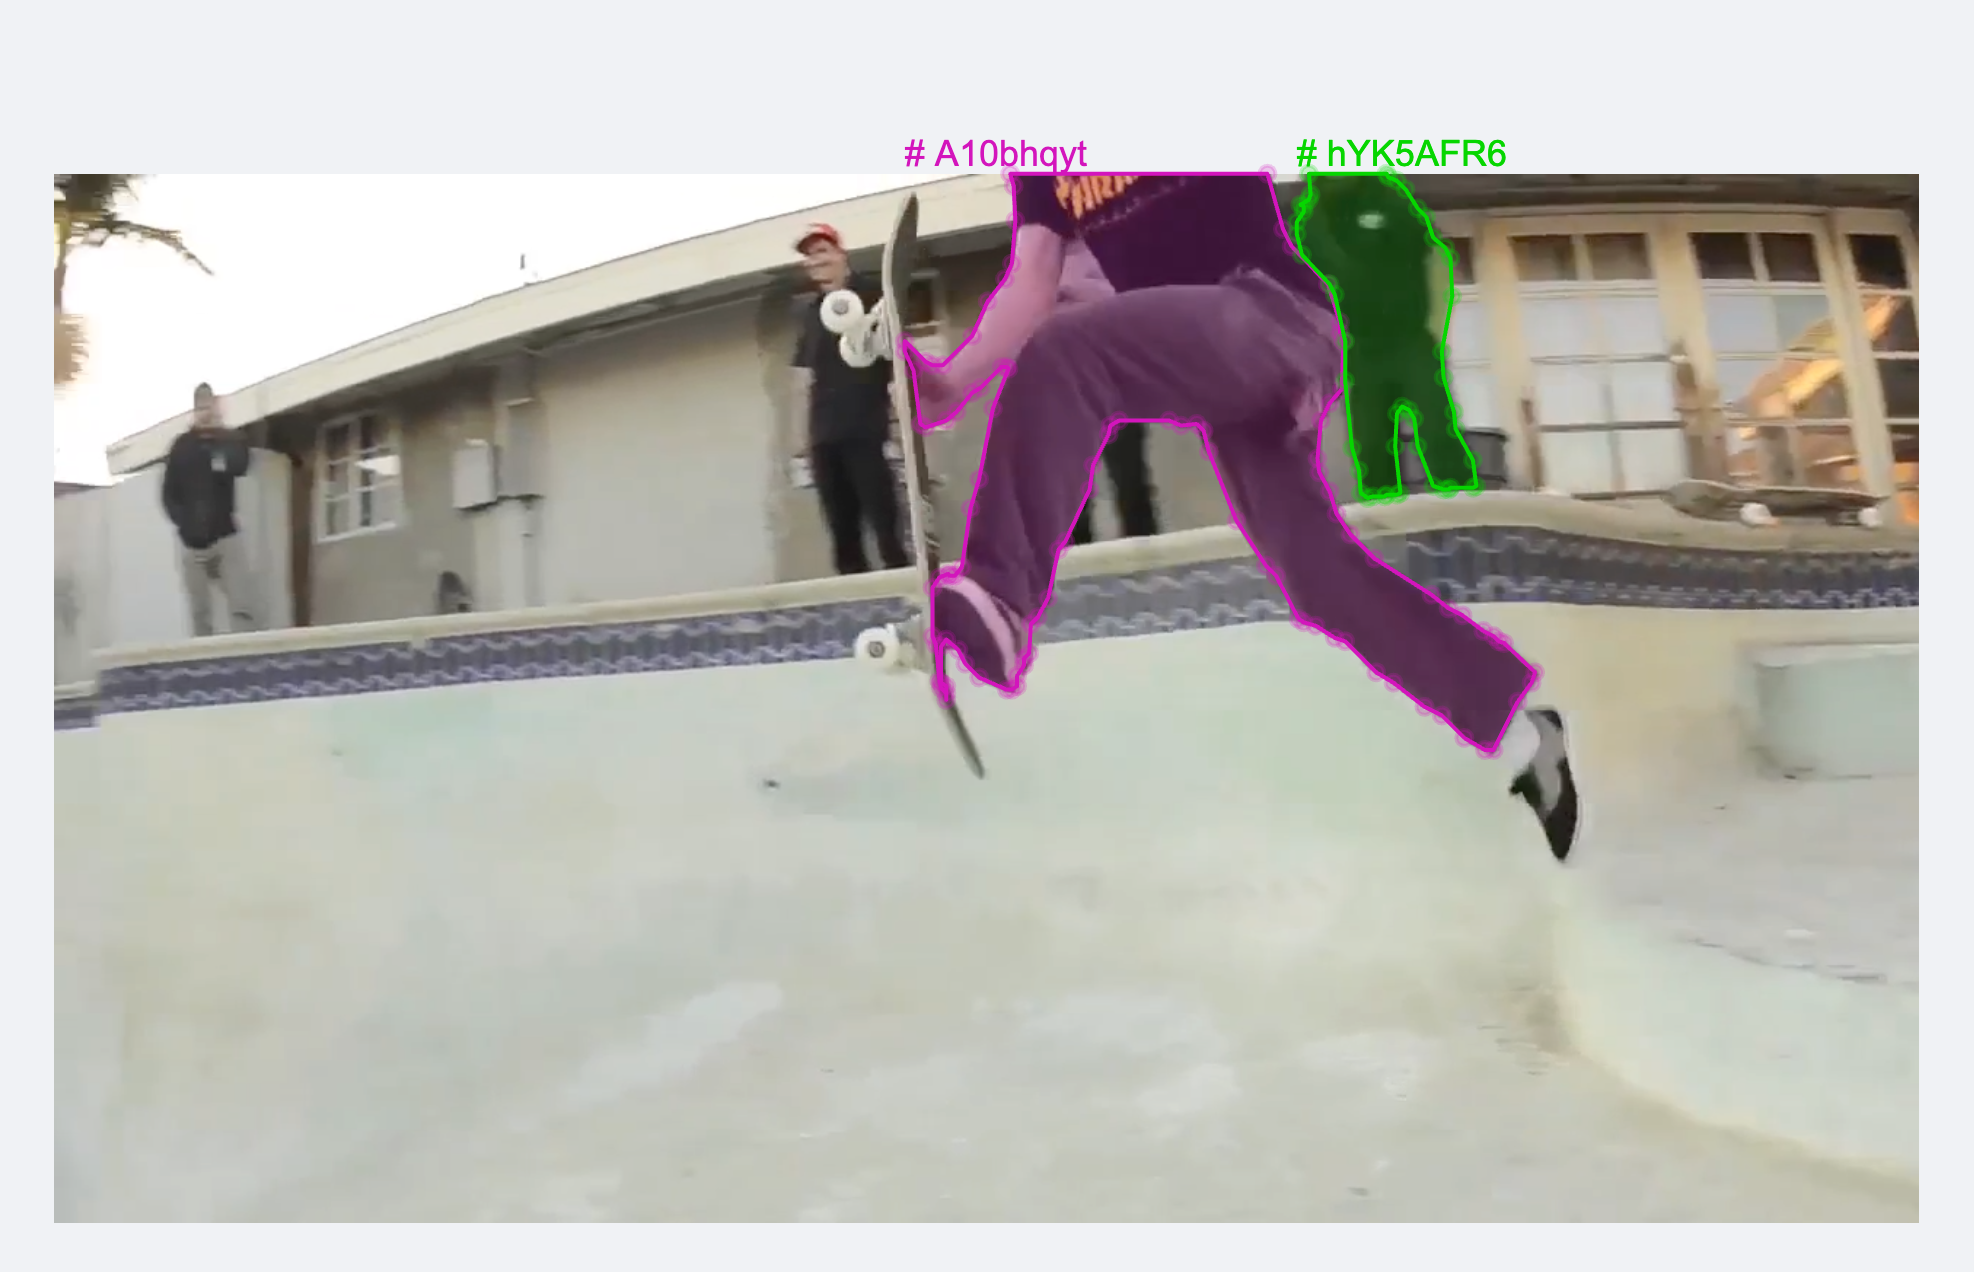
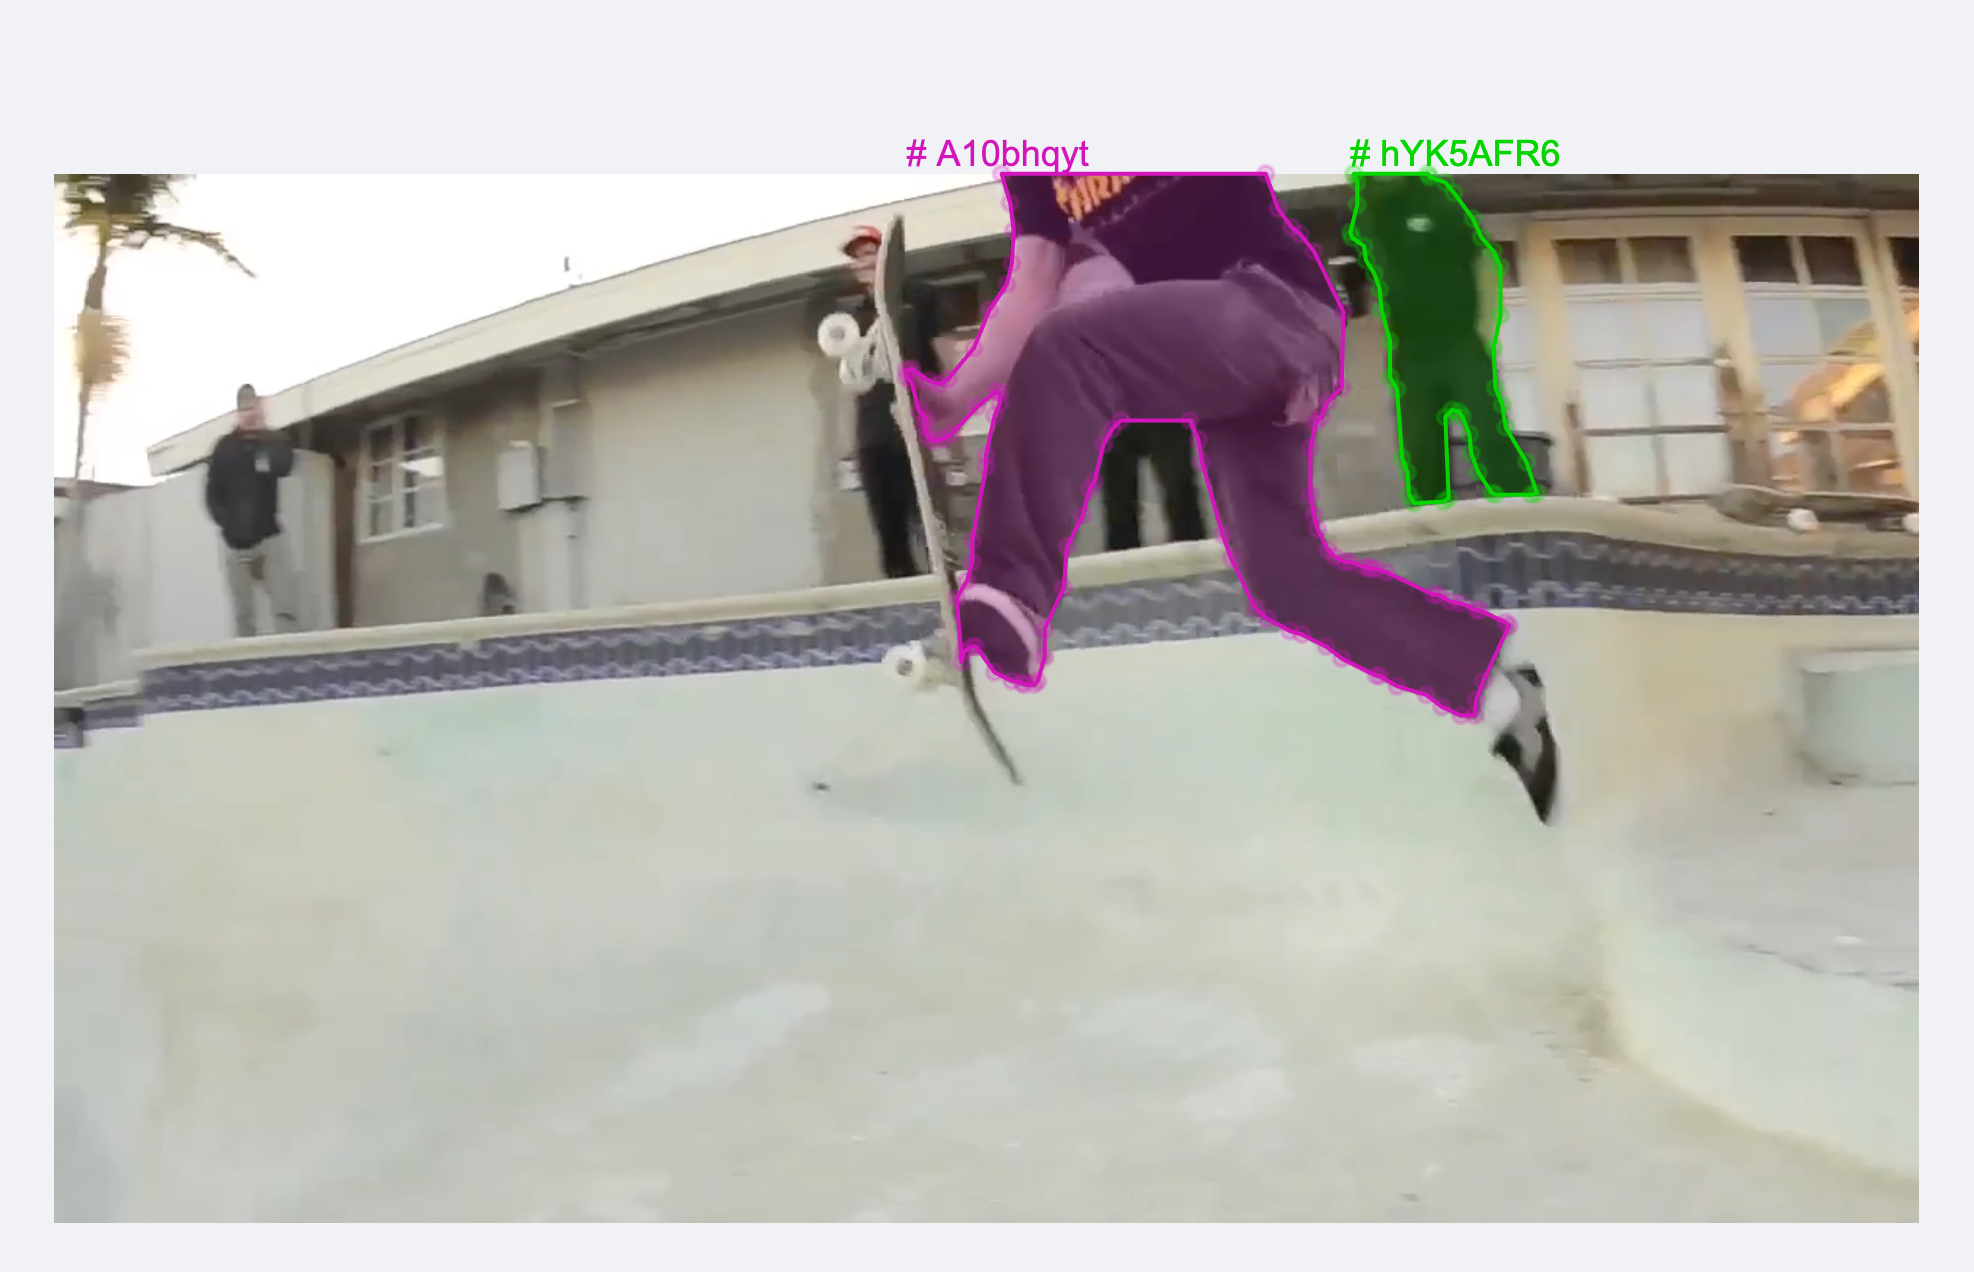
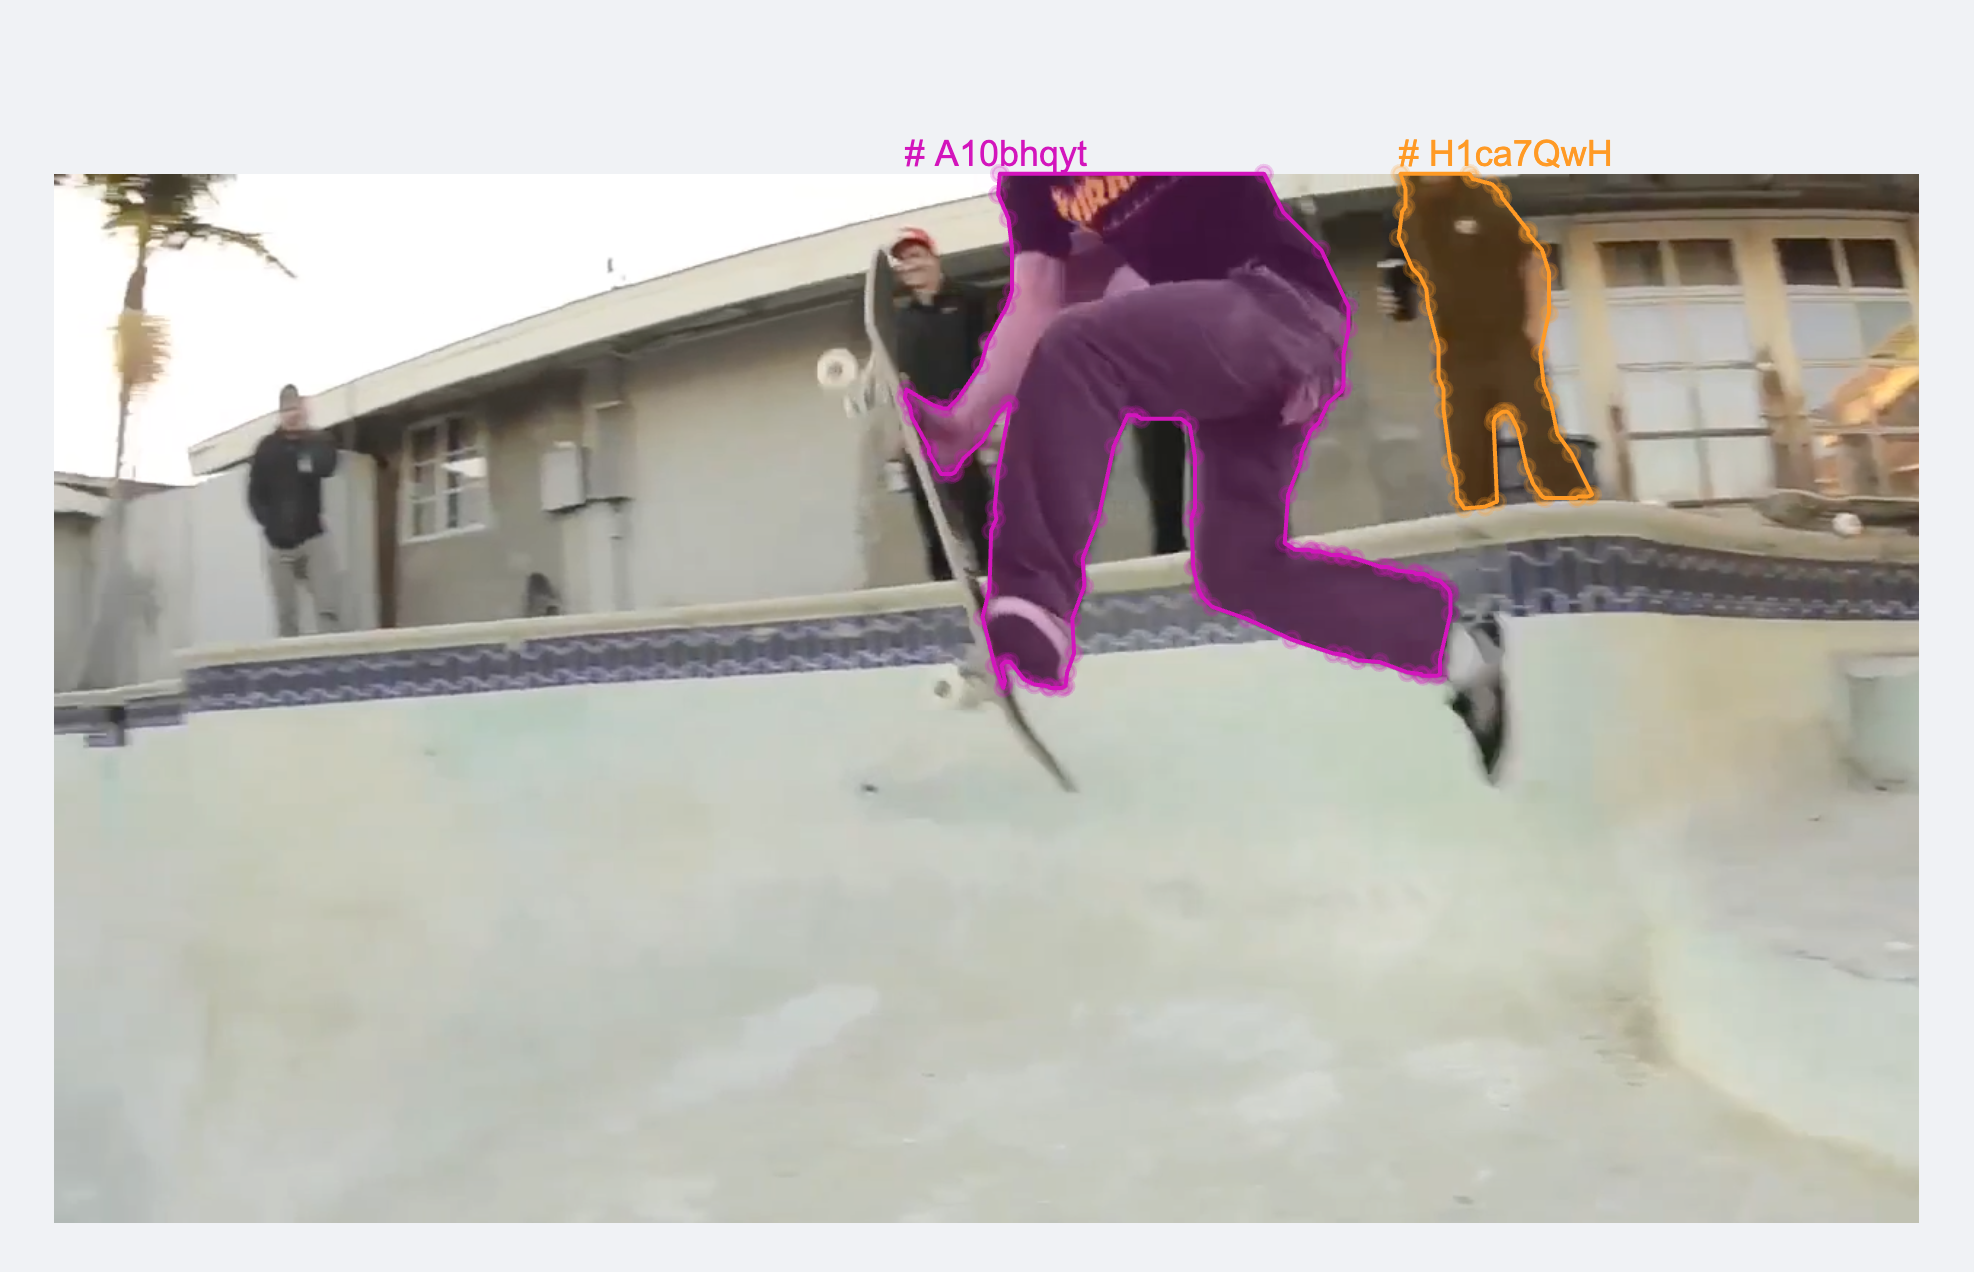
“Inconsistent tracks” are cases an object is being tracked (labeled) across a range of frames, but the occurrence of the label changes part way through tracking the object. For example, you want to track two cars across an entire video. At some point in the video, the labels on the cars are swapped OR a new label gets applied to one or both of the cars. For example, for two neighboring frames, sayt$ and t+1, we assume that for every object o* i,t in frame t, the object o* i, t+1 in frame t+1 with the highest IOU to o* i, t should have the same objectHash.
For every object in frame t, the algorithm works by computing the IOU between that object and every object in frame t+1 to select the one with the highest IOU. If those two objects have the same objectHash, all good, score will be zero. There’s nothing to flag. If, on the other hand, the two objects do not share the same objectHash, it’s flagged by setting the score to the IOU between the two.
Think of o* i, t as the best match (highest IOU) in the following frame.
 In the above, we use
 o i,t. ID as a shorthand for objectHash.
In turn,
- A score equal to 0 means that no issues were found.
- A score close to zero (but not zero) means that there is inconsistency in the object hashes but the objects do not overlap much, so it is less likely to be an actual label error.
- A score closer to one means that the two objects have a high overlap and inconsistency in object hash.
hYK5AFR6 for a while, and suddenly it changes to H1ca7QwH. Also indicated here by color (which would not actually be the case in the editor).

Find Inconsistent Classes
“Inconsistent classes” are similar to Inconsistent Tracking, but the scoring function cares about classification rather than objectHash: Why is this useful? In some situations, track ids are not relevant but the classification is. For example, if you know there is only ever one instance of an object per frame, then id is implicitly defined. Such situations do not necessarily work with the “Inconsistent Tracks” metric but should with the classification metric.
An example of the is panoptic segmentation where some classes are “stuff classes” (like the dirt class). Stuff classes would usually only have one instance per frame.
Why is this useful? In some situations, track ids are not relevant but the classification is. For example, if you know there is only ever one instance of an object per frame, then id is implicitly defined. Such situations do not necessarily work with the “Inconsistent Tracks” metric but should with the classification metric.
An example of the is panoptic segmentation where some classes are “stuff classes” (like the dirt class). Stuff classes would usually only have one instance per frame.
Use Video-Specific Metrics
Remember your videos must have labels on some frames for the Annotation Quality Metrics to be useful.- Navigate Projects and select a Project.
- Open a Project that contains videos.
- Click Explore
- Click Video.
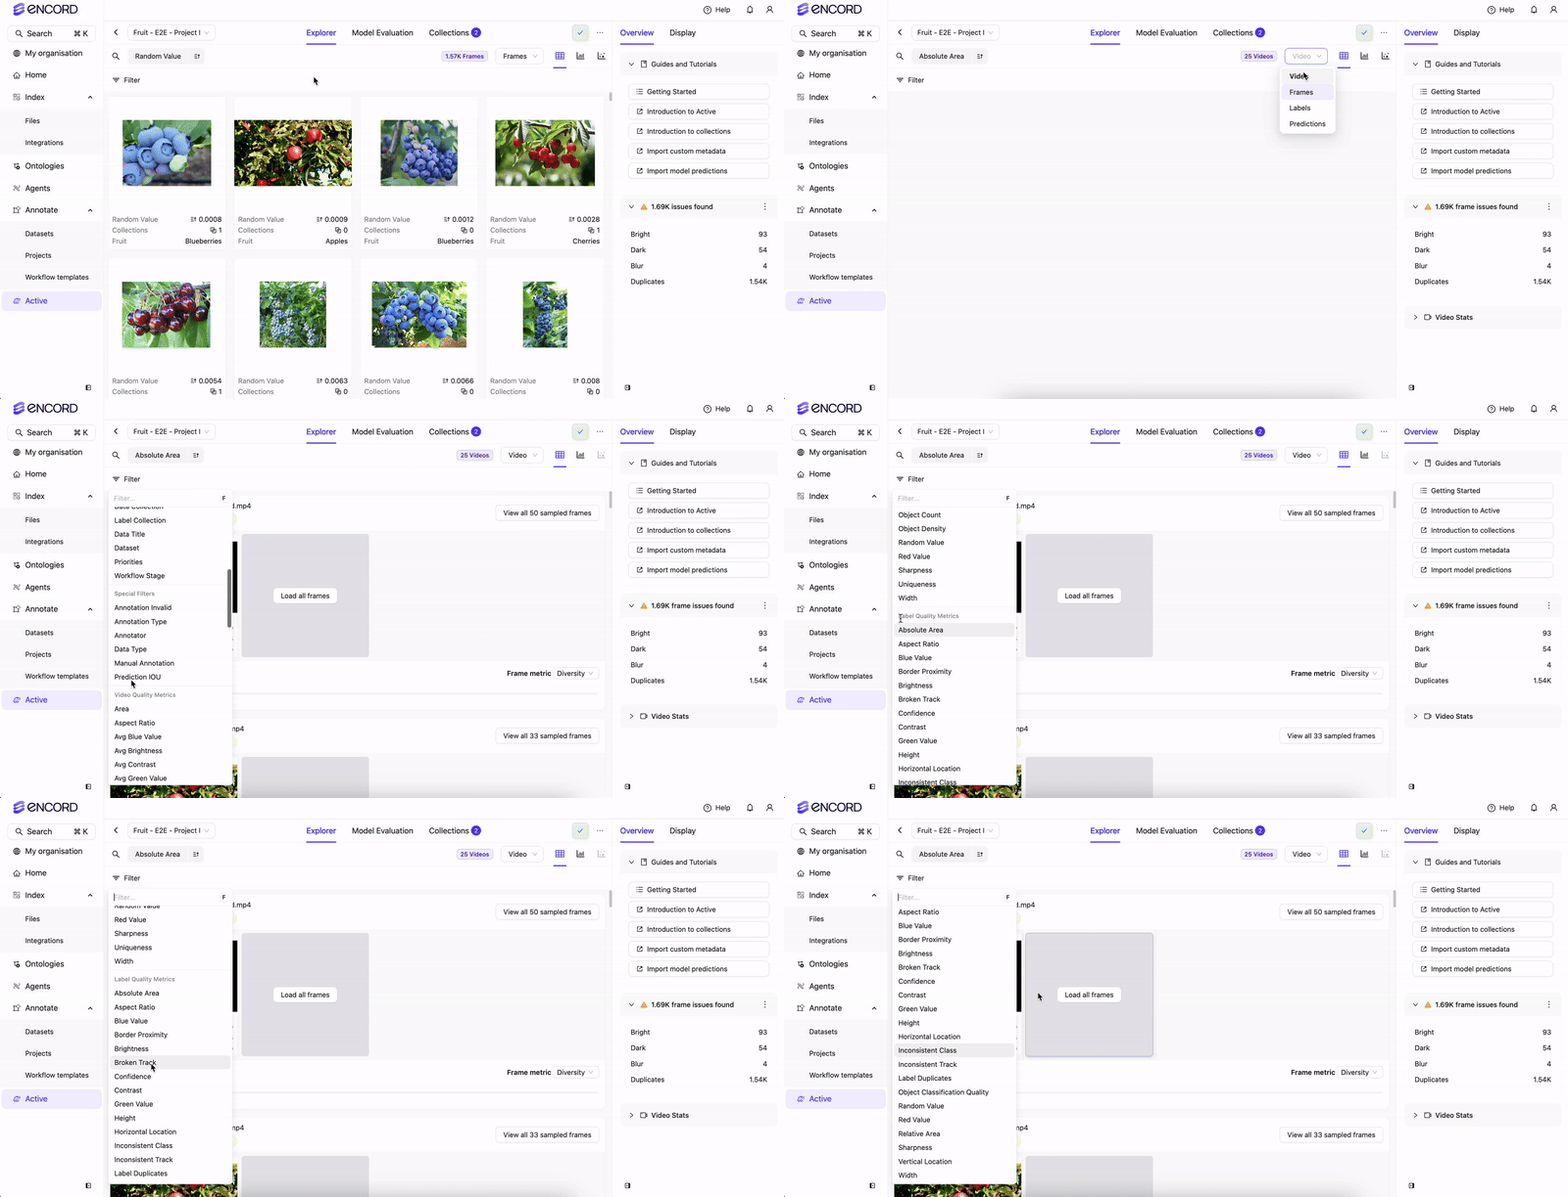
- Sort and filter the videos using the Label Quality Metrics to find the video you want.
-
Apply one of following Annotation Quality Metric filters to your video:
- Broken track
- Inconsistent track
- Inconsistent class
-
Click the Expand image button.
A larger version of the image appears. -
Click Edit in Annotate.
The frame opens in the Label Editor in Annotate. - Move forward and backward a few frames in the video to see the labeling error.