Filtering, sorting, and searching your data is crucial for various reasons. It enables insights and actionable results on the following key aspects and more:Documentation Index
Fetch the complete documentation index at: https://docs.encord.com/llms.txt
Use this file to discover all available pages before exploring further.
- Identification of patterns, trends, or anomalies within a subset of the data.
- Recognition of duplicates, outliers, and inconsistencies.
- Removal of irrelevant, noisy, and erroneous data.
- Understanding a model’s behavior and potential skewness when facing different subsets of the data.
- After filtering, sorting, and searching your data, use Collections with Annotate Projects to streamline your annotation process.
- Filter: Refine your searches using quality metrics, Collections, data types, annotation types, annotation classes, and by annotator from Annotate. This includes filtering by nested attributes within annotation classes.
- Sort: Sort your data, labels, or predictions in ascending or descending order using quality metrics.
- Natural language and image search: Enter descriptive queries in everyday language or use images to make it easier to find relevant data without the need for specific keywords or complex search parameters.
- Embedding plot: A two-dimensional visualization technique used by Encord to represent high-dimensional data in a more interpretable form. Use the plot to select points within a specific rectangular area, focusing on a particular subset of data points for in-depth analysis.
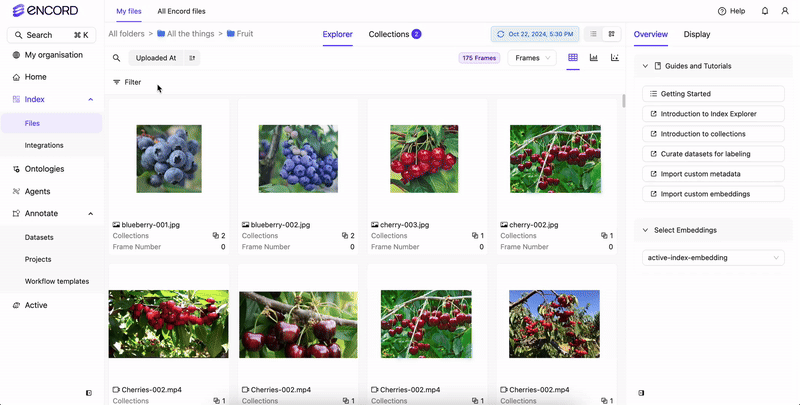
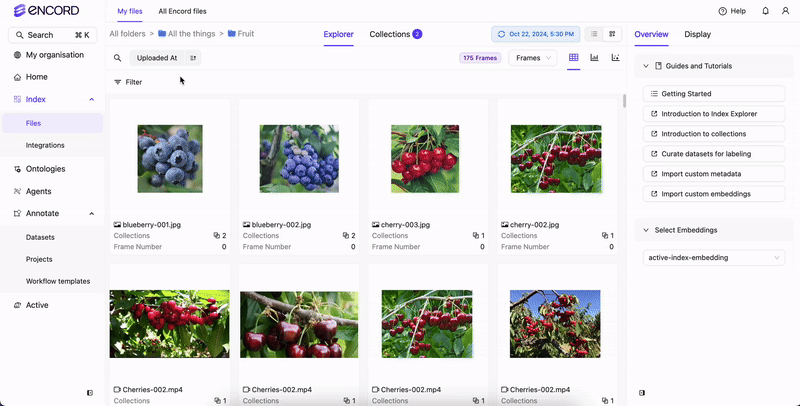
Index
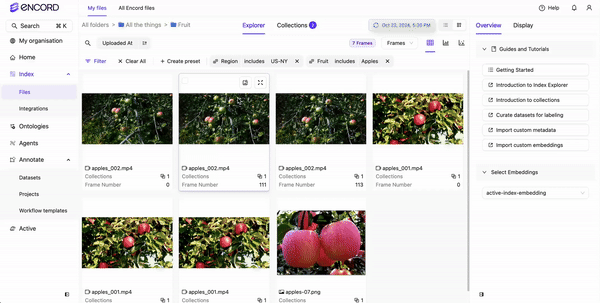
Filters
In the Index Explorer for a folder you can refine searches by data quality metrics, Collections, custom metadata, folders, data titles, and data types. Video Quality Metrics: Video quality metrics are calculated as your videos import into Index. Examples include Area, Clip duration, Frames per second, Number of frames. Data Quality Metrics: Data quality metrics are calculated as your data imports into Index. Examples include Area, Frame number, Random value.Data Quality Metrics
Data Quality Metrics
For more detailed information on Data Quality Metrics go here.
| Title | Metric Type | Ontology Type |
|---|---|---|
| Area - Ranks images by their area (width/height). | image | |
| Aspect Ratio- Ranks images by their aspect ratio (width/height). | image | |
| Blue Value - Ranks images by how blue the average value of the image is. | image | |
| Brightness - Ranks images by their brightness. | image | |
| Contrast- Ranks images by their contrast. | image | |
| Diversity - Forms clusters based on the ontology and ranks images from easy samples to annotate to hard samples to annotate. | image | |
| Frame Number - Selects images based on a specified range. | image | |
| Green Value- Ranks images by how green the average value of the image is. | image | |
| Height - Ranks images by the height of the image. | image | |
| Object Count - Counts number of objects in the image. | image | bounding box, checklist, point, polygon, polyline, radio, rotatable bounding box, skeleton, text |
| Object Density - Computes the percentage of image area that is occupied by objects. | image | bounding box, polygon, rotatable bounding box |
| Randomize Images - Assigns a random value between 0 and 1 to images. | image | |
| Red Value - Ranks images by how red the average value of the image is. | image | |
| Sharpness - Ranks images by their sharpness. | image | |
| Uniqueness - Finds duplicate and near-duplicate images. | image | |
| Width - Ranks images by the width of the image. | image |
video/mp4.
Storage location: The location where your images/videos reside. Examples include AWS, GCP, Local.
Uploaded at: The date and time that the image/video uploaded to Index.
To filter Index data:
- Log in to the Encord platform. The landing page for the Encord platform appears.
- Go to Index > Files. The All folders page appears with a list of all folders in Encord.
-
Click in to a folder.
The landing page for the folder appears and the Explorer button is enabled.
- Click the Explorer button. The Index Explorer page appears.
-
Click the Filters dropdown or press F.
The Filters menu appears.
- Add and configure the filters you need. Frame/video/audio files filter in the Explorer workspace.
Preset Filters
Preset filters provide a way to save your filtering criteria for use and reuse in Index. All preset filters are available everywhere in Index. This means that some preset filters might not return any results. For example, a preset filter might use a specific Folder (Folder A) in the filtering criteria, but if you open Index in a different Folder (Folder B) and the first Folder (Folder A) is not a child of the other Folder (Folder B) no results are returned. To create a Preset filter:- Log in to the Encord platform.
- Go to Index > Files and click in to a folder.
- Click the Explorer button.
- Click the Filters dropdown or press F.
-
Add and configure the filters you need.
-
Click Presets > Create Presets once you have added all the filters you need and specified each filter’s settings.
After creating the Preset you can use the Preset in this or any other Folder.
- Log in to the Encord platform.
- Go to Index > Files and click in to a folder.
- Click the Explorer button.
- Click the Filters dropdown or press F.
-
Click Presets.
A menu appears.
- Select the Preset you want to use from the dropdown. Frame/video/audio files filter in the Explorer workspace based on the Preset Filters and their settings.
Global filters apply to any Folder, but Local filters only apply on the Folder where the Preset was created.
Sorting
Sort your data, in ascending or descending order, using data quality metrics. To sort Index data:- Log in to the Encord platform.
- Go to Index > Files and click in to a folder.
- Click the Explorer button.
-
Select the metric to sort the data.
- Specify ascending or descending order.
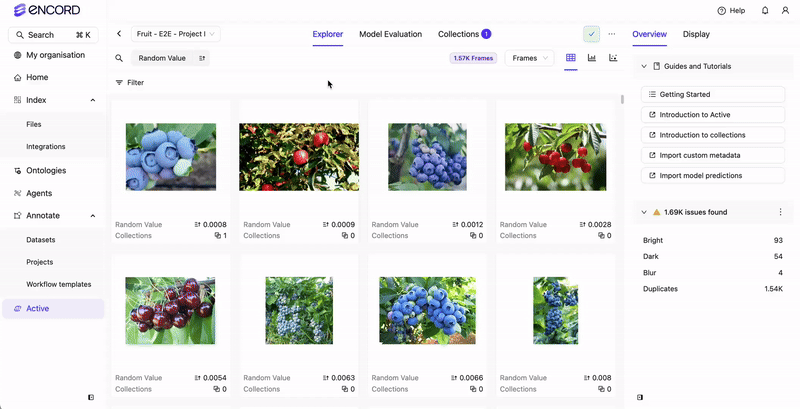
Active
Filters
In the Active Explorer for a Project you can refine searches by data quality metrics, label quality metrics, Collections, data types, annotation types, annotation classes, and by annotator from Annotate.Data Quality Metrics
Data Quality Metrics
For more detailed information on Data Quality Metrics go here.
| Title | Metric Type | Ontology Type |
|---|---|---|
| Area - Ranks images by their area (width/height). | image | |
| Aspect Ratio- Ranks images by their aspect ratio (width/height). | image | |
| Blue Value - Ranks images by how blue the average value of the image is. | image | |
| Brightness - Ranks images by their brightness. | image | |
| Contrast- Ranks images by their contrast. | image | |
| Diversity - Forms clusters based on the ontology and ranks images from easy samples to annotate to hard samples to annotate. | image | |
| Frame Number - Selects images based on a specified range. | image | |
| Green Value- Ranks images by how green the average value of the image is. | image | |
| Height - Ranks images by the height of the image. | image | |
| Object Count - Counts number of objects in the image. | image | bounding box, checklist, point, polygon, polyline, radio, rotatable bounding box, skeleton, text |
| Object Density - Computes the percentage of image area that is occupied by objects. | image | bounding box, polygon, rotatable bounding box |
| Randomize Images - Assigns a random value between 0 and 1 to images. | image | |
| Red Value - Ranks images by how red the average value of the image is. | image | |
| Sharpness - Ranks images by their sharpness. | image | |
| Uniqueness - Finds duplicate and near-duplicate images. | image | |
| Width - Ranks images by the width of the image. | image |
Label Quality Metrics
Label Quality Metrics
For more detailed information on Label Quality Metrics go here.
| Title | Metric Type | Ontology Type |
|---|---|---|
| Absolute Area - Computes object size in amount of pixels. | image | bounding box, polygon, rotatable bounding box |
| Aspect Ratio - Computes aspect ratios of objects. | image | bounding box, polygon, rotatable bounding box |
| Blue Value - Ranks annotated objects by how blue the average value of the object is. | image | bounding box, polygon, rotatable bounding box |
| Brightness - Ranks annotated objects by their brightness. | image | bounding box, polygon, rotatable bounding box |
| Border Proximity - Ranks annotations by how close they are to image borders. | image | bounding box, point, polygon, polyline, rotatable bounding box, skeleton |
| Broken Object Tracks - Identifies broken object tracks based on object overlaps. | sequence, video | bounding box, polygon, rotatable bounding box |
| Confidence - The confidence that an object was annotated correctly. | image | bounding box, polygon, rotatable bounding box |
| Contrast - Ranks annotated objects by their contrast. | image | bounding box, polygon, rotatable bounding box |
| Classification Quality - Compares image classifications against similar images. | image | radio |
| Green Value - Ranks annotated objects by how green the average value of the object is. | image | bounding box, polygon, rotatable bounding box |
| Height - Ranks annotated objects by the height of the object. | image | bounding box, polygon, rotatable bounding box |
| Inconsistent Object Class - Looks for overlapping objects with different classes (across frames). | sequence, video | bounding box, polygon, rotatable bounding box |
| Inconsistent Track ID - Looks for overlapping objects with different track-ids (across frames). | sequence, video | bounding box, polygon, rotatable bounding box |
| Label Duplicates - Ranks labels by how likely they are to represent the same object. | image | bounding box, polygon, rotatable bounding box |
| Missing Objects - Identifies missing objects based on object overlaps. | sequence, video | bounding box, polygon, rotatable bounding box |
| Object Classification Quality - Compares object annotations against similar image crops. | image | bounding box, polygon, rotatable bounding box |
| Occlusion Risk - Tracks objects and detect outliers in videos. | sequence, video | bounding box, rotatable bounding box |
| Polygon Shape Anomaly - Calculates potential outliers by polygon shape. | image | polygon |
| Randomize Objects - Assigns a random value between 0 and 1 to objects. | image | bounding box, polygon, rotatable bounding box |
| Red Value - Ranks annotated objects by how red the average value of the object is. | image | bounding box, polygon, rotatable bounding box |
| Relative Area - Computes object size as a percentage of total image size. | image | bounding box, polygon, rotatable bounding box |
| Sharpness - Ranks annotated objects by their sharpness. | image | bounding box, polygon, rotatable bounding box |
| Width - Ranks annotated objects by the width of the object. | image | bounding box, polygon, rotatable bounding box |
- Log in to the Encord platform. The landing page for the Encord platform appears.
- Click Active in the main menu. The landing page for Active appears.
-
Click the Project.
The landing page for the Project appears with the Explorer tab selected.

- Select Data, Labels, or Predictions.
- Click Filters. A menu appears.
- Add and configure the filters you need. Images/video/audio files filter in the Explorer workspace.
Filter Nested Attributes
Active supports filtering on the top level Classes and nested attributes on both Objects and Classifications. Supports up to seven levels of depth.Images/frames in the Project MUST have labels applied for this filter to return results.
- Log in to the Encord platform.
- Click Active in the main menu.
- Click the Project.
-
Select Data, Labels, or Predictions.

- Click Filters. A menu appears.
- Select the class and the nested attribute under Class.
Preset Filters
Preset filters provide a way to save your filtering criteria for use and reuse on other Projects. Preset filters are made up of global and local filter criteria. Global filter criteria are filters, and their settings, that can apply to any Project. For example, Data Quality Metrics like Area, Blue Value, and Sharpness or Label Quality Metrics like Annotation Quality, Confidence, or Label Duplicates. Local filter criteria are filters that can only be applied to a specific Project. For example, the following filters and their settings are likely only applicable to a specific Project: Class, Dataset, or Collection.To create a Preset filter:
To create a Preset filter:
- Log in to the Encord platform.
- Click Active in the main menu.
- Click the Project.
-
Select Data, Labels, or Predictions.

- Click Filters. A menu appears.
- Add and configure the filters you need.
- Click Create preset once you have added all the filters you need and specified each filter’s settings. After creating the Preset you can use the Preset in this or any other Project.
To use an existing Preset:
To use an existing Preset:
- Log in to the Encord platform.
- Click Active in the main menu.
- Click the Project.
-
Select Data, Labels, or Predictions.
- Click Filters. A menu appears.
- Select the Preset you want to use from the dropdown. Images/video/audio files filter in the Explorer workspace based on the Preset Filters and their settings.
Global filters apply to any Project, but Local filters only apply on the Project where the Preset was created.
Sorting
Sort your data, labels, or predictions in ascending or descending order using data or label quality metrics. To sort data, labels, or predictions in Active:- Log in to the Encord platform.
- Click Active in the main menu.
- Click the Project.
-
Select Data, Labels, or Predictions.

- Select the metric to sort the data.
- Specify ascending or descending order.
Annotate
Filters
In the Project Explore tab you can refine searches by data quality metrics, label quality metrics, Collections, data types, annotation types, annotation classes, and by annotator. The filter options available in Annotate’s Explore tab are the same as in Active. Refer to the Active filter criteria above for the full list of Data Quality Metrics, Label Quality Metrics, and other filter options.
To filter data, labels, or predictions in Annotate:
- Log in to the Encord platform.
- Click Annotate > Projects in the main menu. The Project list page appears.
- Click a Project.
- Click Explore.
- Select Video, Frames, or Labels.
- Click Filters. A menu appears.
- Add and configure the filters you need. Images/video/audio files filter in the Explore workspace.
Filter Nested Attributes
Annotate supports filtering on the top level Classes and nested attributes on both Objects and Classifications. Supports up to seven levels of depth.Images/frames in the Project MUST have labels applied for this filter to return results.
- Log in to the Encord platform.
- Click Annotate > Projects in the main menu.
- Click a Project.
- Click Explore.
- Select Video, Frames, or Labels.
- Click Filters. A menu appears.
- Select the class and the nested attribute under Class.
Preset Filters
Preset filters in Annotate work the same way as in Active — global filters apply to any Project while local filters only apply to the Project where the Preset was created.To create a Preset filter:
To create a Preset filter:
- Log in to the Encord platform.
- Click Annotate > Projects in the main menu.
- Click a Project.
- Click Explore.
- Select Video, Frames, or Labels.
- Click Filters. A menu appears.
- Add and configure the filters you need.
- Click Create preset once you have added all the filters you need and specified each filter’s settings. After creating the Preset you can use the Preset in this or any other Project.
To use an existing Preset:
To use an existing Preset:
- Log in to the Encord platform.
- Click Annotate > Projects in the main menu.
- Click a Project.
- Click Explore.
- Select Video, Frames, or Labels.
- Click Filters. A menu appears.
- Select the Preset you want to use from the dropdown. Images/video/audio files filter in the Explorer workspace based on the Preset Filters and their settings.
Global filters apply to any Project, but Local filters only apply on the Project where the Preset was created.
Sorting
Sort your data, labels, or predictions in ascending or descending order using data or label quality metrics. To sort videos, frames, or labels in Annotate:- Log in to the Encord platform.
- Click Annotate > Projects in the main menu.
- Click a Project.
- Click Explore.
- Select Video, Frames, or Labels.
- Select the metric to sort the data.
- Specify ascending or descending order.