Your data is registered in the Files section of Index where it is organized into folders and sub-folders. Importing your data into Encord is a multi-step process:Documentation Index
Fetch the complete documentation index at: https://docs.encord.com/llms.txt
Use this file to discover all available pages before exploring further.
- Create a folder to store your data in Encord.
- Upload your data to the folder.
Step 1: Create a folder
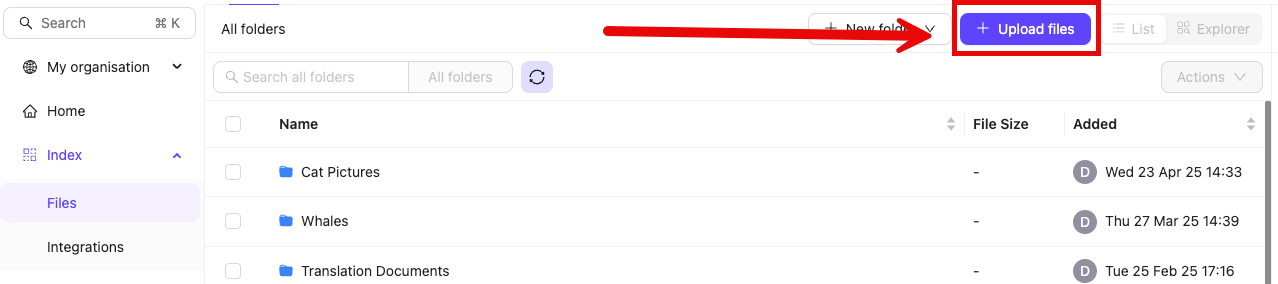
- Navigate to Files section of Index in the Encord platform.
- Click + New folder. Select the type of folder you want to create.

- Give the folder a meaningful name and description.
- Click Create to create the folder. The folder is listed in Files.
Step 2: Upload your data to the folder
- Navigate to Files section of Index in the Encord platform.
- Click into a Folder.
- Click + Upload files. A dialog appears.
-
Click one of the following:
- Upload: Upload images, videos, and audio files.

- Batch images as: Upload image batches as image groups or image sequences.

- DICOM/NifTi: Upload DICOM or NifTi series.
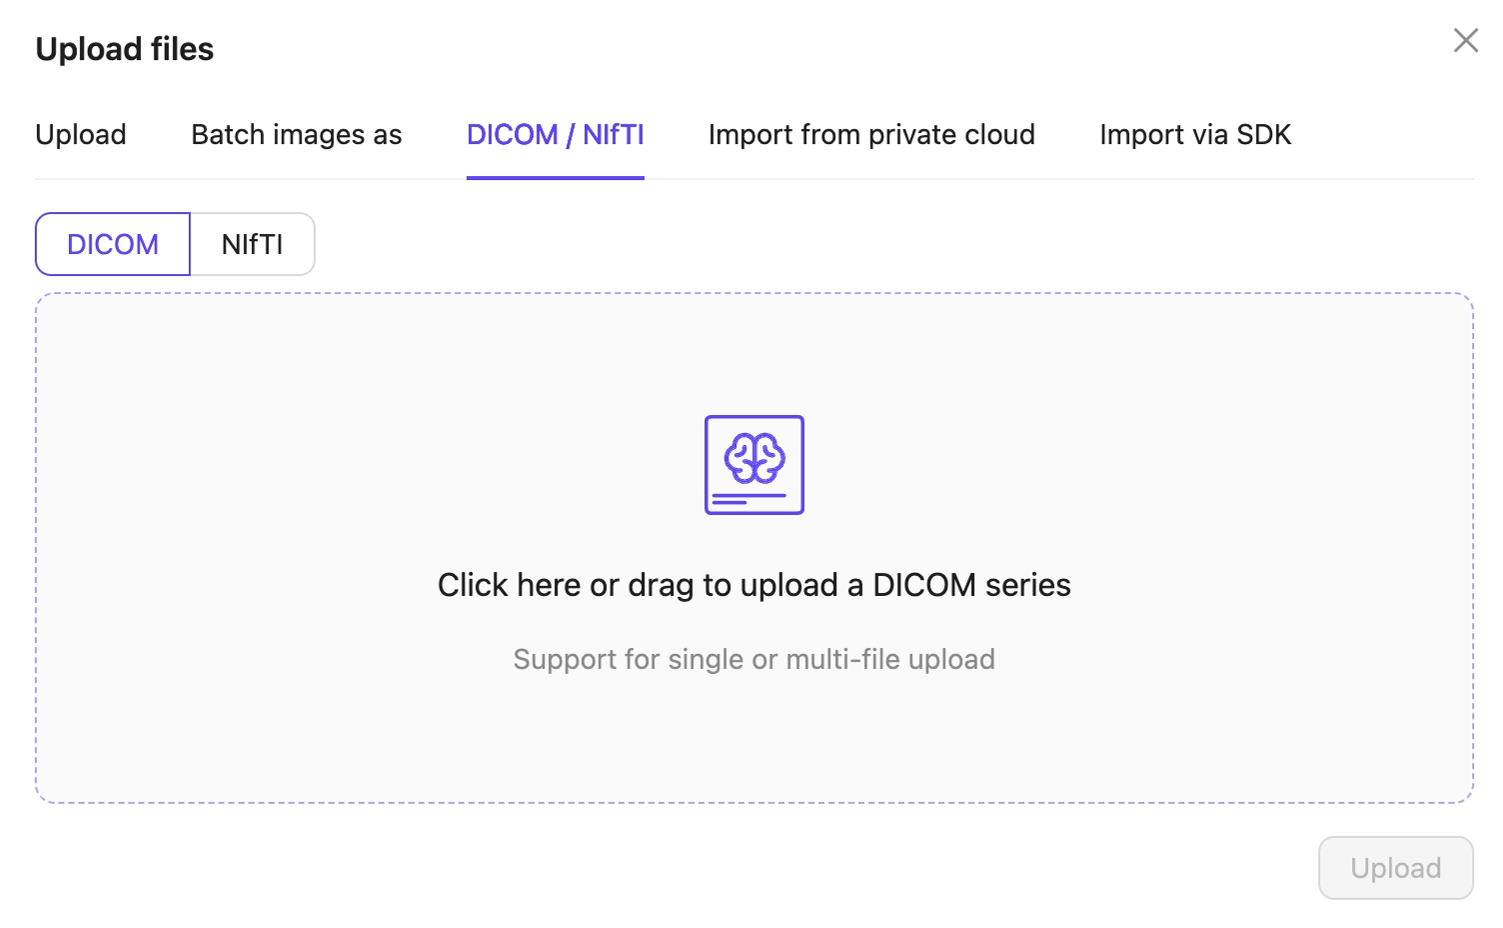
- Upload: Upload images, videos, and audio files.
- Click Upload after selecting your images or series. Your files upload into the Folder in Encord.