Create Ontologies
We recommend learning about Ontology structure in Encord before creating Ontologies.
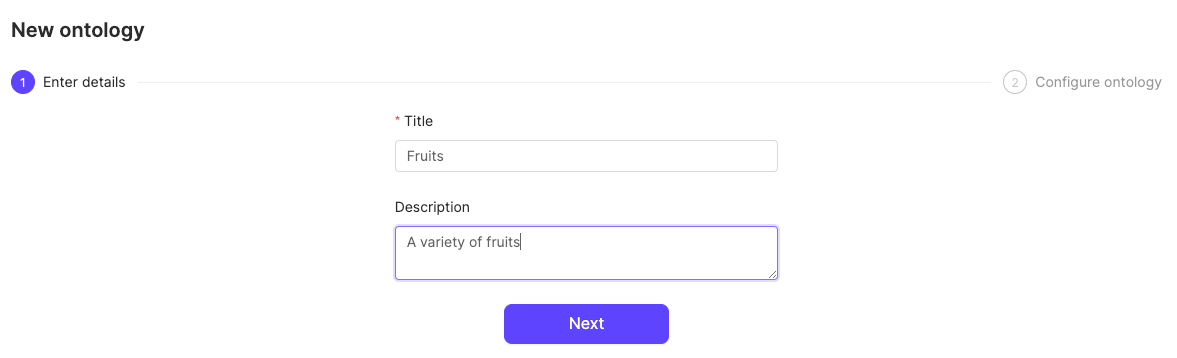
- Click the New ontology button in the Ontologies section to create a new Ontology.

- Give your Ontology a meaningful title and description. A clear title and description keeps your Ontologies organized.
- Click Next to continue.
- Define your Ontology structure. See our documentation on Ontology structure for more information on the various types of objects, classifications, and attributes.
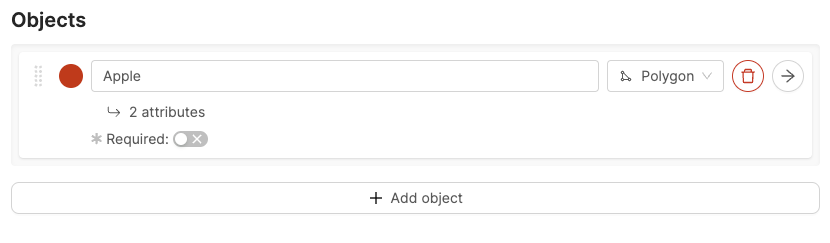
- Click Add object to create a new object.
- Give the object a name. For example “Apple”.
- Select a shape for the object. For example polygon.
- Optionally, enable the Required toggle to mark the object as Required.
- Optionally, add attributes to the object.
- Repeat these steps for as many objects as necessary.

- Click the arrow icon next to an object to add attributes to the object.
- Give the attribute a name. For example “Color”.
- Click the attribute type to change the attribute type. The default attribute type is a text field.
- Click Add option to add an option, if you have chosen a radio button or checklist attribute.
- Enter a name for the attribute option. For example, the attribute “Color” can have the options “Red”, “Green”, and “Yellow”.
- Click the Back to parent button to return the Ontology creation view.
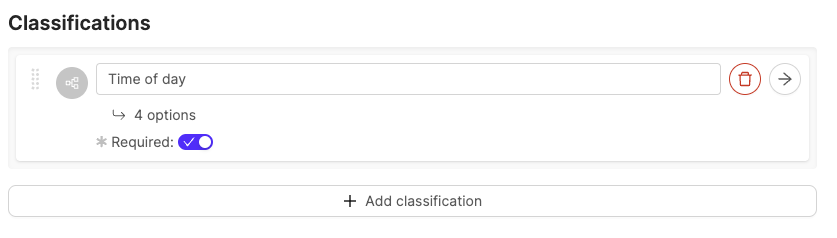
- Click Add classification to create a new classification.
- Give the classification a name. For example, “Time of day”.
- Optionally, configure the classification. The default classification type is a text field.
- Optionally, enable the Required toggle to mark the object as Required.
- Repeat these steps for as many classifications as necessary.
- Click the arrow icon next to an object to configure the classification.

- Click the classification type to change the classification type. The default classification type is a text field.
- Click Add option to add an option if you have selected a radio button or check list classification.
- Enter a name for the classification option. For example, the classification “Time of day” can have the options “Night” and “Day”.
- Click the Back to parent button to return the Ontology creation view.