

Basic Geometric Example
A simple example showing how to use objectHashes.agent.py
objectHashes to your agent. Your agent can then use the dep_objects method to gain immediate access to these specific object instances, which greatly simplifies integrating your OCR model for targeted processing.
Test the Agent
- Save the above code as
agent.py. - Run the following command to run the agent in debug mode in your terminal.
- Open your Project in the Encord platform and navigate to a frame with an object that you want to act on. Choose an object from the bottom left sider and click
Copy URLas shown:

- In another shell operating from the same working directory, source your virtual environment and test the agent.
- To see if the test is successful, refresh your browser to see the action taken by the Agent. If the test has run successfully, the agent can be deployed. Visit the deployment documentation to learn more.
Nested Classification using Claude 3.5 Sonnet
The goals of this example are:- Create a Custom Agent that automatically adds frame-level classifications.
- Demonstrate how to use the
OntologyDataModelfor classifications.
- Created a virtual Python environment.
- Installed all necessary dependencies.
- Have an Anthropic API key.
- Are able to authenticate with Encord.
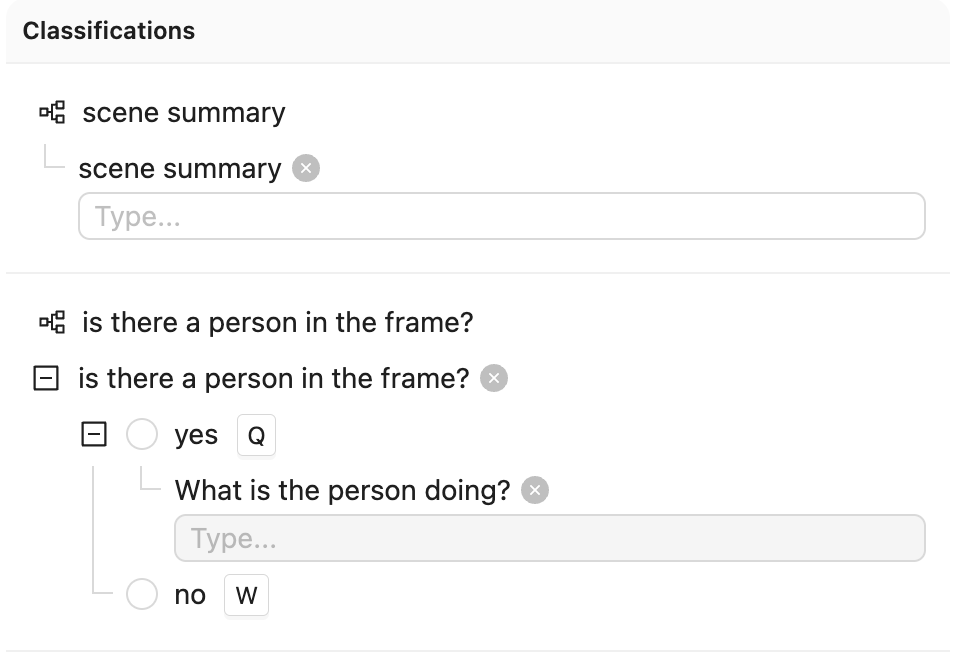
Ontology JSON and Script
Ontology JSON and Script
Ontology JSON
Create Ontology
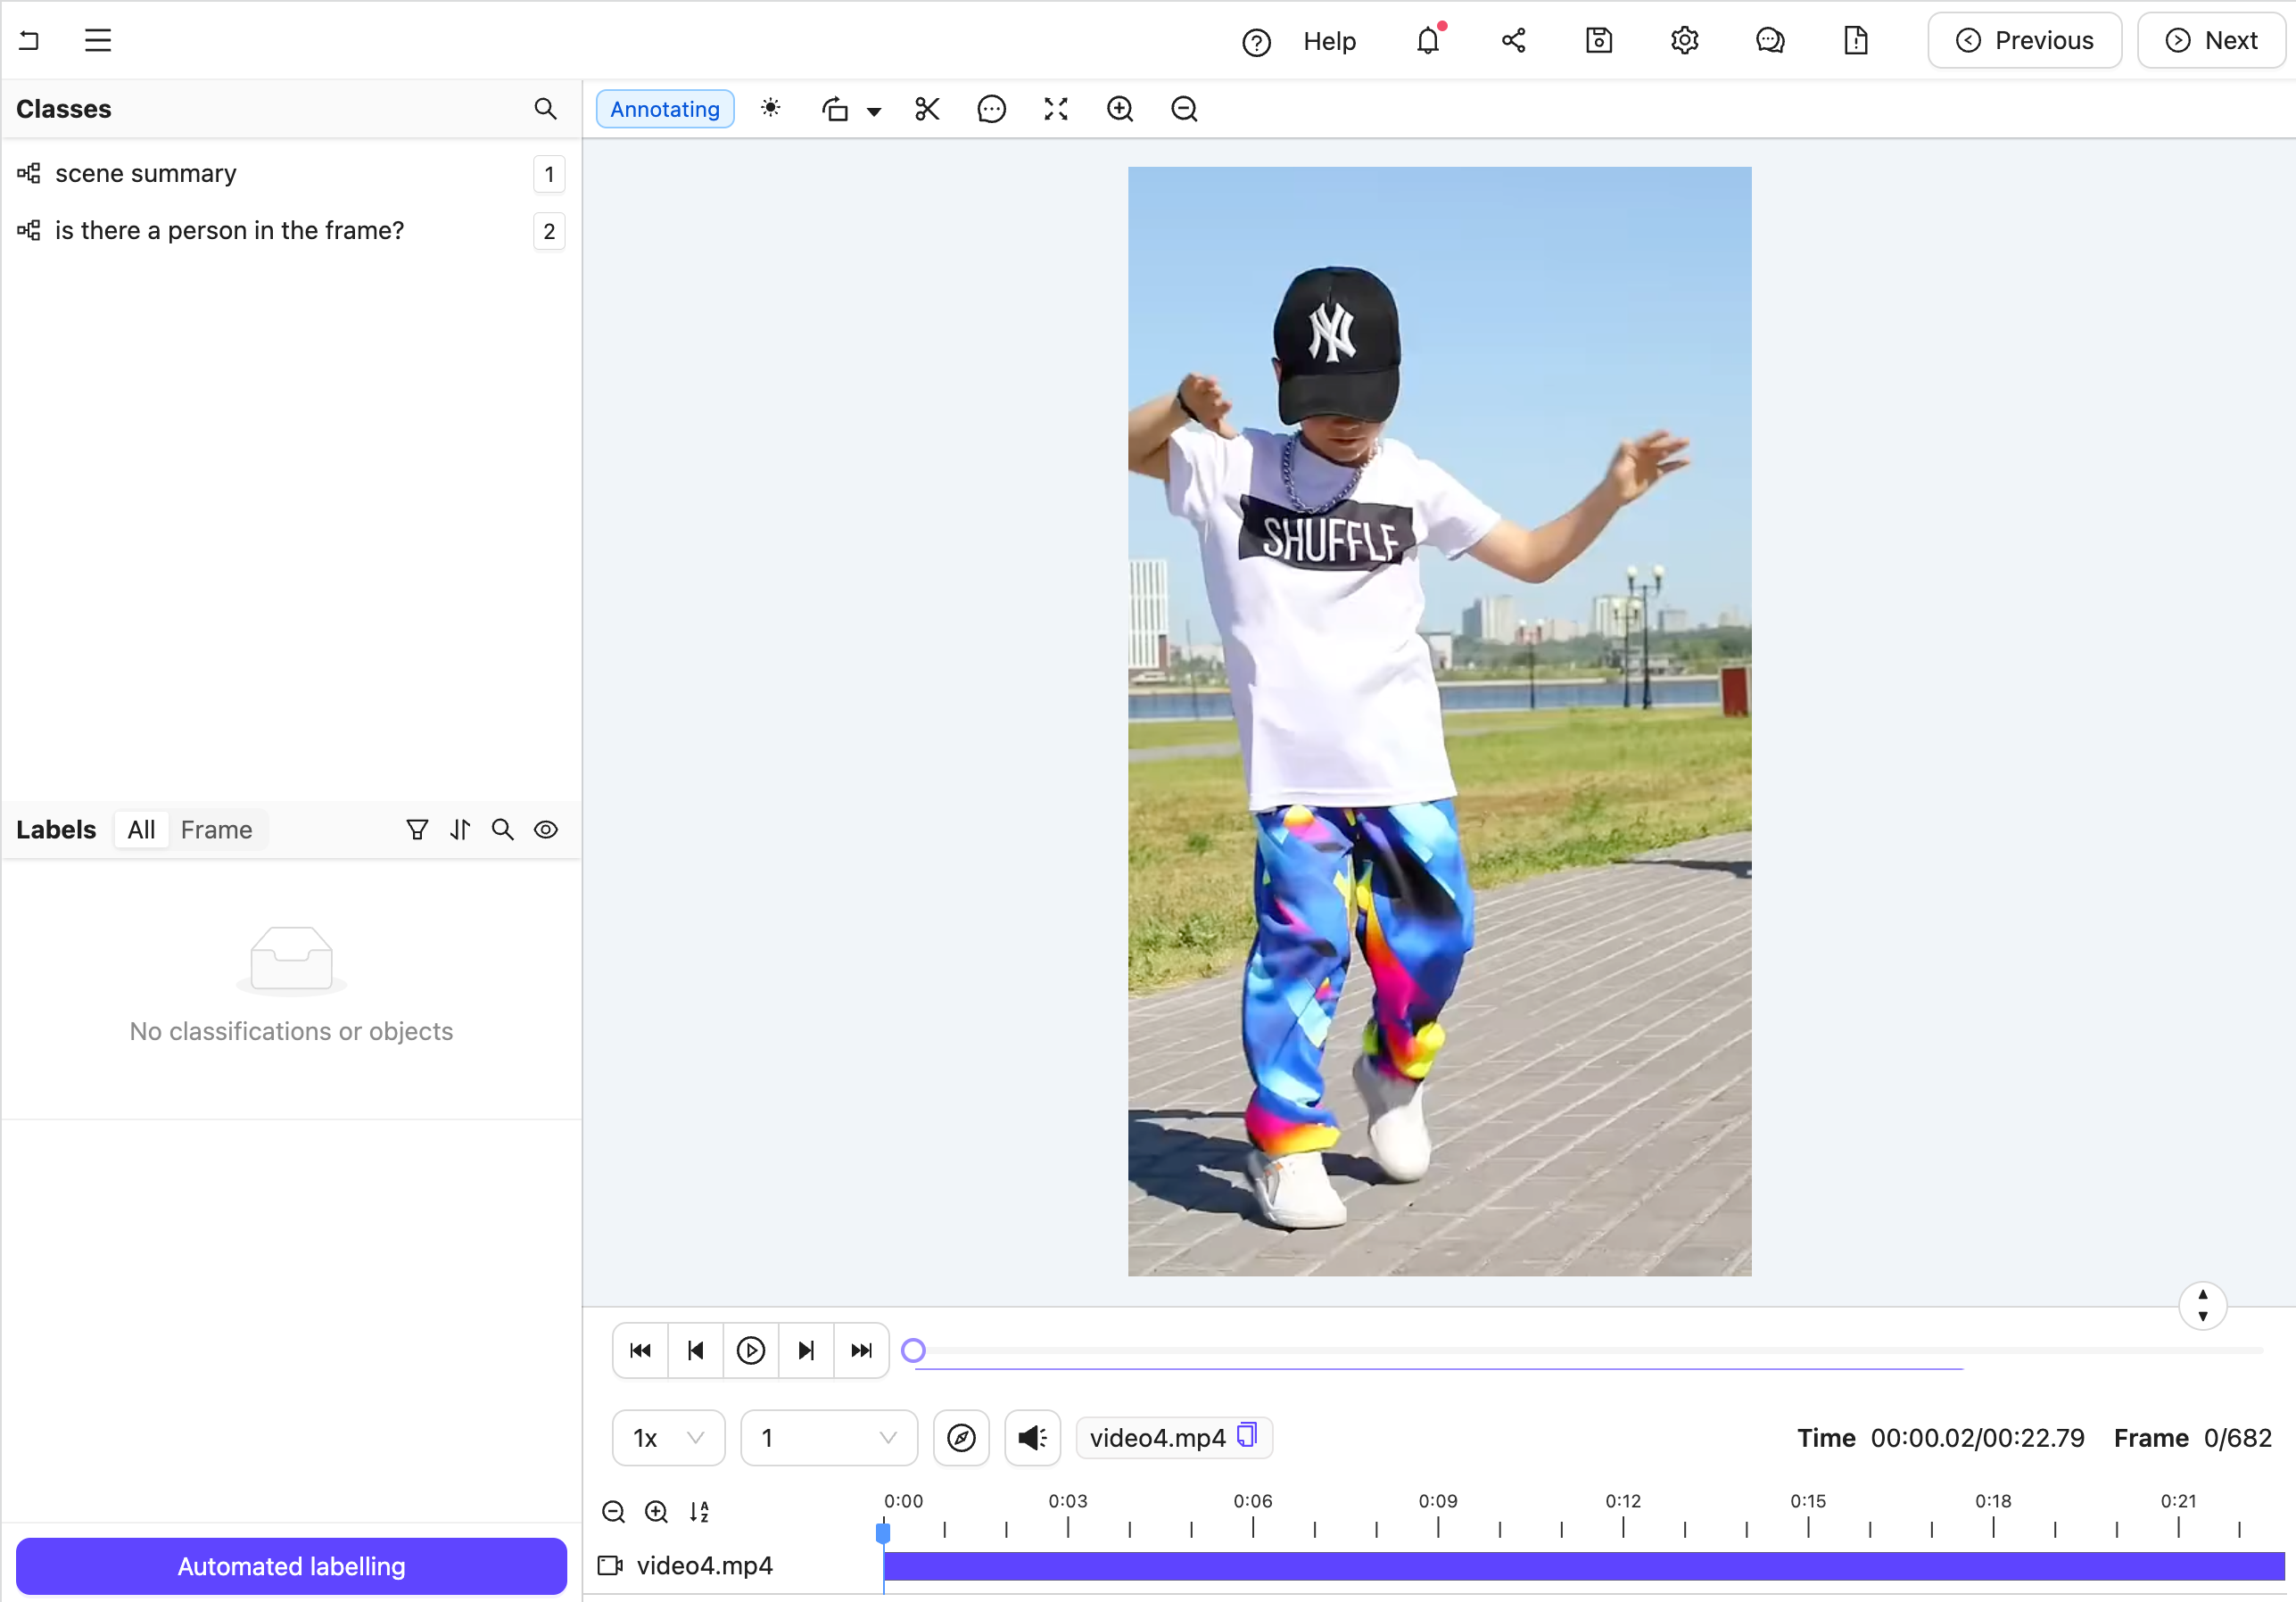 Figure A: No classification labels.
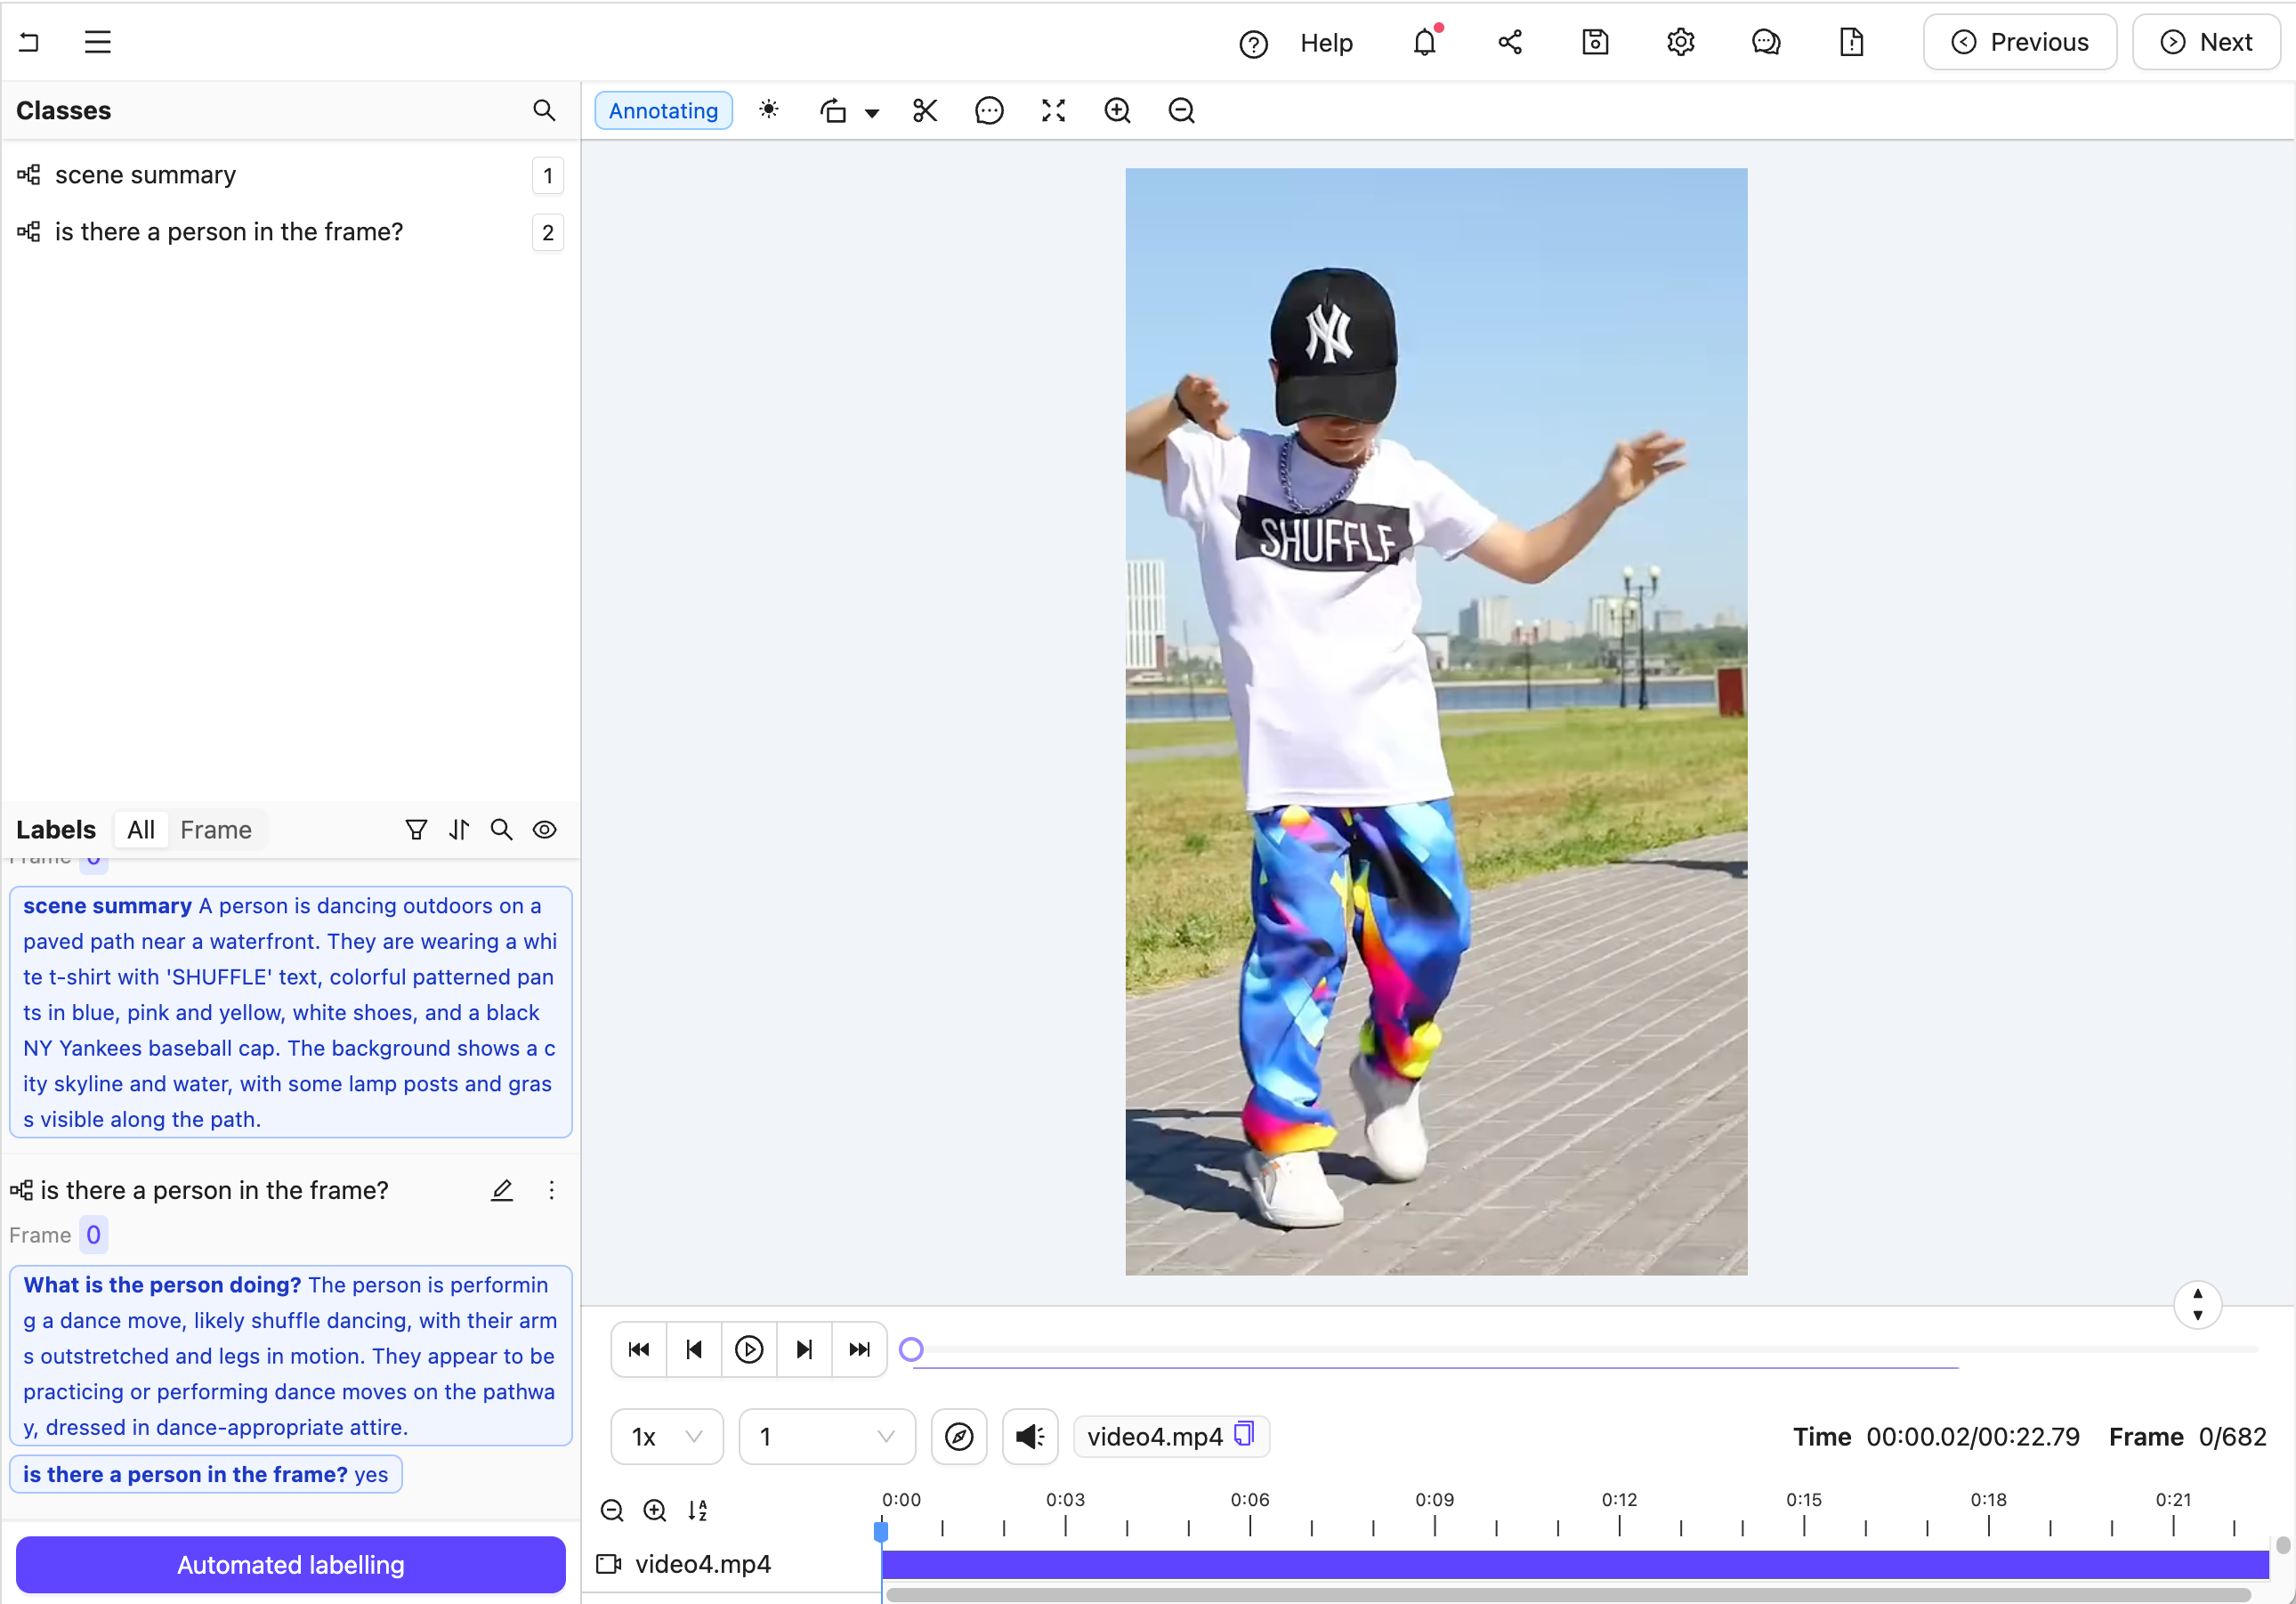 Figure B: Multiple nested classification labels generated by an LLM.
Create the Agent
This section provides the complete code for creating your Custom Agent, along with an explanation of its internal workings.
Agent Setup Steps
Figure B: Multiple nested classification labels generated by an LLM.
Create the Agent
This section provides the complete code for creating your Custom Agent, along with an explanation of its internal workings.
Agent Setup Steps
- Import dependencies, authenticate with Encord, and set up the Project. Ensure you insert your Project’s unique identifier.
- Create a data model and a system prompt based on the Project Ontology to tell Claude how to structure its response.
- Set up an Anthropic API client to establish communication with the Claude model.
- Define the Custom Agent. This includes
- Retrieving Frame Content: It automatically fetches the current frame’s image data using the
dep_single_framedependency. - Analyzing with Claude: The frame image is then sent to the Claude AI model for analysis.
- Parsing Classifications: Claude’s response is parsed and transformed into structured classification instances using the predefined data model.
- Saving Results: The new classifications are added to the active label row, and the updated results are saved within the Project.
See the contents of data_model.model_json_schema_str here
See the contents of data_model.model_json_schema_str here
- In your current terminal, run the following command to run the agent in debug mode.
- Open your Project in the Encord platform and navigate to a frame you want to add a classification to. Copy the URL from your browser.
- In another shell operating from the same working directory, source your virtual environment and test the agent.
- To see if the test is successful, refresh your browser to view the classifications generated by Claude. Once the test runs successfully, you are ready to deploy your agent. Visit the deployment documentation to learn more.
Nested Attributes using Claude 3.5 Sonnet
The goals of this example are:- Create a Custom Agent that can convert generic object annotations (class-less coordinates) into class specific annotations with nested attributes like descriptions, radio buttons, and checklists.
-
Demonstrate how to use both the
OntologyDataModeland thedep_object_cropsdependency.
- Created a virtual Python environment.
- Installed all necessary dependencies.
- Have an Anthropic API key.
- Are able to authenticate with Encord.
"generic".
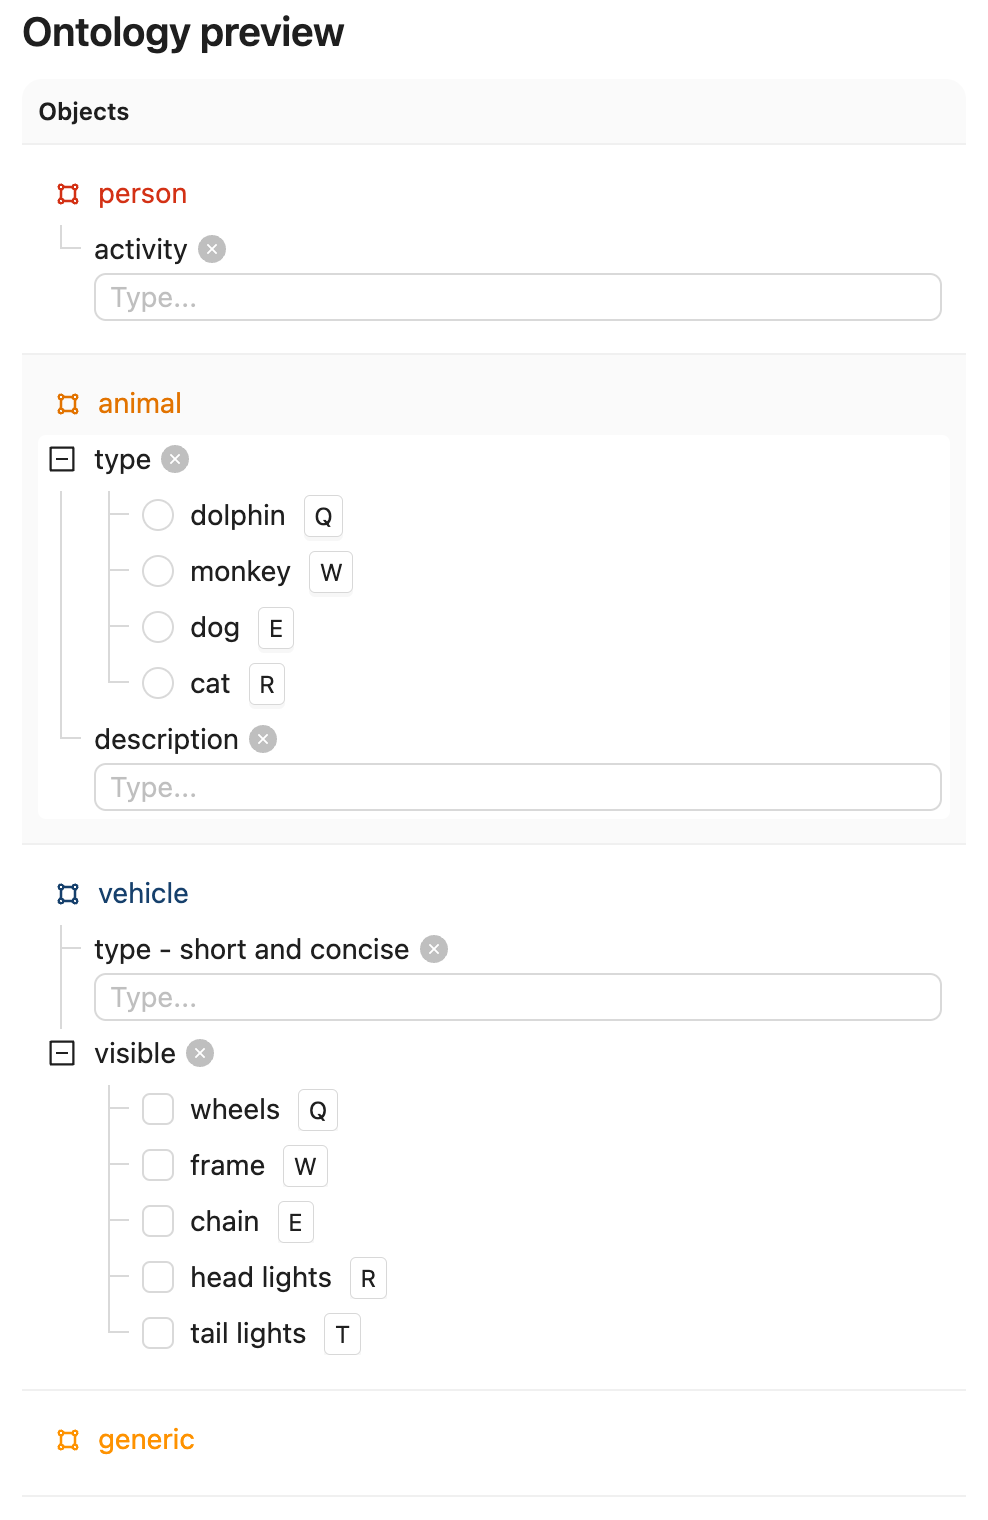
Ontology JSON and Script
Ontology JSON and Script
ontology.json
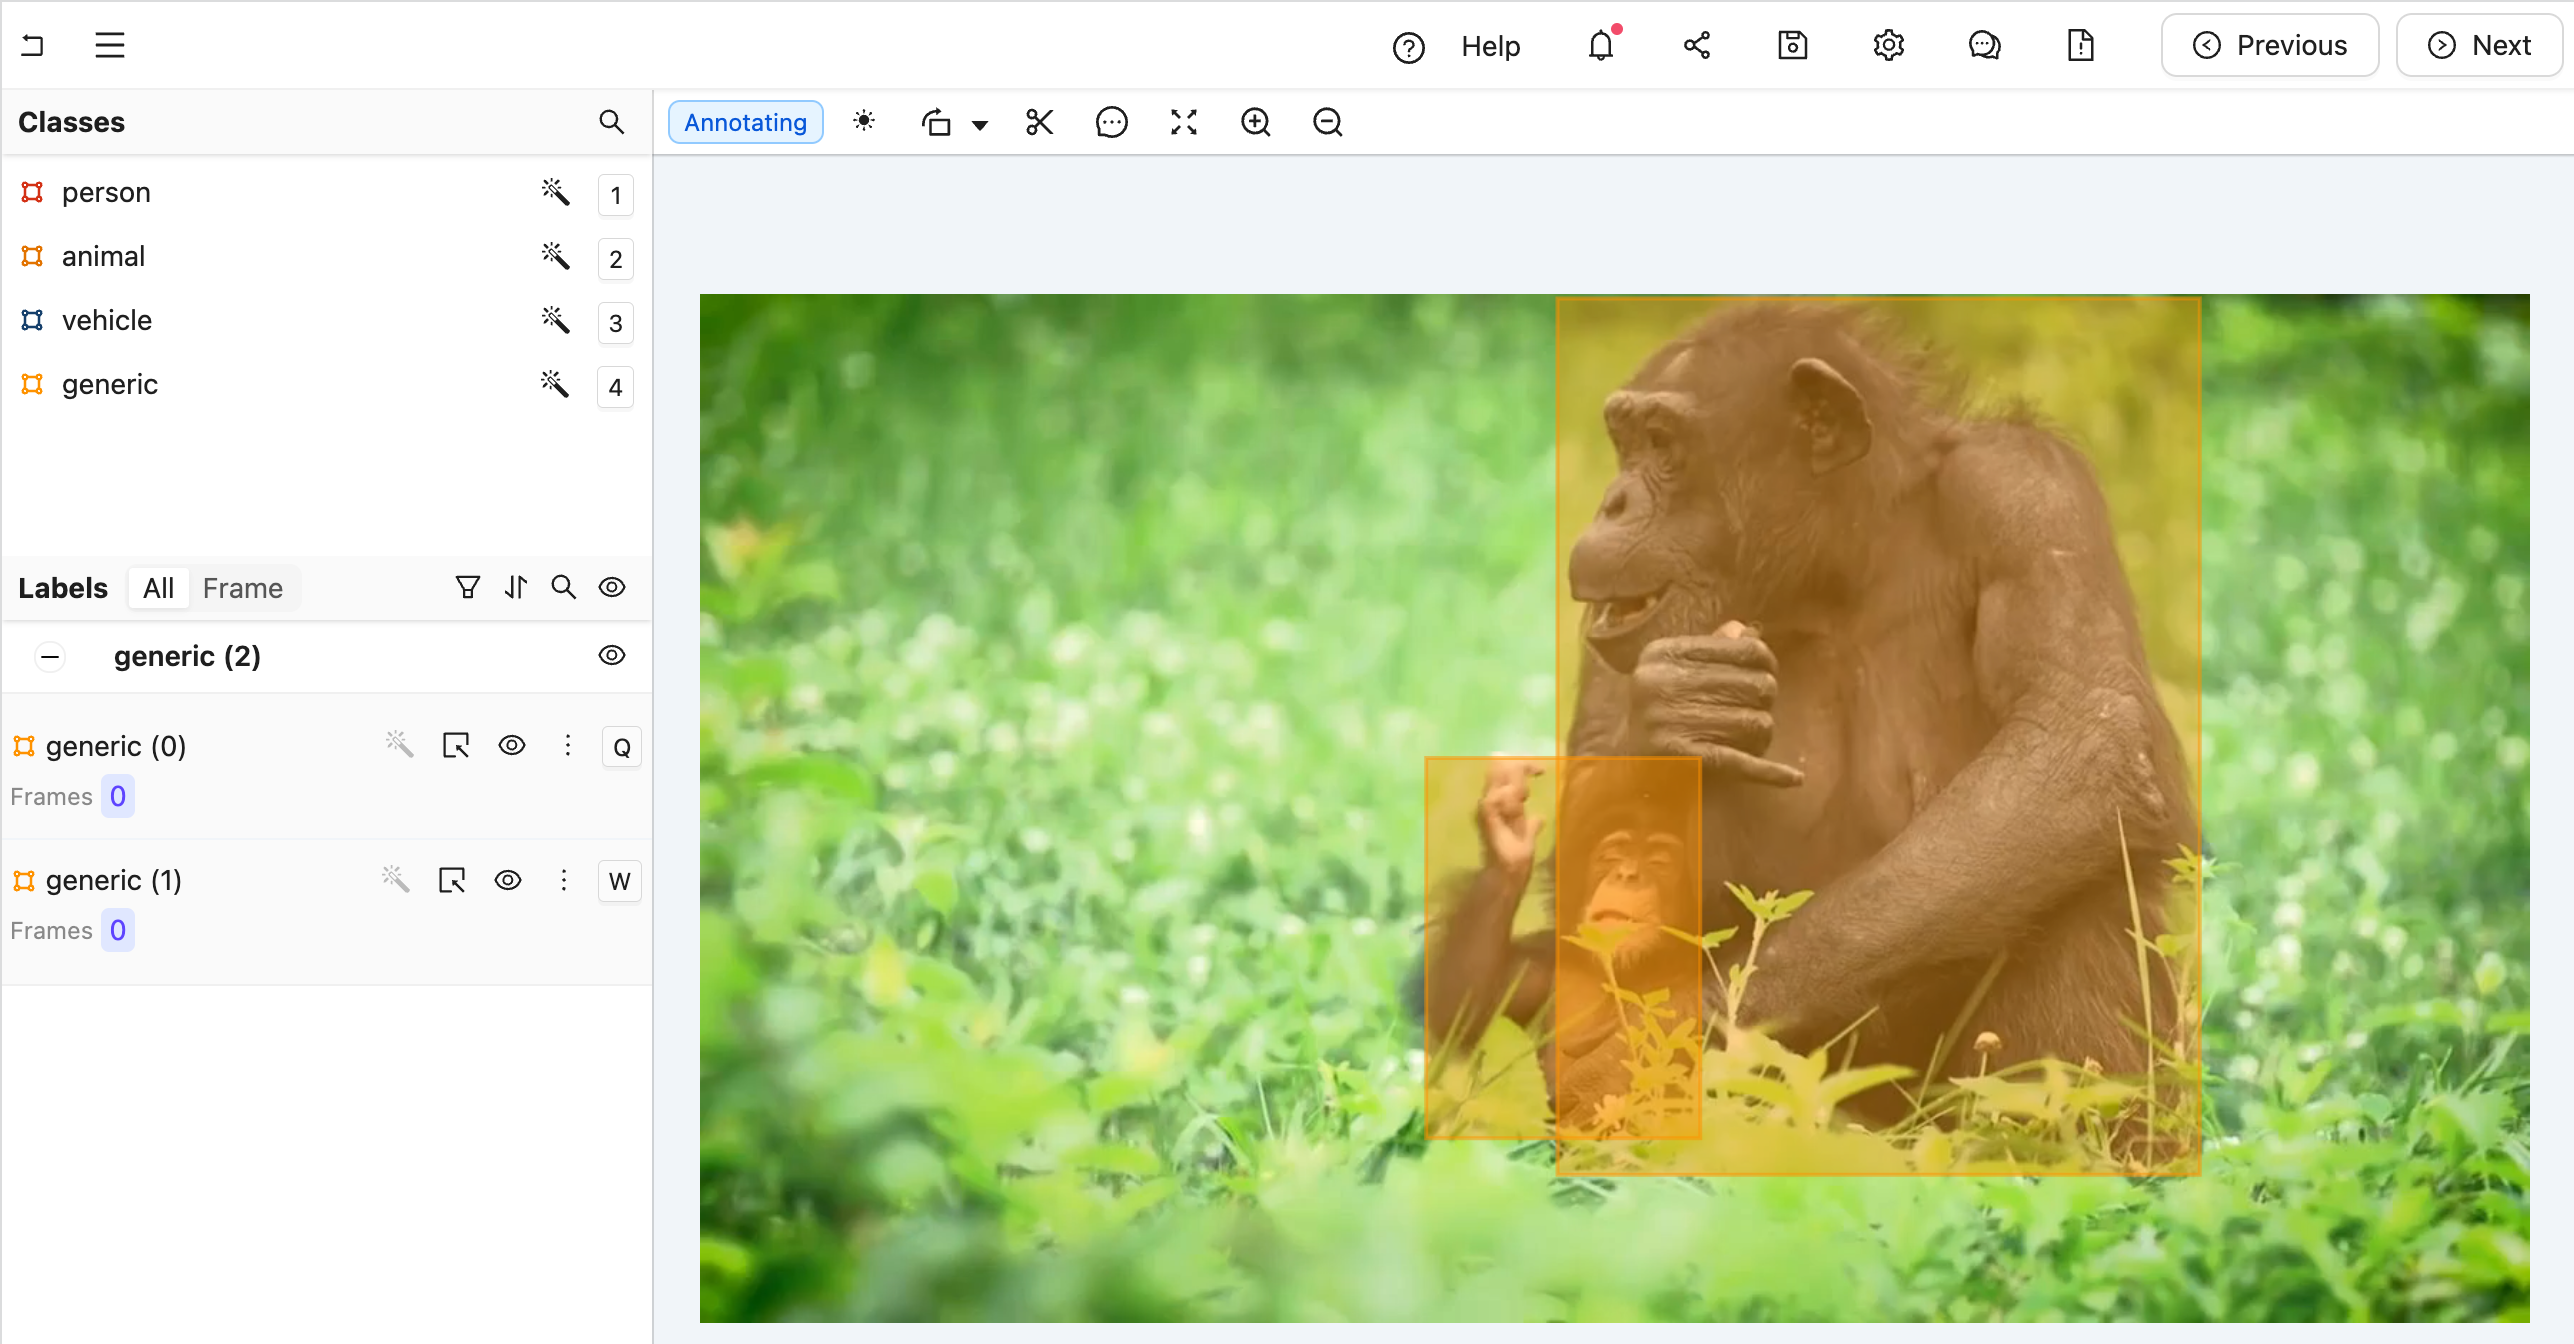 Figure A: No classification labels.
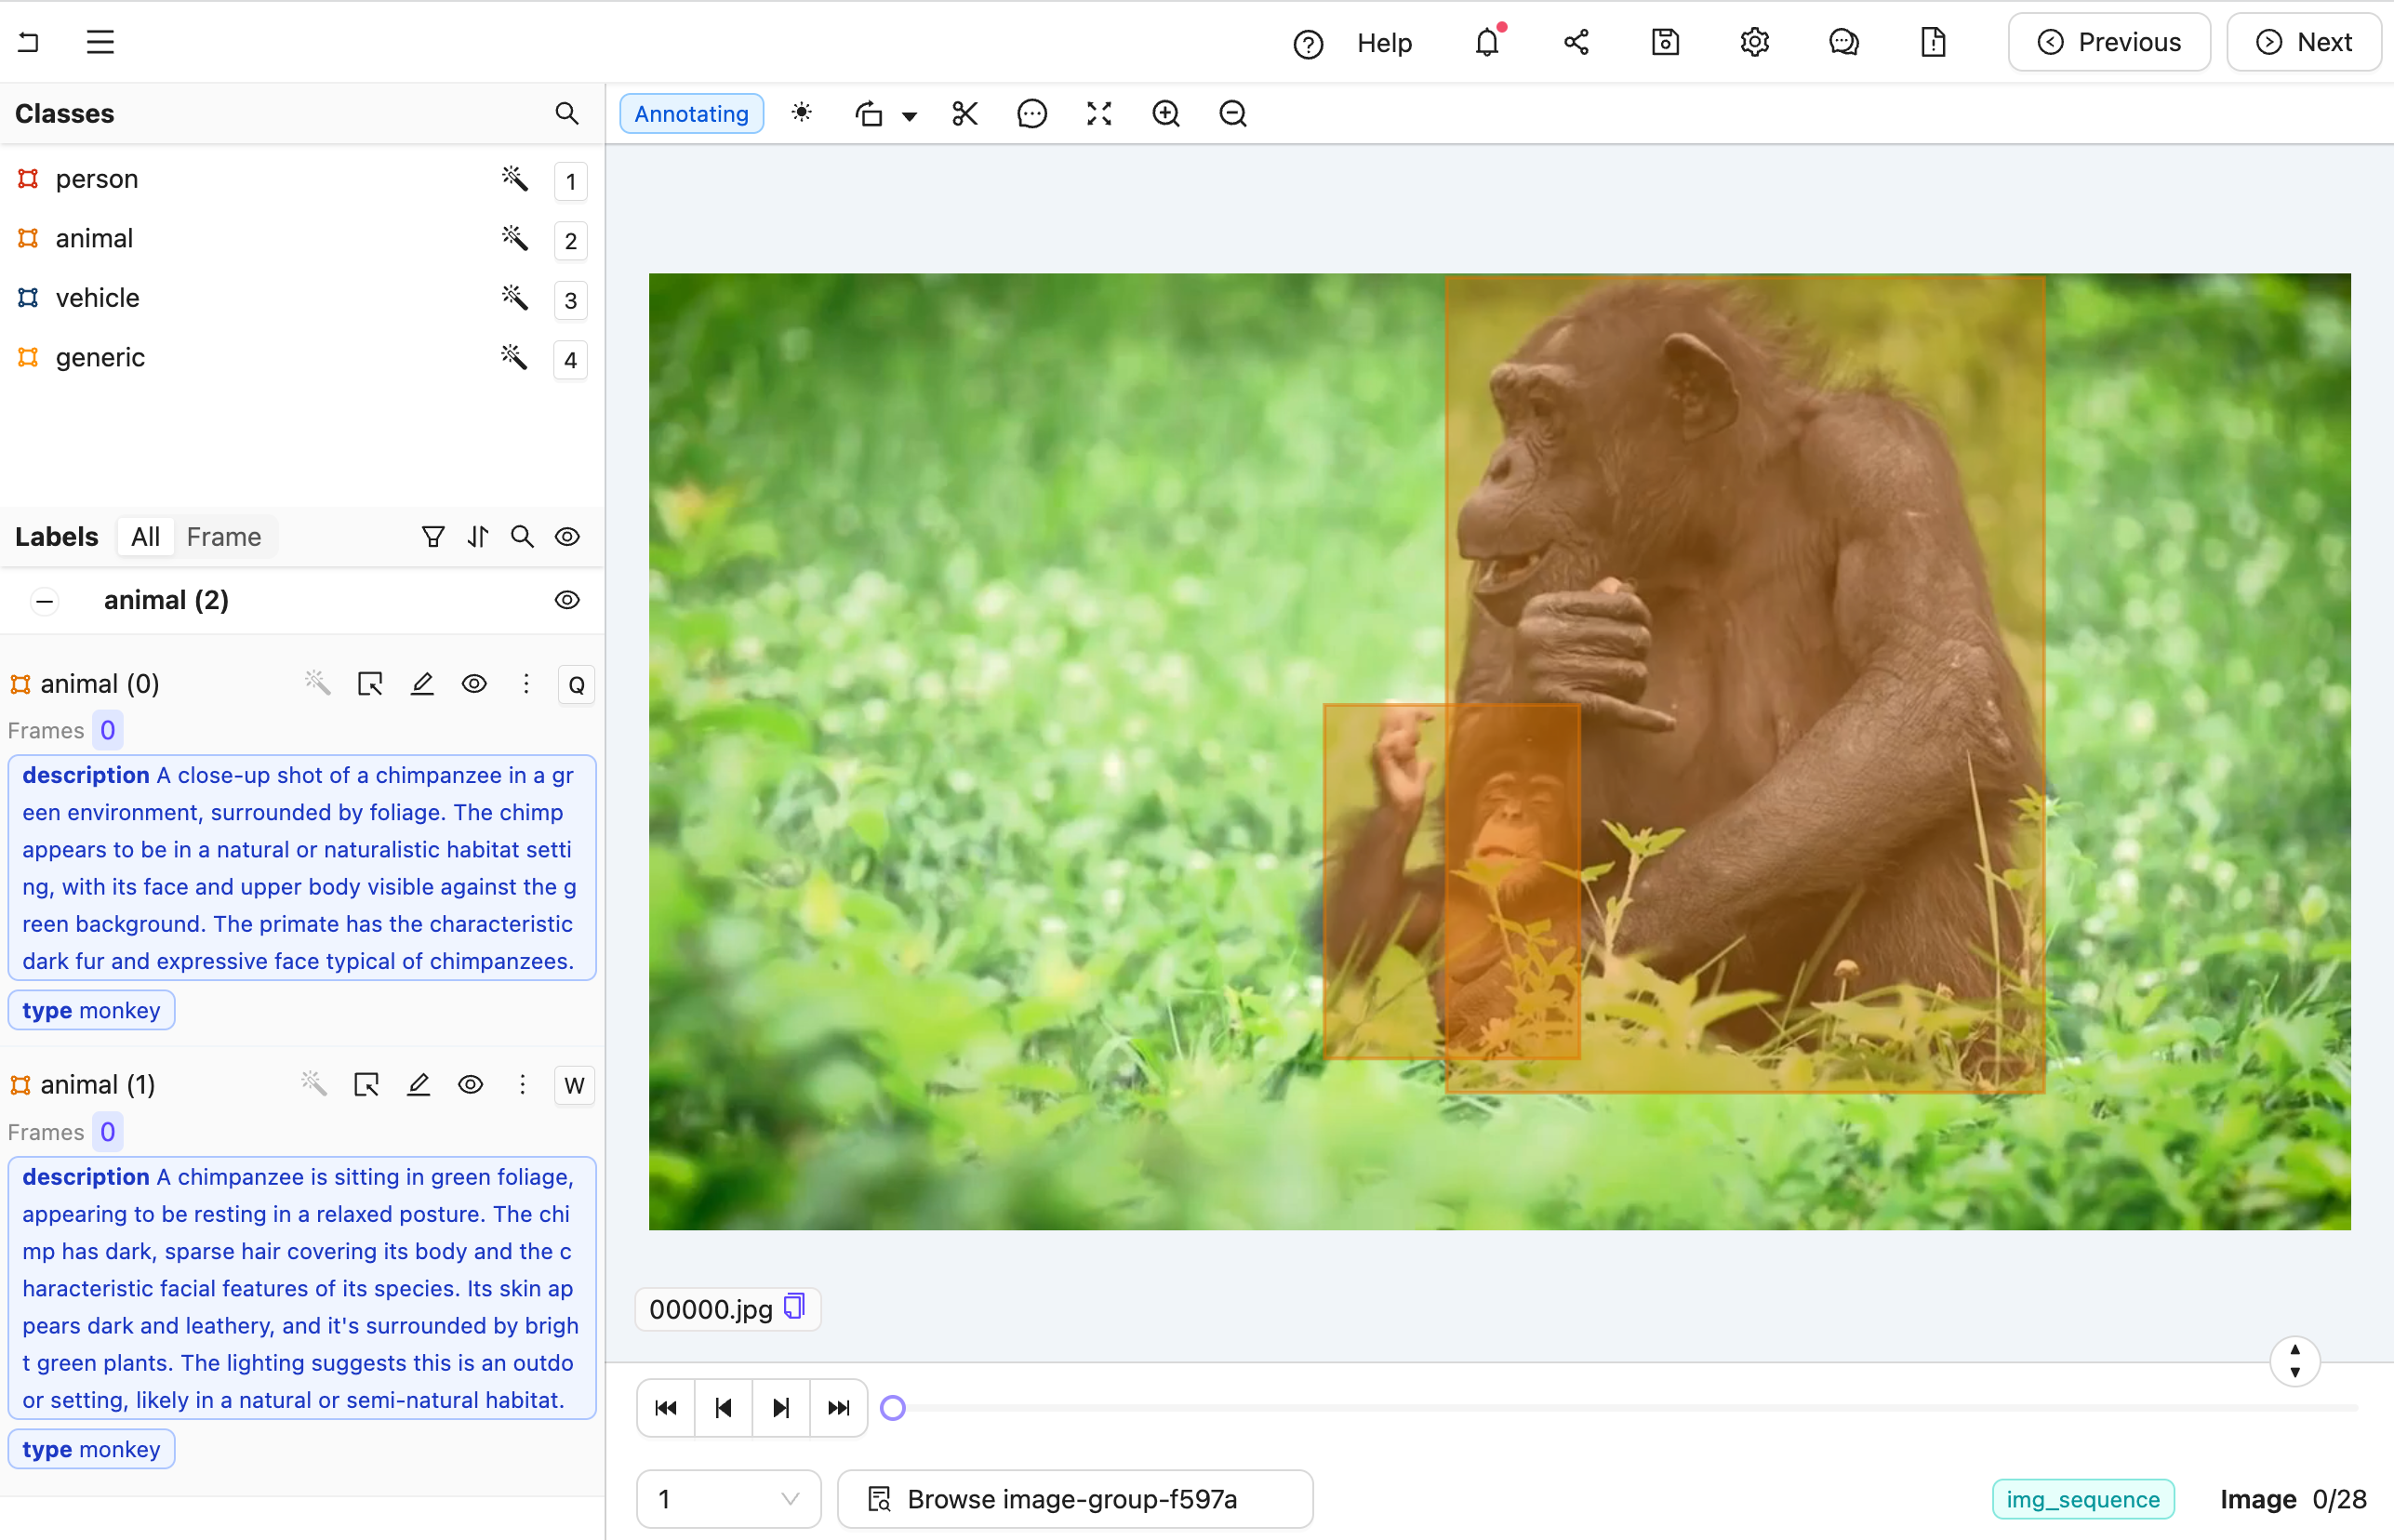 Figure B: Multiple nested classification labels generated by an LLM.
Create the Agent
This section provides the complete code for creating your Custom Agent, along with an explanation of its internal workings.
Agent Setup Steps
Figure B: Multiple nested classification labels generated by an LLM.
Create the Agent
This section provides the complete code for creating your Custom Agent, along with an explanation of its internal workings.
Agent Setup Steps
- Import dependencies, authenticate with Encord, and set up the Project. Ensure you insert your Project’s unique identifier.
-
Extract the generic Ontology object and the specific objects of interest. This example sorts Ontology objects based on whether their title is
"generic". The generic object is used to query image crops within the agent. Before that,other_objectsis used to pass in the specific context we want Claude to focus on. TheOntologyDataModelclass helps convert Encord Ontology Objects into a Pydantic model and parse JSON into Encord ObjectInstances. -
Prepare the system prompt for each object crop using the
data_modelto generate the JSON schema. Onlyother_objectsis passed to ensure the model can choose only from non-generic object types. - Set up an Anthropic API client to establish communication with the Claude model. You must include your Anthropic API key.
- Define the Custom Agent.
- All arguments are automatically injected when the agent is called. For details on dependency injection, see here.
- The
dep_object_cropsdependency allows filtering. In this case, it includes only “generic” object crops, excluding those already converted to actual labels.
-
Query Claude using the image crops. The
cropvariable has a convenientb64_encodingmethod to produce an input that Claude understands. -
Parse Claude’s message using the
data_model. When called with a JSON string, it attempts to parse it with respect to the JSON schema we saw above to create an Encord object instance. If successful, the old generic object can be removed and the newly classified object added. - Save the labels with Encord.
See the result of data_model.model_json_schema_str for the given example
See the result of data_model.model_json_schema_str for the given example
- In your current terminal, run the following command to run the agent in debug mode.
- Open your Project in the Encord platform and navigate to a frame you want to add a generic object to. Copy the URL from your browser.
- In another shell operating from the same working directory, source your virtual environment and test the agent.
- To see if the test is successful, refresh your browser to view the classifications generated by Claude. Once the test runs successfully, you are ready to deploy your agent. Visit the deployment documentation to learn more.
Video Recaptioning using GPT-4o-mini
The goals of this example are:- Create a Custom Agent that automatically generates multiple variations of video captions.
- Demonstrate how to use OpenAI’s GPT-4o-mini model to enhance human-created video captions with a FastAPI-based agent.
- Created a virtual Python environment.
- Installed all necessary dependencies.
- Have an OpenAI API key.
- Are able to authenticate with Encord.
- One text classification for human-created summaries of what is happening in the video.
- Three text classifications to be automatically filled by the LLM.

Ontology JSON and Script
Ontology JSON and Script
- A human watches the video and enters a caption in the first text field.
- The agent is then triggered and generates three additional caption variations for review.
- Each video is first annotated by a human (ANNOTATE stage).
- Next, a data agent automatically generates alternative captions (AGENT stage).
- Finally, a human reviews all four captions (REVIEW stage) before the task is marked complete.
If no human caption is present when the agent is triggered, the task is sent back for annotation.
If the review stage results in rejection, the task is also returned for re-annotation.
 Create the Agent
This section provides the complete code for creating your Custom Agent, along with an explanation of its internal workings.
Agent Setup Steps
Create the Agent
This section provides the complete code for creating your Custom Agent, along with an explanation of its internal workings.
Agent Setup Steps
- Set up imports and create a Pydantic model for our LLM’s structured output.
- Create a detailed system prompt for the LLM that explains exactly what kind of rephrasing we want.
- Configure the LLM to use structured outputs based on our model.
- Create a helper function to prompt the model with both text and image.
- Define the agent to handle the recaptioning. This includes:
- Retrieving the existing human-created caption, prioritizing captions from the current frame or falling back to frame zero.
- Sending the first frame of the video along with the human caption to the LLM.
- Processing the response from the LLM, which provides three alternative phrasings of the original caption.
- Updating the label row with the new captions, replacing any existing ones.
-
Save the dependencies above into a
requirements.txtfile. -
Set up your Python environment and run the agent:
(Replace
/path/to/your_private_keyand<your-api-key>with your actual credentials.) -
In a separate terminal, test the agent:
(Replace
<url_from_the_label_editor>with the URL from your Encord Label Editor session.)
PDF OCR Encord Agent
The goal is to create a Custom Agent that extracts text from target bounding boxes in a PDF using the Document AI API. This Agent performs the following:- Searches for bounding boxes in your PDF that have a Text or OCR text attributes.
- Rasterizes PDF pages.
- Crops each bounding box.
- Sends the crop to Google Document AI OCR.
- Writes the extracted text back into the attribute on the object.
- Saves the label row after each batch.
- Create a virtual Python environment
- Install all necessary dependencies
- Are able to authenticate with Encord
1
Create Ontology
For the Agent to work, the Ontology for your Project must contain a Bounding Box object with a Text attribute named
Text or OCR.For example, create an Ontology with the following:-
PDF Document Name (bounding box)
- Text (text attribute)
-
Error (bounding box)
- OCR (text attribute)
-
PDF Signature Field (bounding box)
- Signatory Name (text attribute)
- Status (radio button)
- Signed (radio button option)
- Unsigned (radio button option)
2
Create Dataset
Create a Dataset that contains PDFs.
3
Create Project
Create a Project with the following:
- Ontology you created in Step 1
- Dataset with PDFs
- Standard Workflow
main.py in the process to host the Agent.
text and ocr text attributes.
Run the Agent
After Annotating the PDFs, run the Custom Agent.