> ## Documentation Index
> Fetch the complete documentation index at: https://docs.encord.com/llms.txt
> Use this file to discover all available pages before exploring further.
# Register GCP Data
Your data is stored under **Data** > **Files & Folders**, where it is organized into folders and sub-folders.
1. Set up a GCP integration.
2. Create a GCP integration in Encord.
3. Create a Cloud-synced folder to store your data in Encord.
4. Sync data to the folder.
See our [GCP integration documentation](/platform-documentation/General/annotate-data-integrations/annotate-gcp-integration) for a detailed guide to setting up a GCP integration.
## Step 1: Setup GCP Integration
<>
Clickable Div
## Step 2: Create Encord Integration
Once your GCP storage is set up and configured, you are ready to create the integration in the Encord platform ([https://app.encord.com/integrations](https://app.encord.com/integrations) or [https://app.us.encord.com/integrations](https://app.us.encord.com/integrations)).
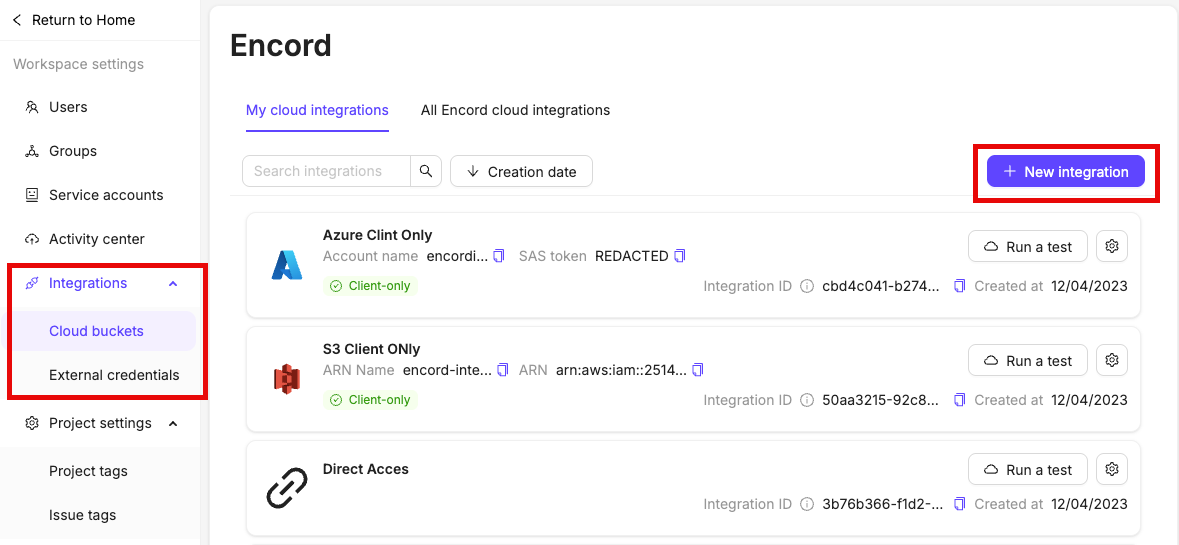
In the *Integrations* section of the Encord platform, click **+New integration** to create a new integration.
Click **+ Add integration**.
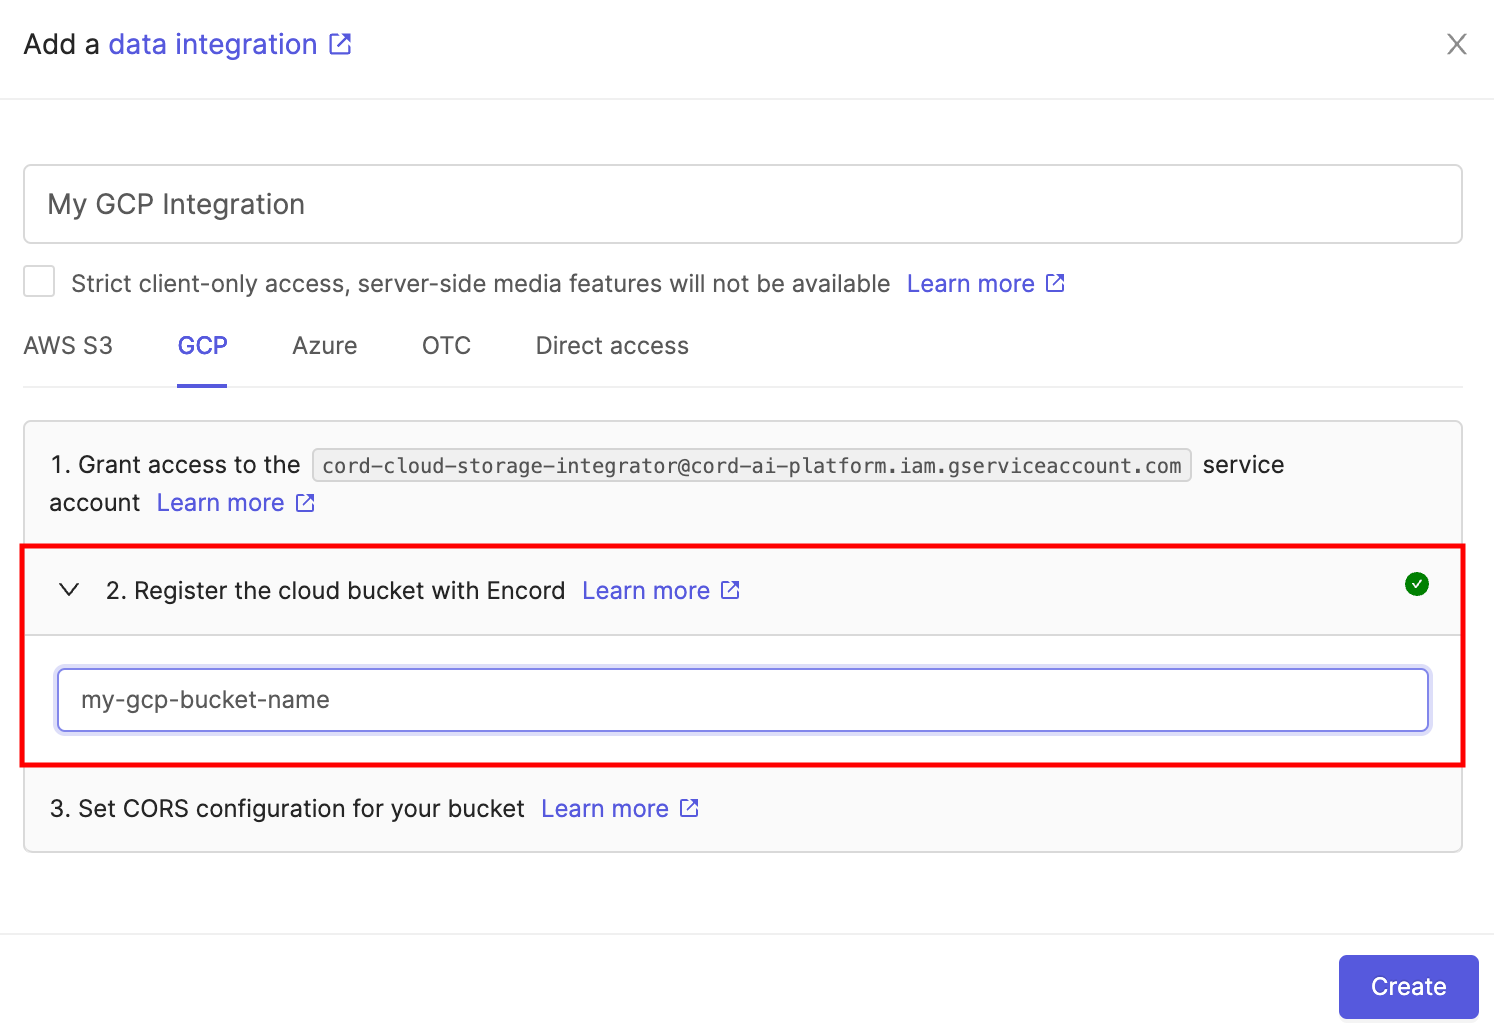
Create the integration by selecting *GCP* at the top of the chooser. Enter a name for the integration, and enter the name of the bucket you wish to make available in the second dropdown of the GCP integration window.
Optionally check the box to enable **Strict client-only access, server-side media features will not be available** if you would like Encord to sign URLs, but refrain from downloading any media files onto Encord servers. Read more about this feature [here](/platform-documentation/General/annotate-data-integrations#strict-client-only-access).
Click **Create** to create the GCP integration.
## Step 3: Create a Cloud-synced Folder
You cannot change URI after folder creation.
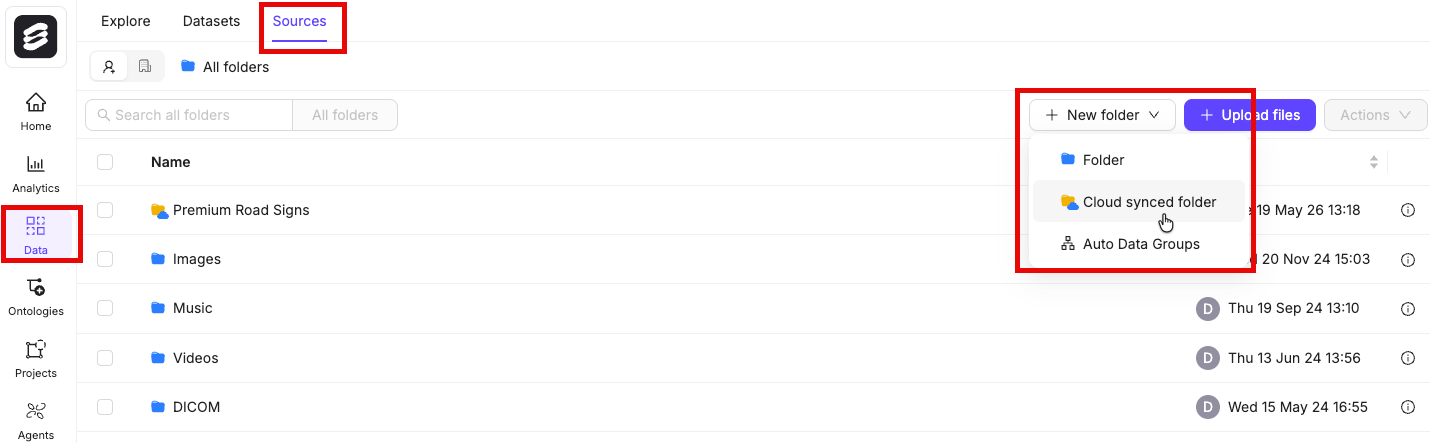
1. Go to **Data** > **Files & Folders**.
2. Click **New folder > Cloud-synced folder**.
The *New Cloud-synced folder* dialog appears.
3. Provide the following:
* **Title:** Provide a meaningful name for the Cloud-synced folder.
* **Description:** OPTIONAL - Provide a meaningful description for the Cloud-synced folder.
* **Select your integration:** Select the integration to use from the drop down.
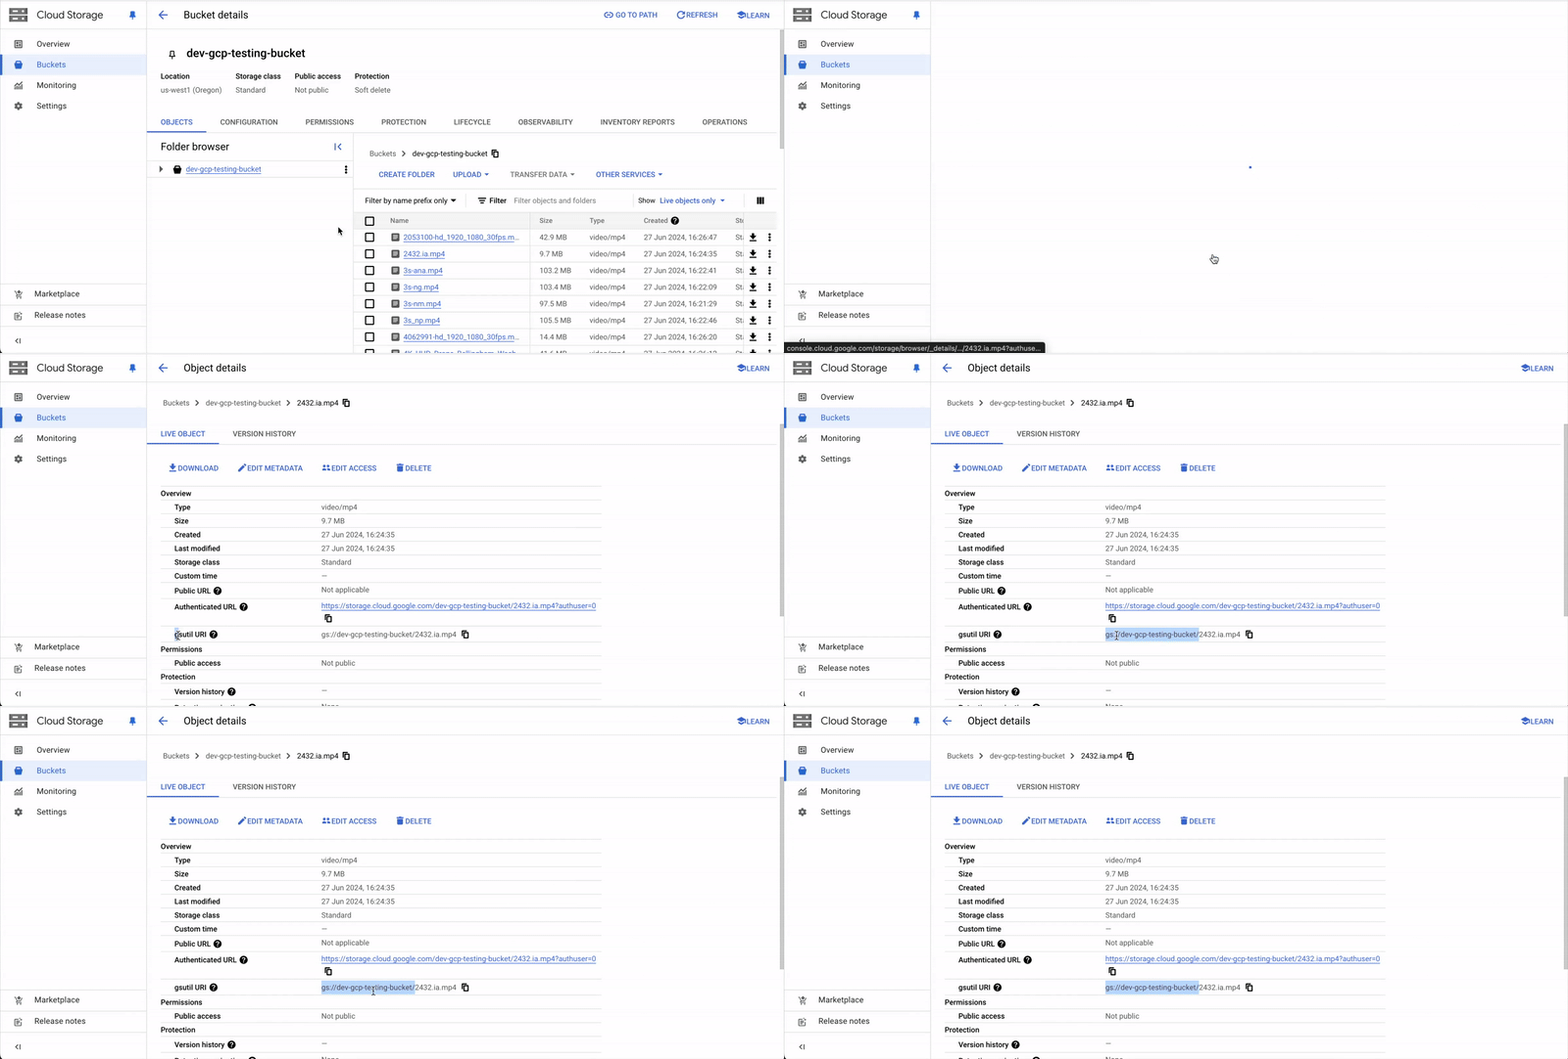
* **Storage path:** Specify the storage/file path to your cloud storage. For example: `gs://encord-gcp-bucket/CloudSync/` or `s3://encord-aws-bucket/CloudSync`.
* **Automatically sync data**: Automatically syncs data from your cloud storage to Encord once every 24 hours.
* **Metadata ingestion**: Enable this toggle to import custom metadata files from your cloud storage. Set your sidecar suffix (default is `.metadata.json`). Any file matching that suffix is treated as metadata for its paired data file and does not appear as a separate item in your folder.
4. Click **Create**.
The page for the new Cloud-synced folder appears.
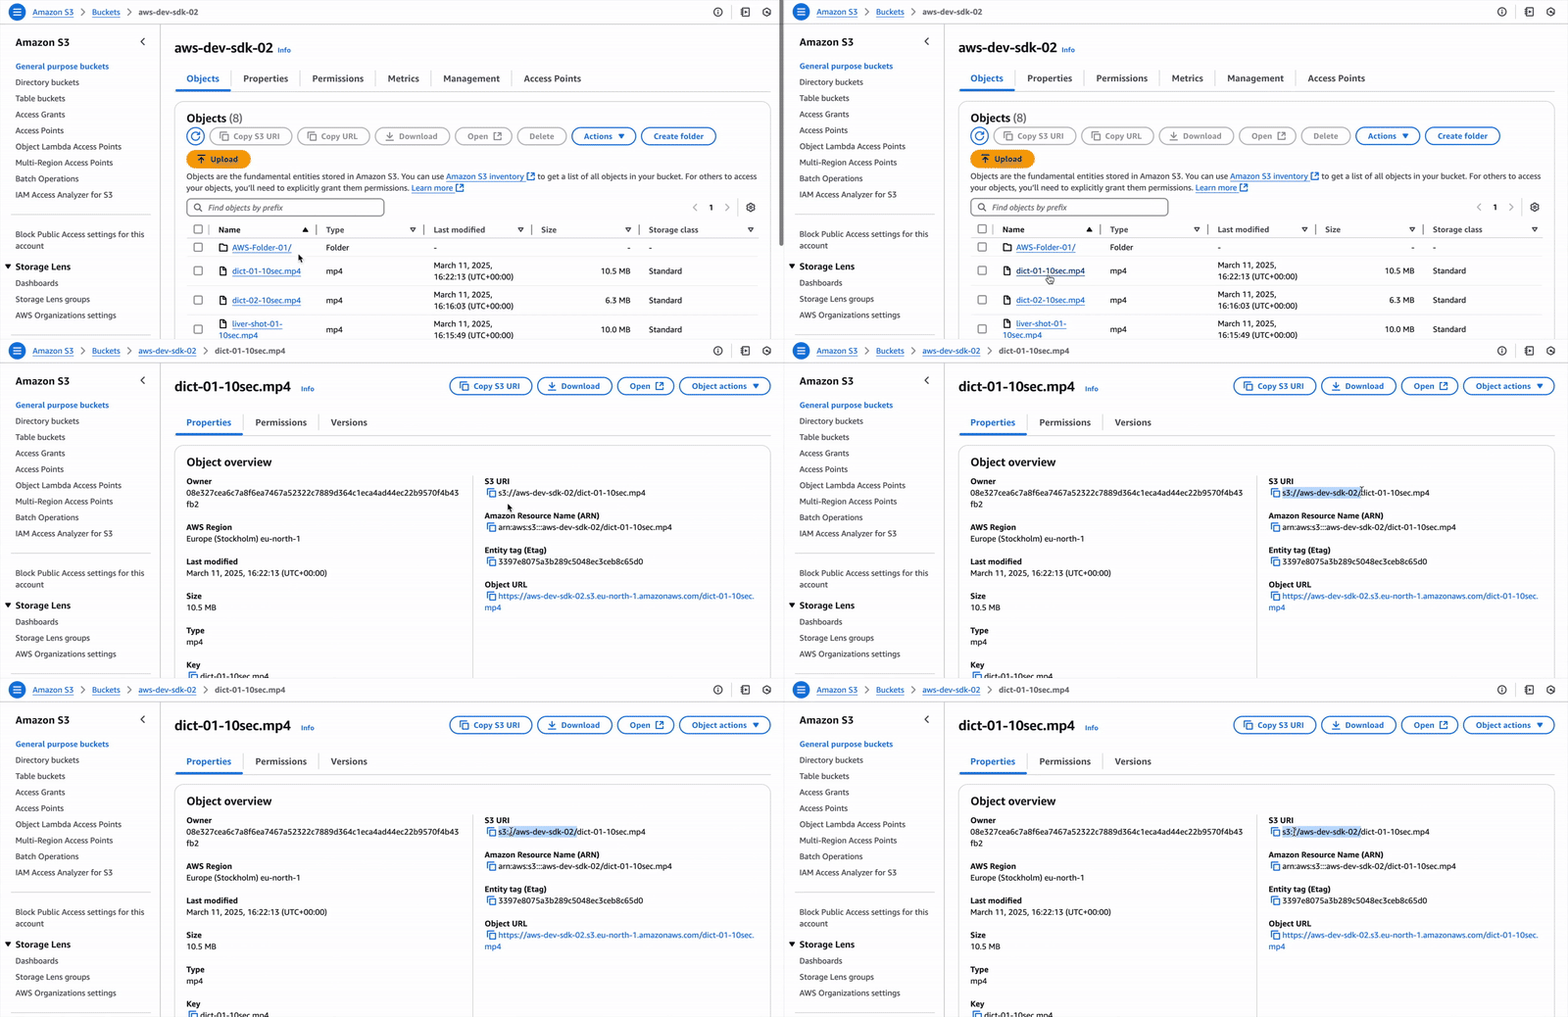
#### Find Storage Path
Finding the Storage path for your folder or object varies across Cloud Storage platforms.
**AWS**
**GCP**
## STEP 4: Sync Data Between Encord and Cloud Storage
1. Go to **Data** > **Files & Folders**.
The Cloud-synced folder page appears.
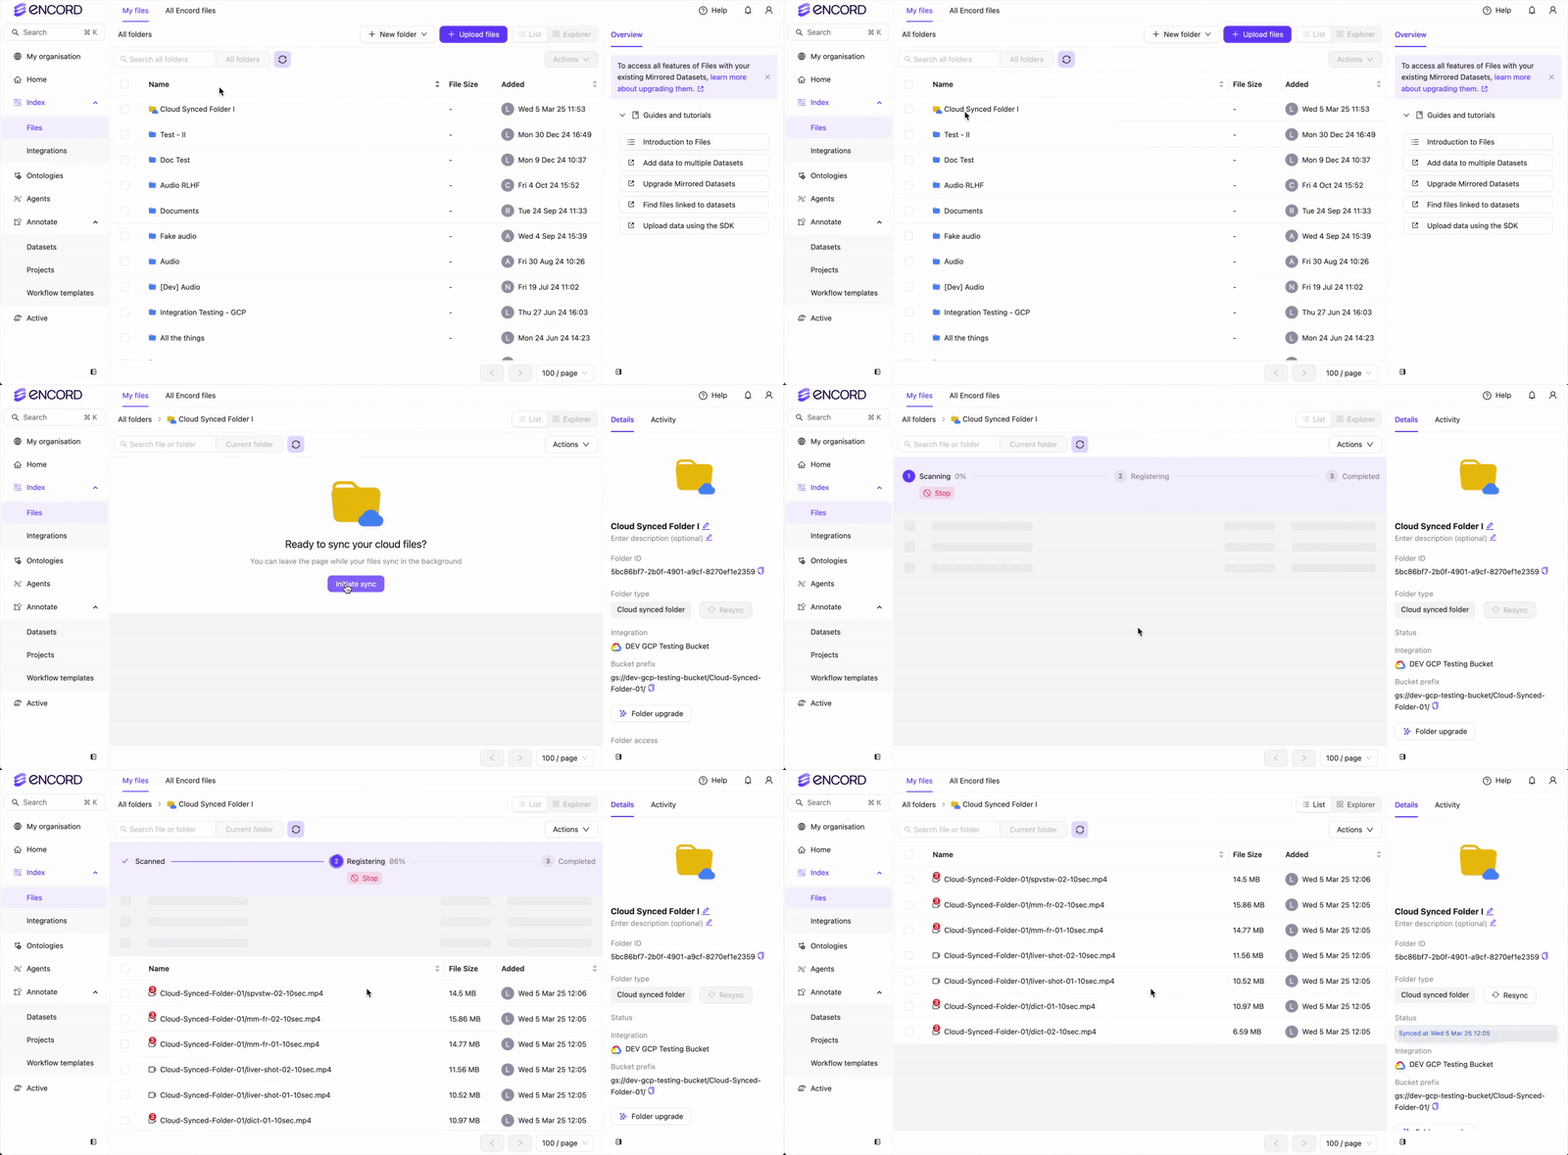
2. Click into your cloud-synced folder.
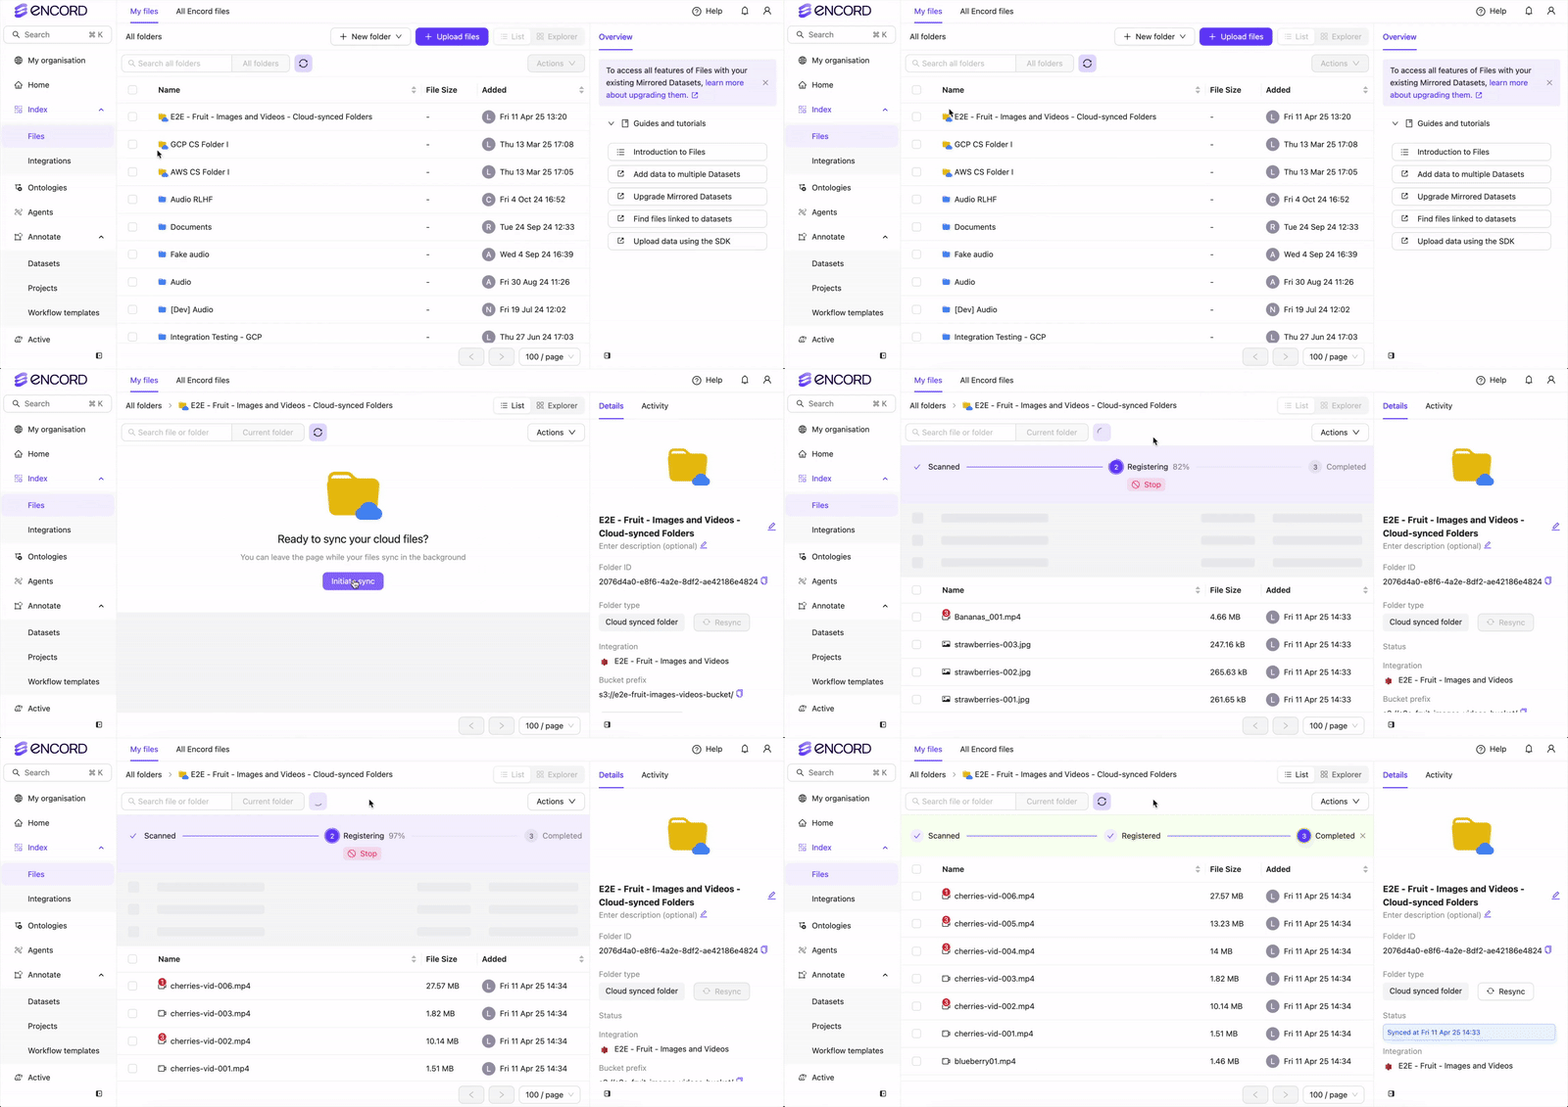
3. Click **Initiate sync**.
The sync between the folder and your cloud storage begins.