> ## Documentation Index
> Fetch the complete documentation index at: https://docs.encord.com/llms.txt
> Use this file to discover all available pages before exploring further.
# 5. Create an Ontology
We recommend learning about [Ontology structure](/platform-documentation/Annotate/annotate-ontologies/annotate-ontologies) in Encord before creating Ontologies.
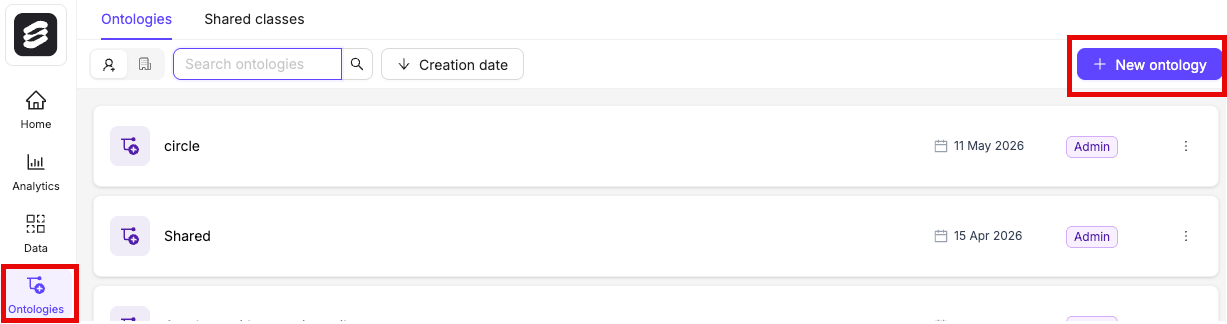
1. Click the **New ontology** button in the *Ontologies* section to create a new Ontology.
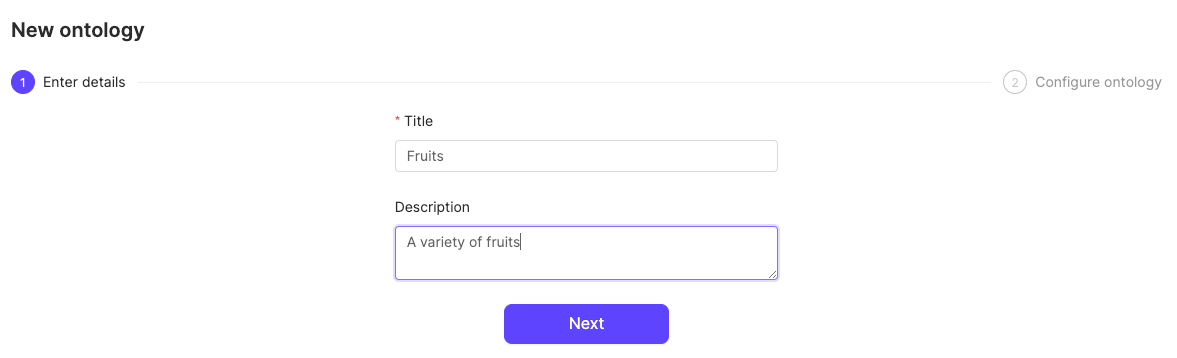
2. Give your Ontology a meaningful title and description. A clear title and description keeps your Ontologies organized.
3. Click **Next** to continue.
4. Define your Ontology structure. See our [documentation on Ontology structure](/platform-documentation/Annotate/annotate-ontologies/annotate-ontologies) for more information on the various types of objects, classifications, and attributes.
**To add objects:**
Ensure that you add *Audio Region* objects for audio files and *Text Region* objects for text files.
1. Click the **Add object** button.
2. Do one of the following:
* Select a **Shared class**
* Click **New Object**
**Shared classes** cannot be edited while creating an Ontology. To edit a shared class go to the **Ontologies** > **Shared classes** page.
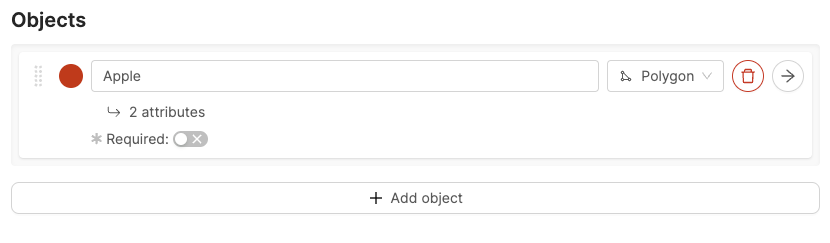
3. To create a new object, give the object a name. For example "Apple".
4. Select a shape for the object. For example *polygon*.
5. Optionally, enable the **Required** toggle to mark the object as *Required*.
6. Optionally, add attributes to the object.
7. Repeat these steps for as many objects as necessary.
**To add attributes to an object**:
You can add attributes to objects that define the object's characteristics. For example the object "Apple" can have an attribute "Color".
1. Click the arrow icon next to an object to add attributes to the object.
2. Give the attribute a name. For example "Color".
3. Click the attribute type to change the attribute type. The default attribute type is a text field.
4. Click **Add option** to add an option, if you have chosen a radio button or checklist attribute.
5. Enter a name for the attribute option. For example, the attribute "Color" can have the options "Red", "Green", and "Yellow".
6. Click the **Back to parent** button to return the Ontology creation view.
**To add a classification**:
1. Click **Add classification**.
2. Do one of the following:
* Select a **Shared class**
* Click **New classification**
**Shared classes** cannot be edited while creating an Ontology. To edit a shared class go to the **Ontologies** > **Shared classes** page.
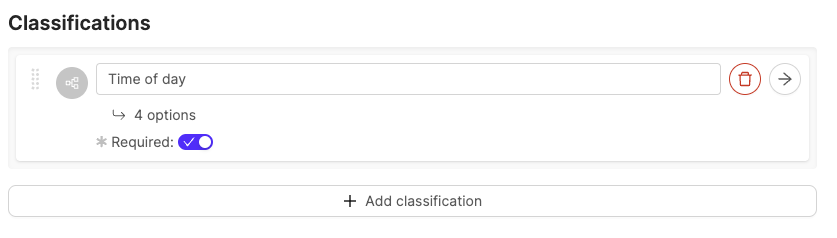
3. For a new classification, give the classification a name. For example, "Time of day".
4. Optionally, configure the classification. The default classification type is a text field.
5. Optionally, enable the **Required** toggle to mark the object as *Required*.
6. Repeat these steps for as many classifications as necessary.
**Configure classifications**:
You can configure classifications to change the classification type, and to add classification options to radio buttons and check lists.
1. Click the arrow icon next to an object to configure the classification.
2. Click the classification type to change the classification type. The default classification type is a text field.
3. Click **Add option** to add an option if you have selected a radio button or check list classification.
4. Enter a name for the classification option. For example, the classification "Time of day" can have the options "Night" and "Day".
5. Click the **Back to parent** button to return the Ontology creation view.