> ## Documentation Index
> Fetch the complete documentation index at: https://docs.encord.com/llms.txt
> Use this file to discover all available pages before exploring further.
# Re-encoding Videos
Re-encoding within the Encord platform is only available to Enterprise customers. Contact [sales@encord.com](mailto:sales@encord.com) for more information.
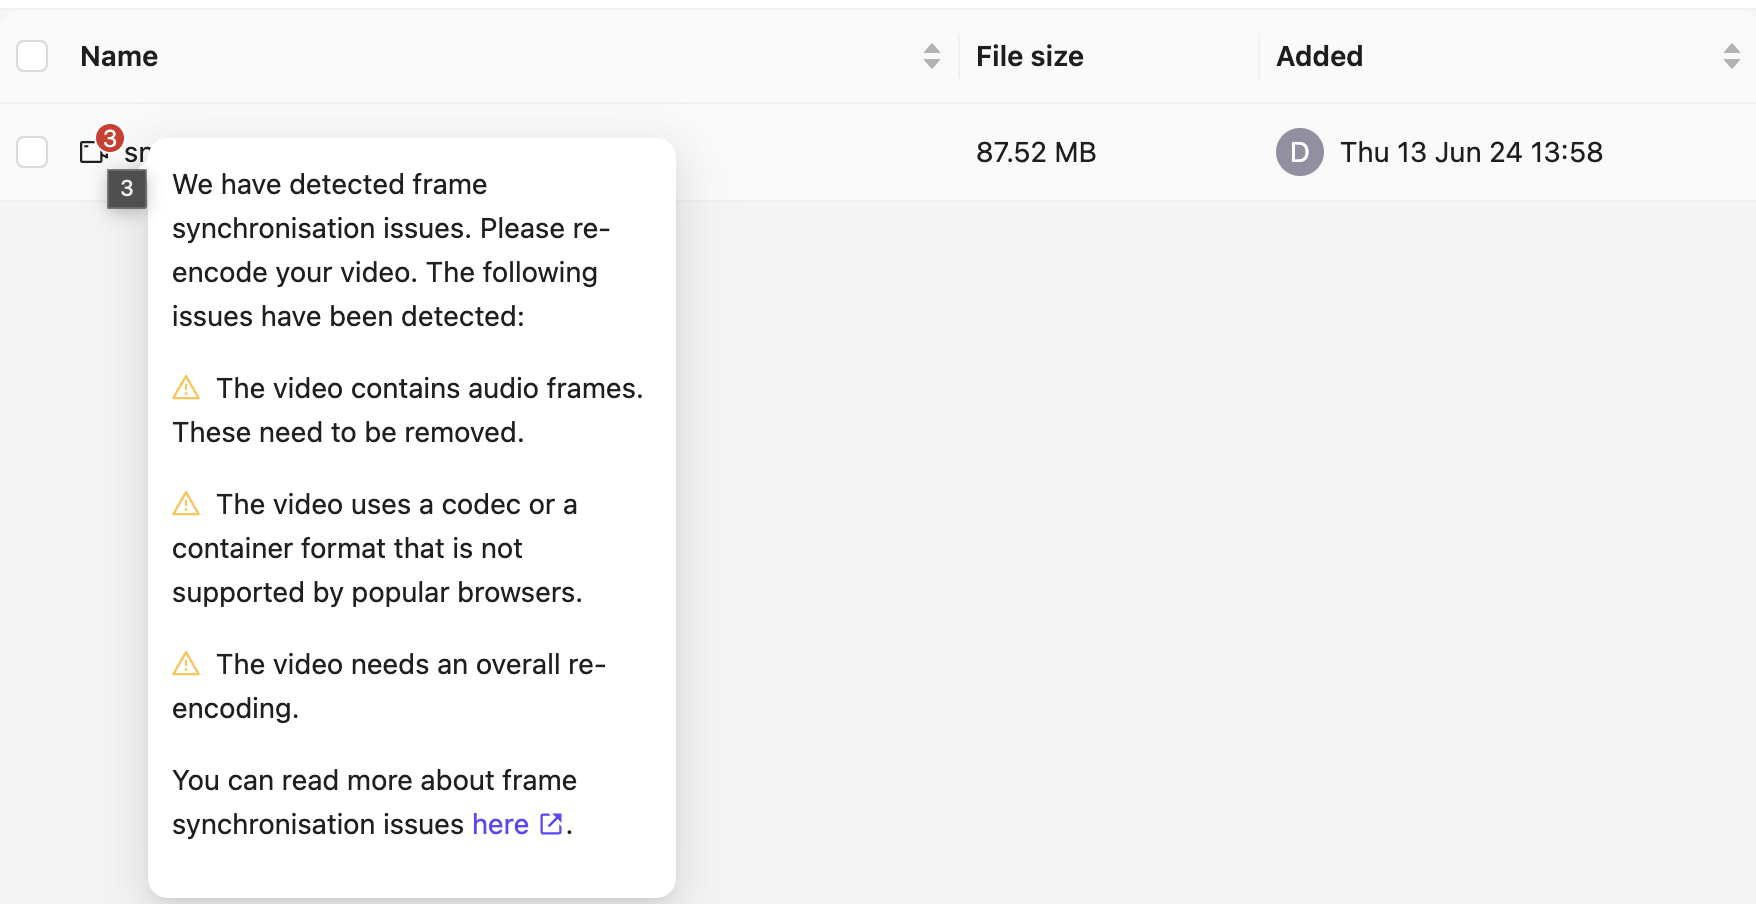
Encord automatically checks all uploaded videos for re-encoding, a process that ensures they meet our platform's requirements. This prevents [frame synchronization issues](/platform-documentation/General/general-supported-data#frame-synchronization-issues) and guarantees accurate labels.
If a video requires re-encoding, a red badge on the file icon indicates the number of issues. You can view each issue by selecting the file and checking the details pane or by hovering over the badge.
## How to Re-Encode
You can Re-encode your videos in the **Files & Folders** or **Datasets** interfaces, but we strongly recommend doing so at the **Files & Folders** level. Videos re-encoded at the Folder level can be used in any Project, while those re-encoded at the Dataset or Project level are restricted to their associated resources.
### Re-encode from Folders
Re-encoding is only available to Enterprise customers. Contact [sales@encord.com](mailto:sales@encord.com) for more information.
1. Go to **Data > Sources**.
2. Go into the Folder where the video you want to re-encode resides.
3. Perform one of the following:
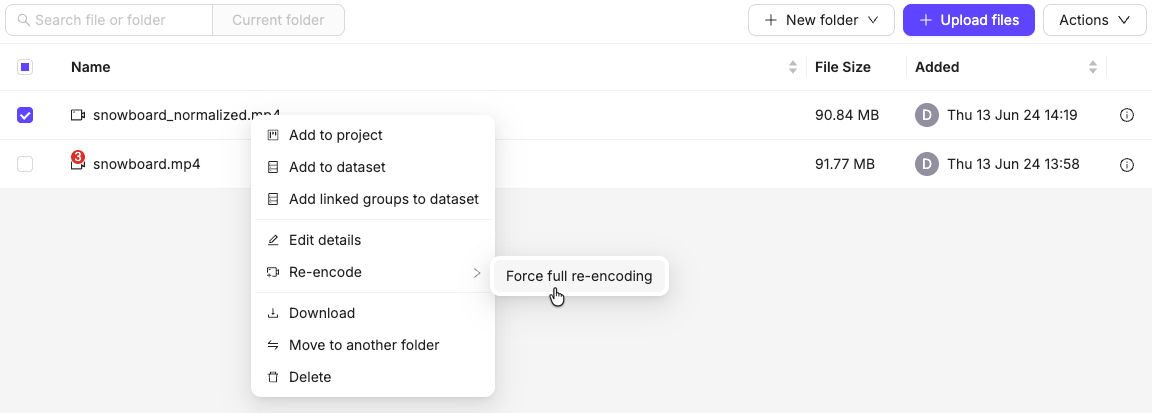
* Right-click the video and select **Re-encode** and select the [type of re-encoding](/platform-documentation/Curate/files/files-re-encoding#types-of-re-encoding) to perform.
* Select one or more videos and click **Actions > Re-encode** and select the type of re-encoding to perform.
4. Check the progress of the re-encoding job by clicking the bell icon in the top-right of the app.
When the process is complete a new video file with the word "normalized" appended to the name appears in the folder. For example, if you re-encoded `snowboard.mp4`, the new video is `snowboard_normalized.mp4`.
### Re-encode from Datasets
Re-encoding is only available to Enterprise customers. Contact [sales@encord.com](mailto:sales@encord.com) for more information.
1. Go to **Data** > **Datasets**.
A list of all Datasets available appears on the *Datasets* page.
2. Go into the Dataset where the video you want to re-encode resides.
3. Select one or more videos.
4. Click **Re-encode** and select the [type of re-encoding](/platform-documentation/Curate/files/files-re-encoding#types-of-re-encoding) to perform.
5. Check the progress of the re-encoding job by clicking the bell icon in the top-right of the app. The number displayed in red signifies how many new notifications you have.
When the process is complete a new video file with the word "normalized" appended to the name appears in the folder. For example, if you re-encoded `snowboard.mp4`, the new video is `snowboard_normalized.mp4`.
## Types of Re-encoding
### Automatically fix detected issue
**Re-encode (Auto)**: Encord performs a spot fix for any detected encoding issues. This is quicker than a full re-encoding, but for some issues, a full re-encoding is required.
### Force full re-encoding
**Re-encode (Full)**: Encord performs a full re-encoding of the video to a specific frame rate and video codec, regardless of the issues detected. This method ensures all issues are resolved, but it can take significantly more time to perform.
### Re-encode Locally
Some cases, such as corrupted metadata, might require you to re-encode your data locally before uploading them to the Encord platform.
Use the following `ffmpeg` command, replacing `video.mp4` with the name of the file you want to re-encode, and `re-encoded-video.mp4` with the name you want the re-encoded file to have:
```bash theme={"dark"}
ffmpeg -err_detect aggressive -fflags discardcorrupt -i video.mp4 -r 30 -c:v libx264 -movflags faststart -an -tune zerolatency re-encoded-video.mp4
```
Since browsers require a constant frame rate, we apply the -r 30 flag (30 fps). Verify your video’s frame rate and adjust the value accordingly.
We recommend using the average frame rate of your video to set the constant rate (rounded to the nearest whole number).
You can figure out the average frame rate of your video with this command:
```bash theme={"dark"}
ffprobe -v 0 -select_streams v:0 -show_entries stream=r_frame_rate -of default=noprint_wrappers=1:nokey=1 video.mp4 | bc -l
```
You may need to install `ffprobe` & `bc`
Here is a summary of the various flags:
* `-err_detect aggressive`: Improves error detection during decoding.
* `-fflags discardcorrupt`: Discards corrupted packets to maintain integrity.
* `-r 30`: This sets the frame rate to a constant 30 frames per second (FPS). Feel free to adjust `30` to your desired frame rate.
* `-c:v libx264`: Specifies the `H.264` codec for video re-encoding.
* `-movflags faststart`: Optimizes for web playback by moving video metadata to the beginning of the file.
* -an: This ensures the audio is removed from the re-encoded video.
* `-tune zerolatency`: Configures for low-latency encoding scenarios.