> ## Documentation Index
> Fetch the complete documentation index at: https://docs.encord.com/llms.txt
> Use this file to discover all available pages before exploring further.
# Curating and Annotating Audio Files
This guide assumes your audio files are stored in AWS. To learn how to create integrations with other cloud providers [click here](/platform-documentation/General/annotate-data-integrations).
## STEP 1: Import your Audio Files
Before you can do anything with the Encord platform and cloud storage, you need to configure your cloud storage to work with Encord. Once the integration between Encord and your cloud storage is complete, you can then use your data in Encord.
In order to integrate with AWS S3, you need to:
1. Create a permission policy for your resources that allows appropriate access to Encord.
2. Create a role for Encord and attach the policy so that Encord can access those resources.
3. Activate Cross-origin resource sharing which allows Encord to access those resources from a web browser.
4. Test the integration to make sure it works.
See our [AWS integration documentation](/platform-documentation/General/annotate-data-integrations/annotate-aws-integration) for a detailed explanation of setting up AWS to work with Encord.
You have the following options to integrate AWS and Encord:
Create an S3 bucket to store your files if you haven't already. Your S3 bucket permissions should be set to be blocking all public access.
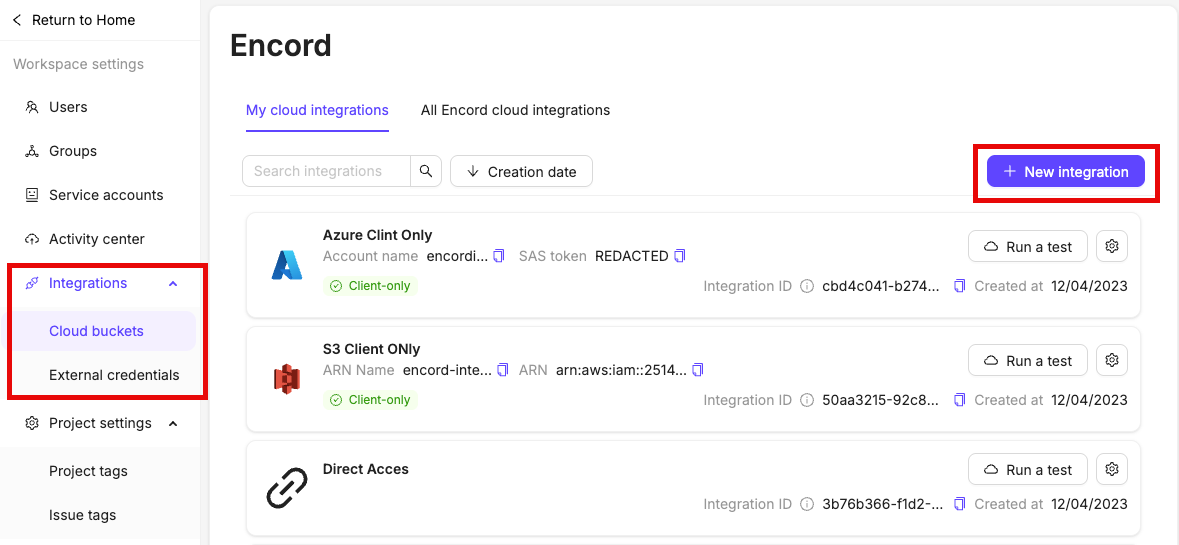
In the *Integrations* section of the Encord platform, click **+New integration** to create a new integration.
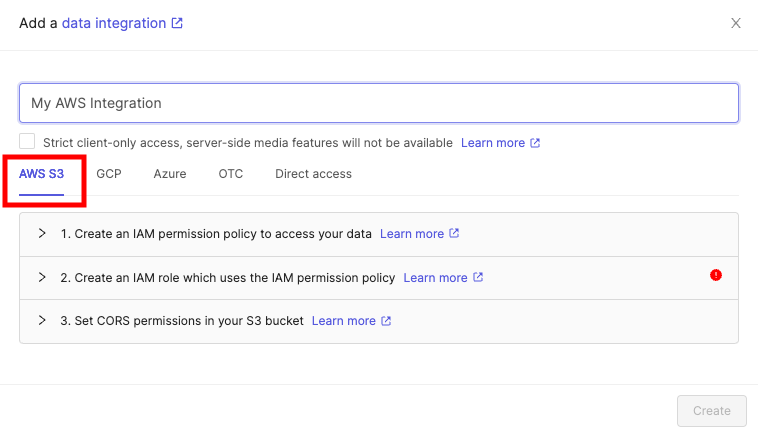
Select *AWS S3* at the top of the chooser.
It is essential you do not close this tab or window until you have finished the whole integration process. If you use the AWS UI for integration, we advise opening the AWS console in a separate tab.
See our [AWS integration documentation](/platform-documentation/General/annotate-data-integrations/annotate-aws-integration) for a detailed explanation of how to set up the AWS integration.
See our documentation [here](/platform-documentation/Curate/add-files/index-register-cloud-data#json-format) for more comprehensive information
Create a JSON file based on the templates provided below. `audioMetadata` is optional unless you are using a [client-only access integration](/platform-documentation/General/annotate-data-integrations#strict-client-only-access).
The `title` field is optional. If omitted, the audio file path and name are used as the default title. For example, if the file is located at `https://encord-solutions-bucket.s3.eu-west-2.amazonaws.com/path/to/my/bucket/song2.mp3`, the title defaults to `/path/to/my/bucket/song2.mp3`.
| Key or Flag | Required? | Default value |
| ---------------- | --------- | ----------------------- |
| "objectUrl" | Yes | |
| "title" | No | The file's path + title |
| "audioMetadata" | No | |
| "clientMetadata" | No | |
| "createVideo" | No | false |
`audioMetadata` must be specified when a [Strict client-only access](/platform-documentation/General/annotate-data-integrations#strict-client-only-access) integration is used. In all other cases, `audioMetadata` is optional, but including it significantly reduces import times.
When the `audioMetadata`, `imageMetadata`, or `videoMetadata` flags are present in the JSON file, we directly use the supplied metadata without performing any additional validation, and do not store the file on our servers. **It is crucial that the metadata you provide is accurate**.
Keys / Flags that are not required can be omitted from the JSON file entirely.
```json Standard integration theme={"dark"}
{
"audio": [
{
"objectUrl": "/path/to/my/bucket/song.mp3",
"audioMetadata": {
"duration": 180.98,
"file_size": 2900000,
"mime_type": "audio/mpeg",
"sample_rate": 44100,
"bit_depth": 24,
"codec": "mp3",
"num_channels": 2
},
"clientMetadata": {"artist": "Miles Davis"}
},
{
"objectUrl": "/path/to/my/bucket/song2.mp3",
"audioMetadata": {
"duration": 153.28,
"file_size": 2900000,
"mime_type": "audio/mpeg",
"sample_rate": 44100,
"bit_depth": 24,
"codec": "mp3",
"num_channels": 2
},
"clientMetadata": {"artist": "Atomic Kitten"}
}
]
}
```
```json Multi-region access point (AWS) theme={"dark"}
{
"audio": [
{
"objectUrl": "Multi-Region-Access-Point-ARN + /path/to/my/bucket/cat.jpg",
"audioMetadata": {
"duration": 180.98,
"file_size": 2900000,
"mime_type": "audio/mpeg",
"sample_rate": 44100,
"bit_depth": 24,
"codec": "mp3",
"num_channels": 2
},
"clientMetadata": {"artist": "Miles Davis"}
},
{
"objectUrl": "/path/to/my/bucket/song2.mp3",
"audioMetadata": {
"duration": 153.28,
"file_size": 2900000,
"mime_type": "audio/mpeg",
"sample_rate": 44100,
"bit_depth": 24,
"codec": "mp3",
"num_channels": 2
},
"clientMetadata": {"artist": "Atomic Kitten"}
}
],
"skip_duplicate_urls": true
}
```
```json MRAP Example theme={"dark"}
{
"audio": [
{
"objectUrl": "https://arn:aws:s3::123123123:accesspoint/frf28frarf9.mrap.s3-accesspoint.amazonaws.com/Music/2022/song_1.jpg",
"audioMetadata": {
"duration": 180.98,
"file_size": 2900000,
"mime_type": "audio/mpeg",
"sample_rate": 44100,
"bit_depth": 24,
"codec": "mp3",
"num_channels": 2
},
"clientMetadata": {
"colour": "black and white"
}
},
{
"objectUrl": "https://arn:aws:s3::123123123:accesspoint/frf28frarf9.mrap.s3-accesspoint.amazonaws.com/Music/2022/song_2.mp3",
"audioMetadata": {
"duration": 153.28,
"file_size": 2900000,
"mime_type": "audio/mpeg",
"sample_rate": 44100,
"bit_depth": 24,
"codec": "mp3",
"num_channels": 2
},
"clientMetadata": {
"colour": "brown"
}
}
],
"skip_duplicate_urls": true
}
```
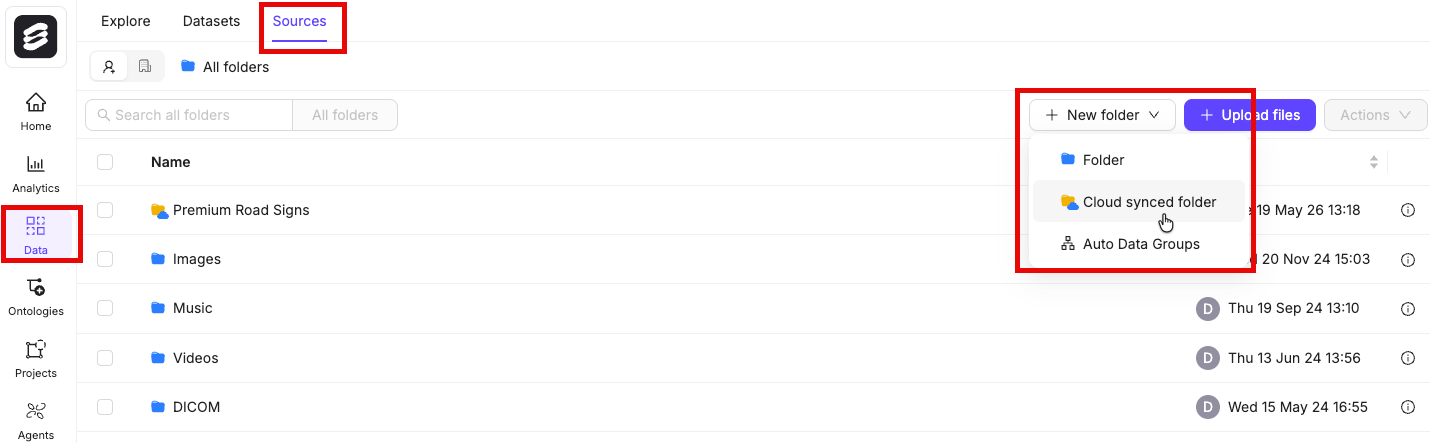
All files in Encord must be stored within folders. Therefore, you need to create a folder before registering any data with Encord. To create a folder:
1. Navigate to **Data** > **Files & Folders**
2. Click the **+ New folder** button to create a new folder. Select the type of folder you want to create.
3. Give the folder a meaningful name and description.
4. Click **Create** to create the folder.
The folder is listed in **Files & Folders**.
To ensure smoother uploads and faster completion times, and avoid hitting absolute file limits, we recommend adding smaller batches of data. Limit uploads to 100 videos or up to 1,000 images at a time. You can also create multiple Datasets, all of which can be linked to a single Project. Familiarize yourself with our [limits and best practices for data import/registration](/platform-documentation/General/best-practices#import-into-encord) before adding data to Encord.
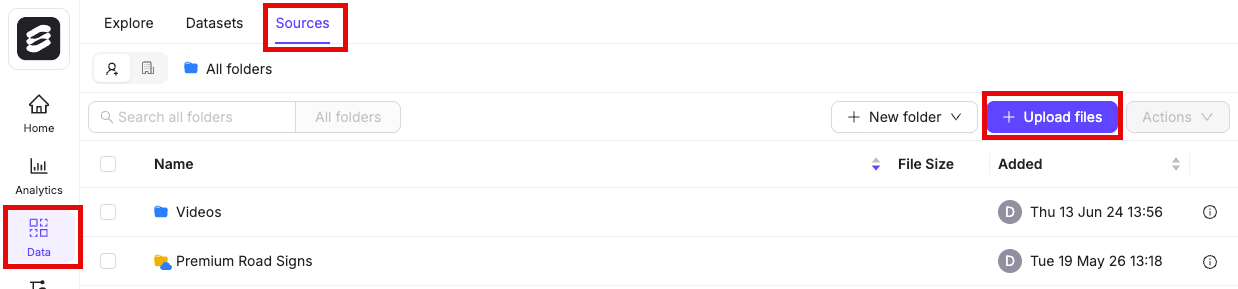
1. Navigate to **Data** > **Files & Folders** in the Encord platform.
2. Click into a Folder.
3. Click **+ Upload files**.
A dialog appears.
4. Click **Import from cloud data**.
We recommend turning on the **Ignore individual file errors** feature. This ensures that individual file errors do not lead to the whole upload process being aborted.
6. Click **Add JSON or CSV files** to add a [JSON](/platform-documentation/Curate/add-files/index-register-cloud-data#json-format) or [CSV](/platform-documentation/Curate/add-files/index-register-cloud-data#csv-format) file specifying cloud data that is to be added.
## STEP 2: Curate your Data
### Create a collection
A Collection is a container for data units (images or videos) that you can use to group your data units together.
Creation of a Collection involves [filtering and sorting your data](/platform-documentation/Curate/curation-basics#filters). Once you have selected a smaller group of images, videos or audio files, [create a Collection](/platform-documentation/Curate/curation-basics#collections).
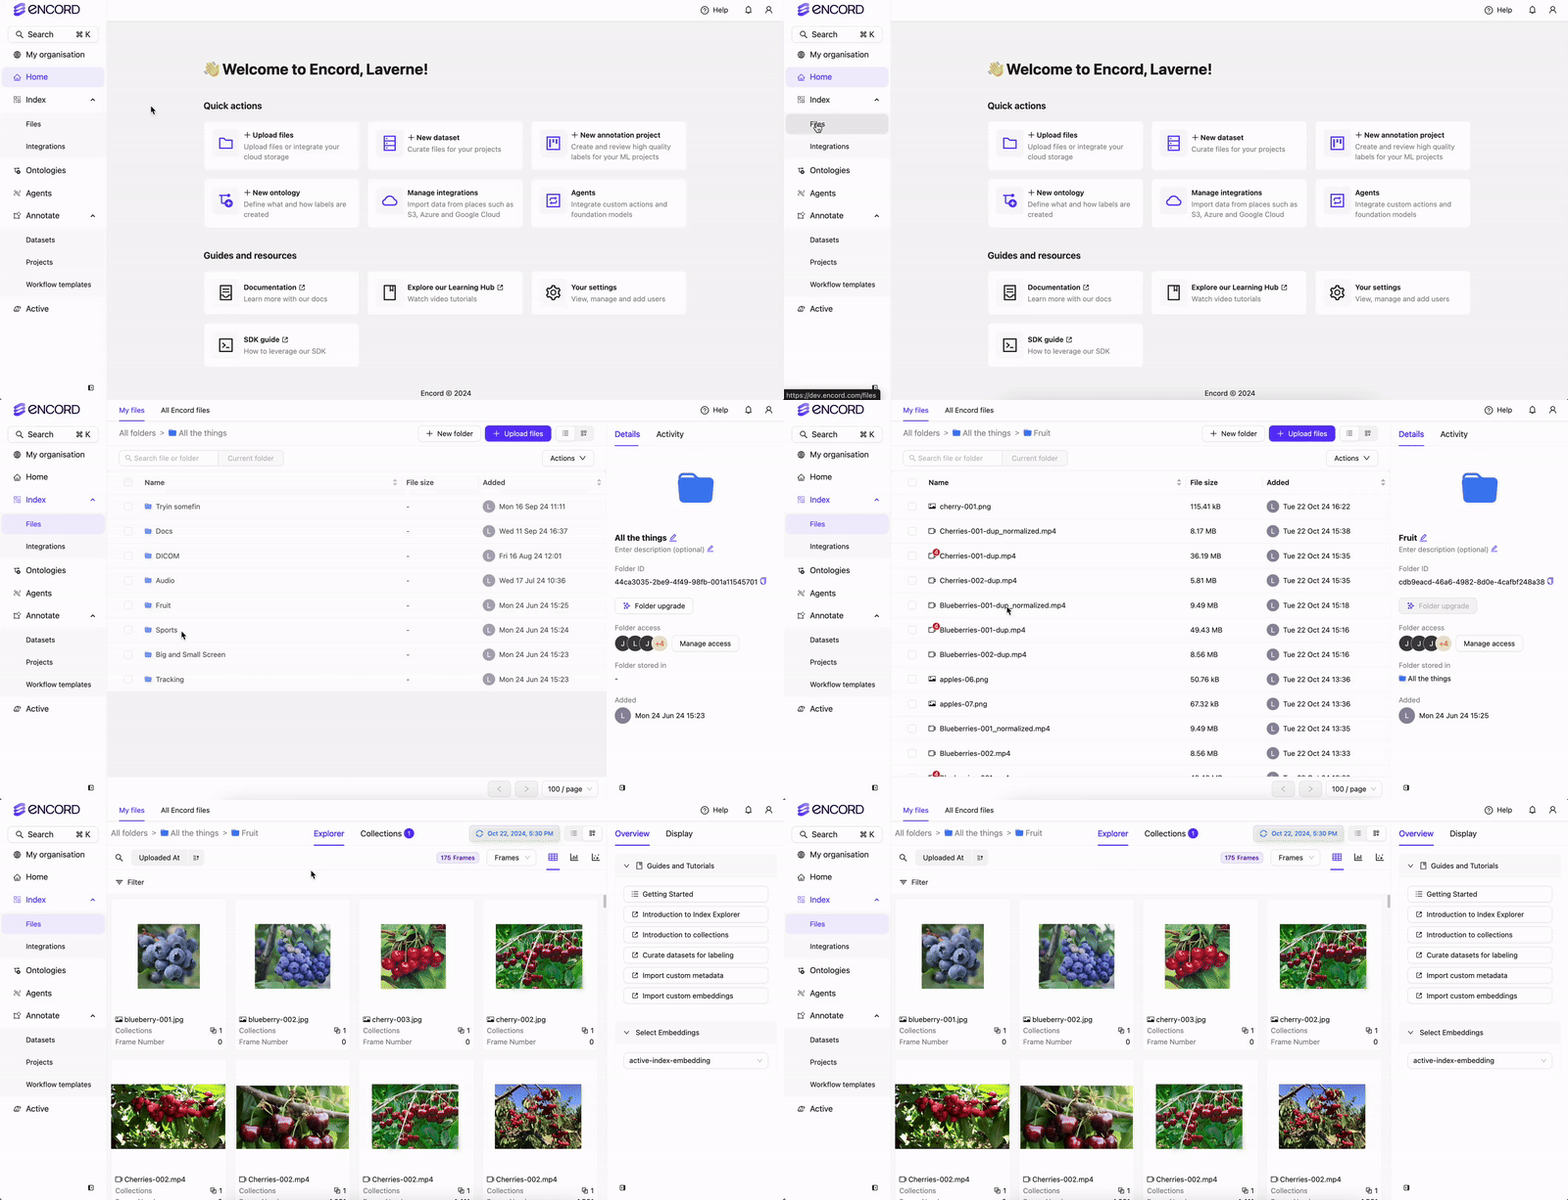
1. Log in to the Encord platform.
The landing page for the Encord platform appears.
2. Navigate to **Data** > **Explore**.
The *All folders* page appears with a list of all folders in Encord.
3. Open a folder.
4. Click the **Explorer** button.
The *Index Explorer* page appears.
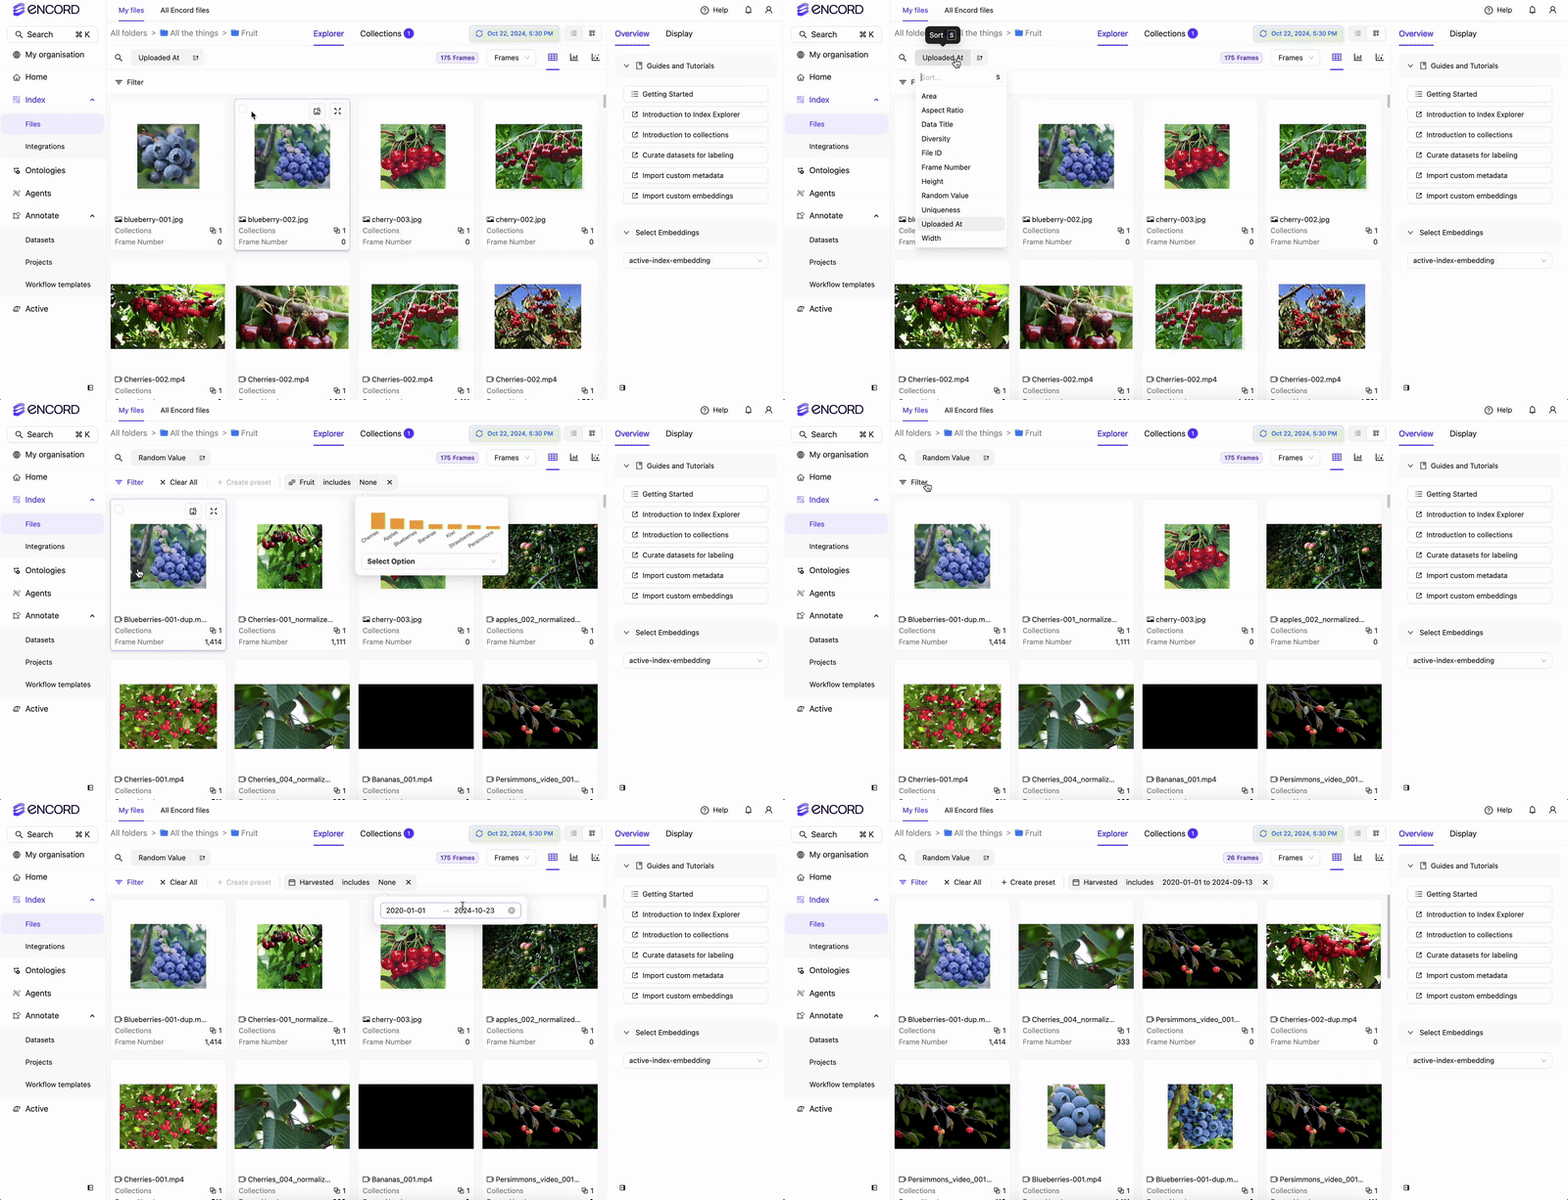
5. Search, sort, and filter your data until you have the subset of the data you need.
6. Select one or more of the images/frames/audio files in the Explorer workspace.
A ribbon appears at the top of the Explorer workspace.
Selecting a video frame selects the entire video. Specific frames from a video cannot be selected.
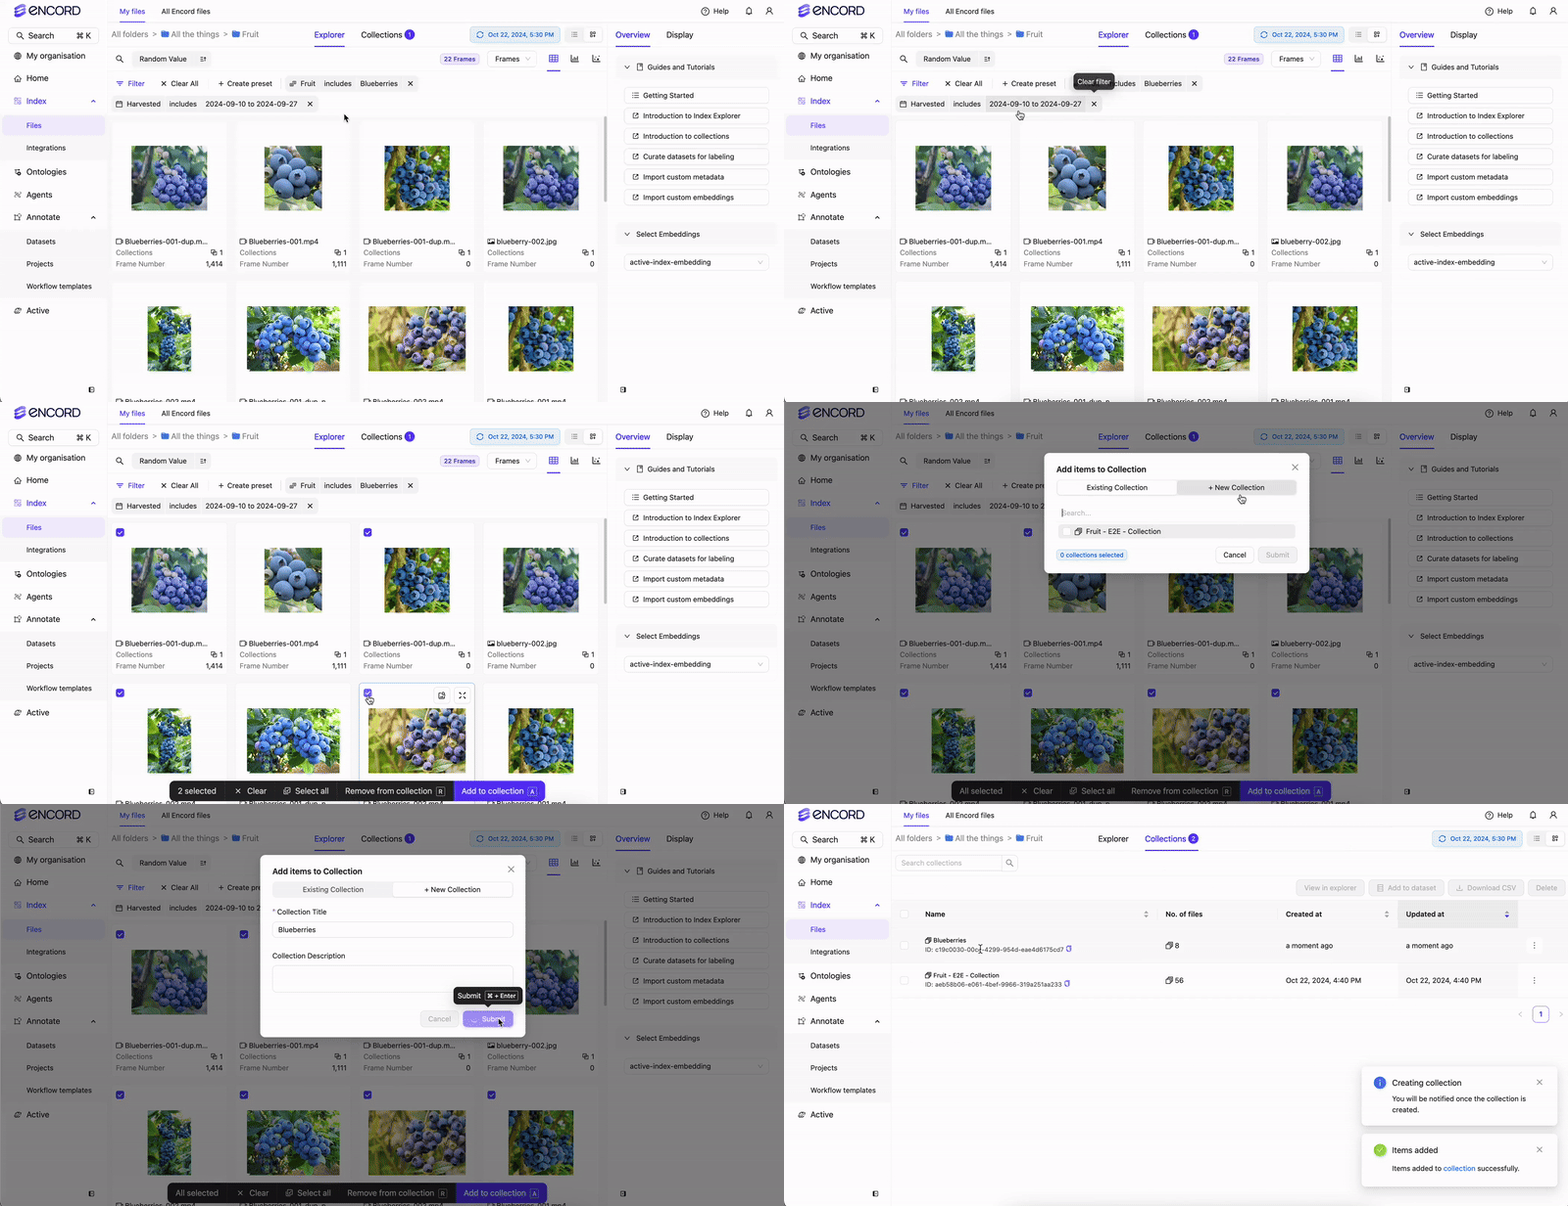
7. Click **Select all** to select all the files in the subset.
Use Command + A as a short cut to select all files.
8. Click **Add to a Collection**.
9. Click **New Collection**.
10. Specify a meaningful title and description for the Collection.
The title specified here is applied as a tag/label to every selected image.
11. Click **Collections** to verify the Collection appears in the Collections list.
## Collection actions menu
Each collection in the Explorer filter panel has a **...** (horizontal dots) button that opens a collection actions submenu. The submenu provides quick access to all available actions for that collection.
The submenu displays:
* The **collection name** in bold at the top of the menu.
* The **collection ID** beneath the name. Click the copy icon next to the ID to copy it to your clipboard.
* **Actions grouped into sections** separated by dividers, making it easier to find the right action. Actions are organized into the following groups:
* **Navigate** — for example, View in Explorer.
* **Manage** — for example, Edit Details.
* **Data** — for example, Add to Dataset and Download CSV.
* **Workflow** — for example, Task Actions, Bulk Classify, Convert Collection, and Edit Object Class. These actions appear only when you are working within a project.
* **Danger** — for example, Delete.
Sections with no available actions for your current context are hidden automatically — no empty dividers appear.
The grouped layout and copyable collection ID apply only to the collection actions submenu in the Explorer filter panel. The collections table row menu is unchanged.
## STEP 2: Set Up Your Project
Once you have a Collection, you can create a Dataset from your Collection.
We recommend learning about [Ontology structure](/platform-documentation/Annotate/annotate-ontologies/annotate-ontologies) before creating Ontologies.
Ensure that Ontologies used for audio annotations only include Classifications and *Audio Region* objects
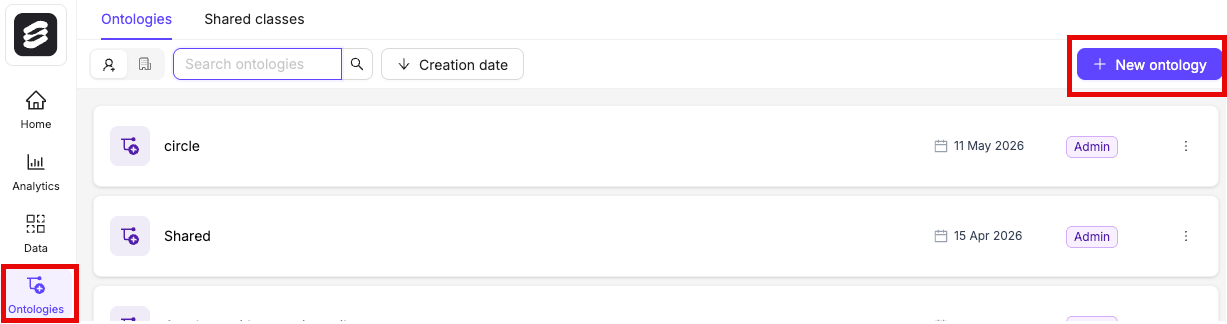
1. Click the **New ontology** button in the *Ontologies* section to create a new Ontology.
2. Give your Ontology a meaningful title and description. A clear title and description keeps your Ontologies organized.
3. Click **Next** to continue.
4. Define your Ontology structure. Audio files are labeled using the Audio Region object type and Classifications.
**To add an Audio Region object**:
1. Click **+ Add object** to create a new object.
2. Give the object a name, for example "Male Vocals".
3. Select the *Audio Region* object type.
4. Optionally, configure the object to add any attributes.
5. Optionally, enable the **Required** toggle to mark the object as *Required*.
6. Repeat these steps for as many Audio Region objects as necessary.
**Configure Objects**:
Objects can be configured to add attributes.
1. Click the arrow button next to the object to start configuring.
2. Click **+ Add attribute** to add an attribute.
3. Select the attribute type: Text, radio button, or checklist. Select Text and check *Transcription* to transcribe audio files.
4. Give the attribute a name, for example "Pitch", or "Lyrics".
5. If your attribute is a radio button or a checklist click **Add option**.
6. Add the options you want your attribute to have. For "Pitch" this can be "High" and "Low".
7. Optionally mark the object as [*Required*](/platform-documentation/Annotate/annotate-ontologies/annotate-ontologies#mark-as-required) and / or [*Dynamic*](/platform-documentation/Annotate/annotate-ontologies/annotate-ontologies#dynamic-attributes).
8. Click the **Back to parent** button to return the Ontology creation view.
**To add a Classification**:
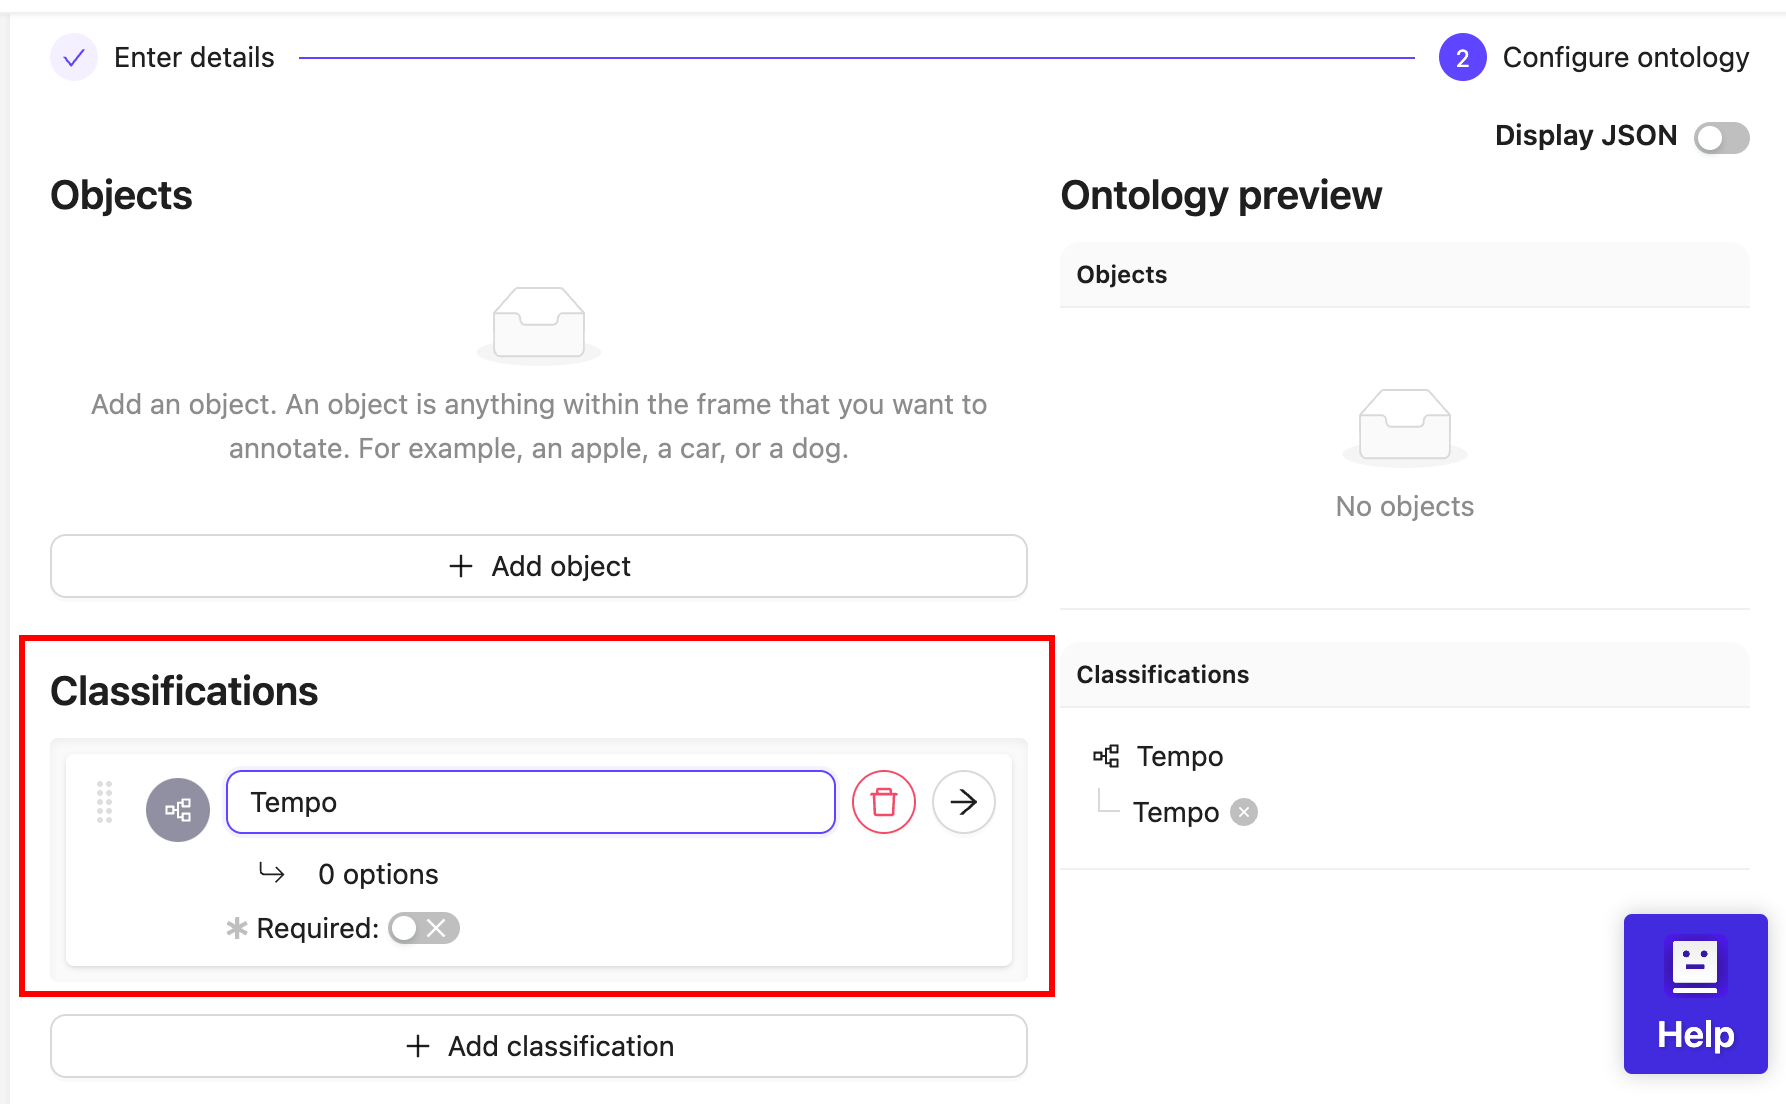
1. Click **+ Add classification** to create a new classification.
2. Give the classification a name. For example, "Tempo".
3. Optionally, configure the classification to change the classification type. The default classification type is a text field.
4. Optionally, enable the **Required** toggle to mark the classification as *Required*.
5. Repeat these steps for as many classifications as necessary.
**Configure classifications**:
Classifications can be configured to change the classification type, and to add classification options to radio buttons and check lists.
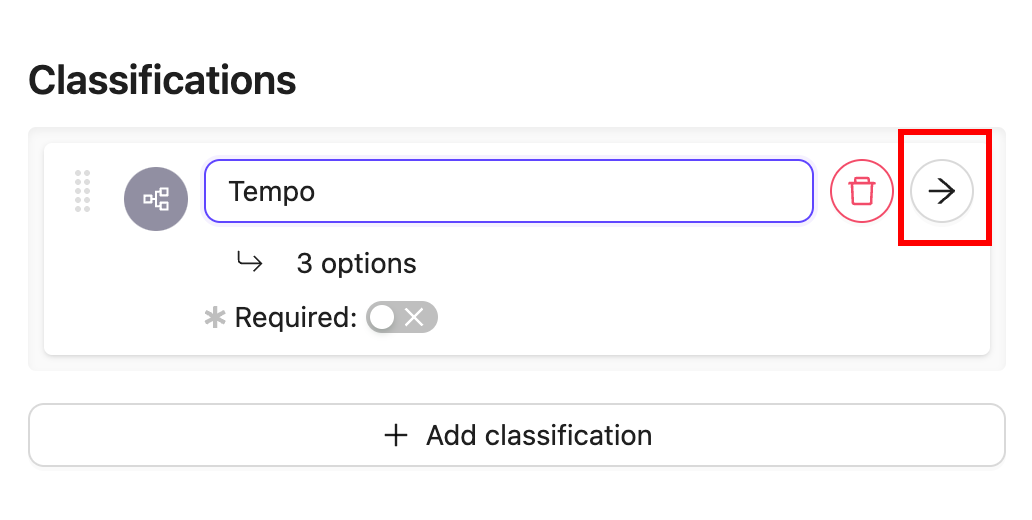
1. Click the arrow icon next to an object to configure the classification.
2. Click the classification type to change the classification type. The default classification type is a text field.
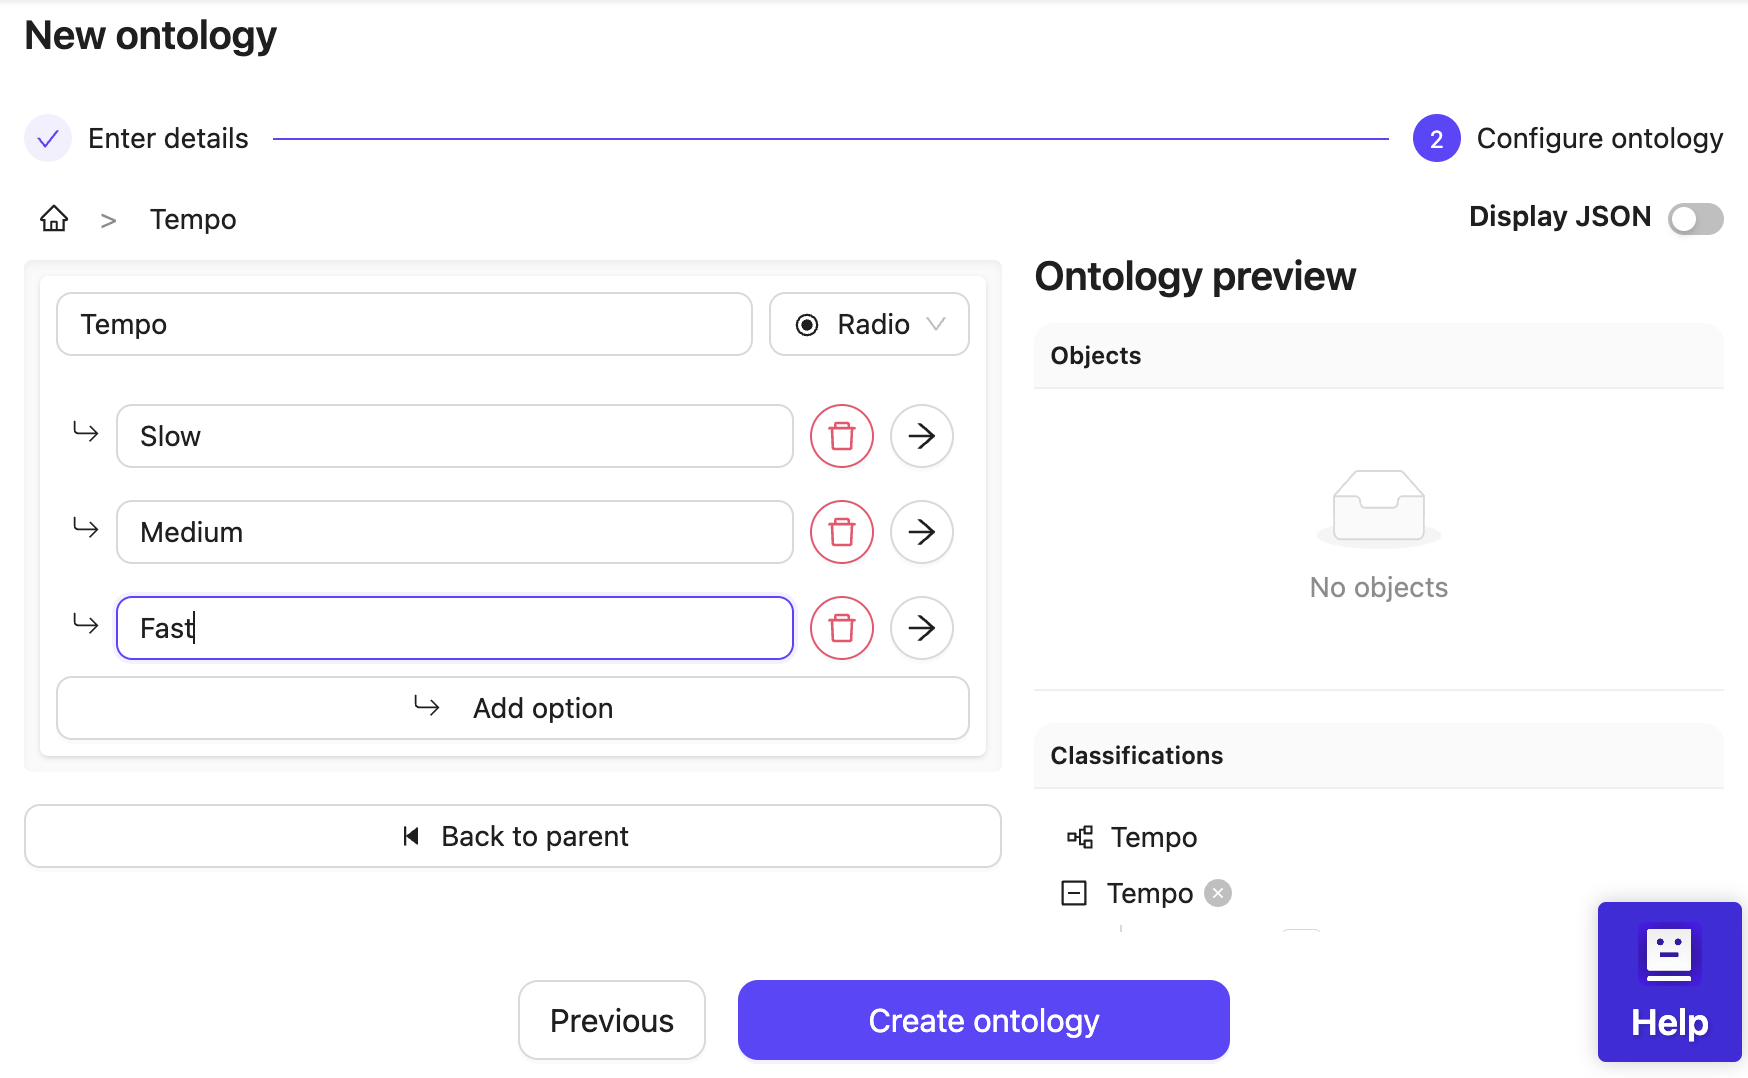
3. Click **Add option** to add an option if you have selected a radio button or check list classification.
4. Enter a name for the classification option. For example, the classification "Tempo" can have the options "Slow", "Medium", and "Fast".
5. Click the **Back to parent** button to return the Ontology creation view.
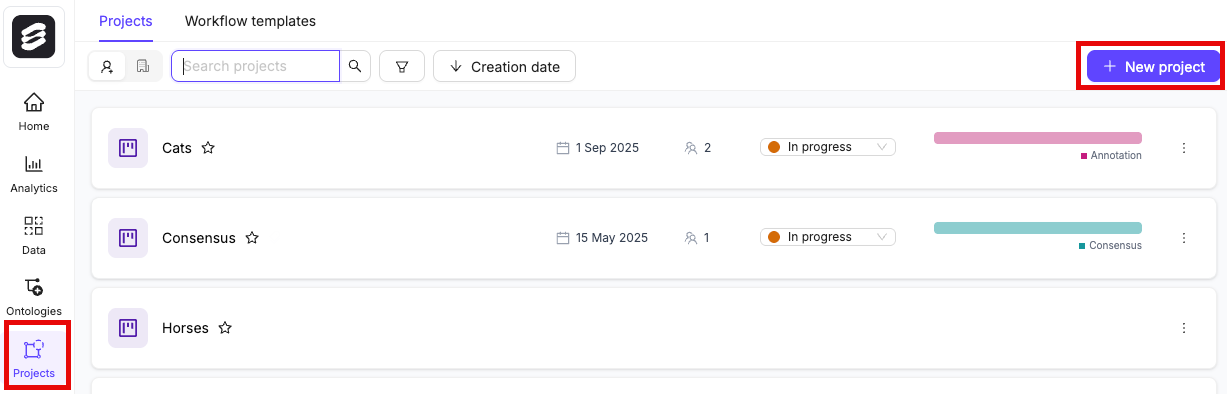
1. In the Encord platform, navigate to **Projects**.
2. Click the **+ New annotation project** button to create a new Project.
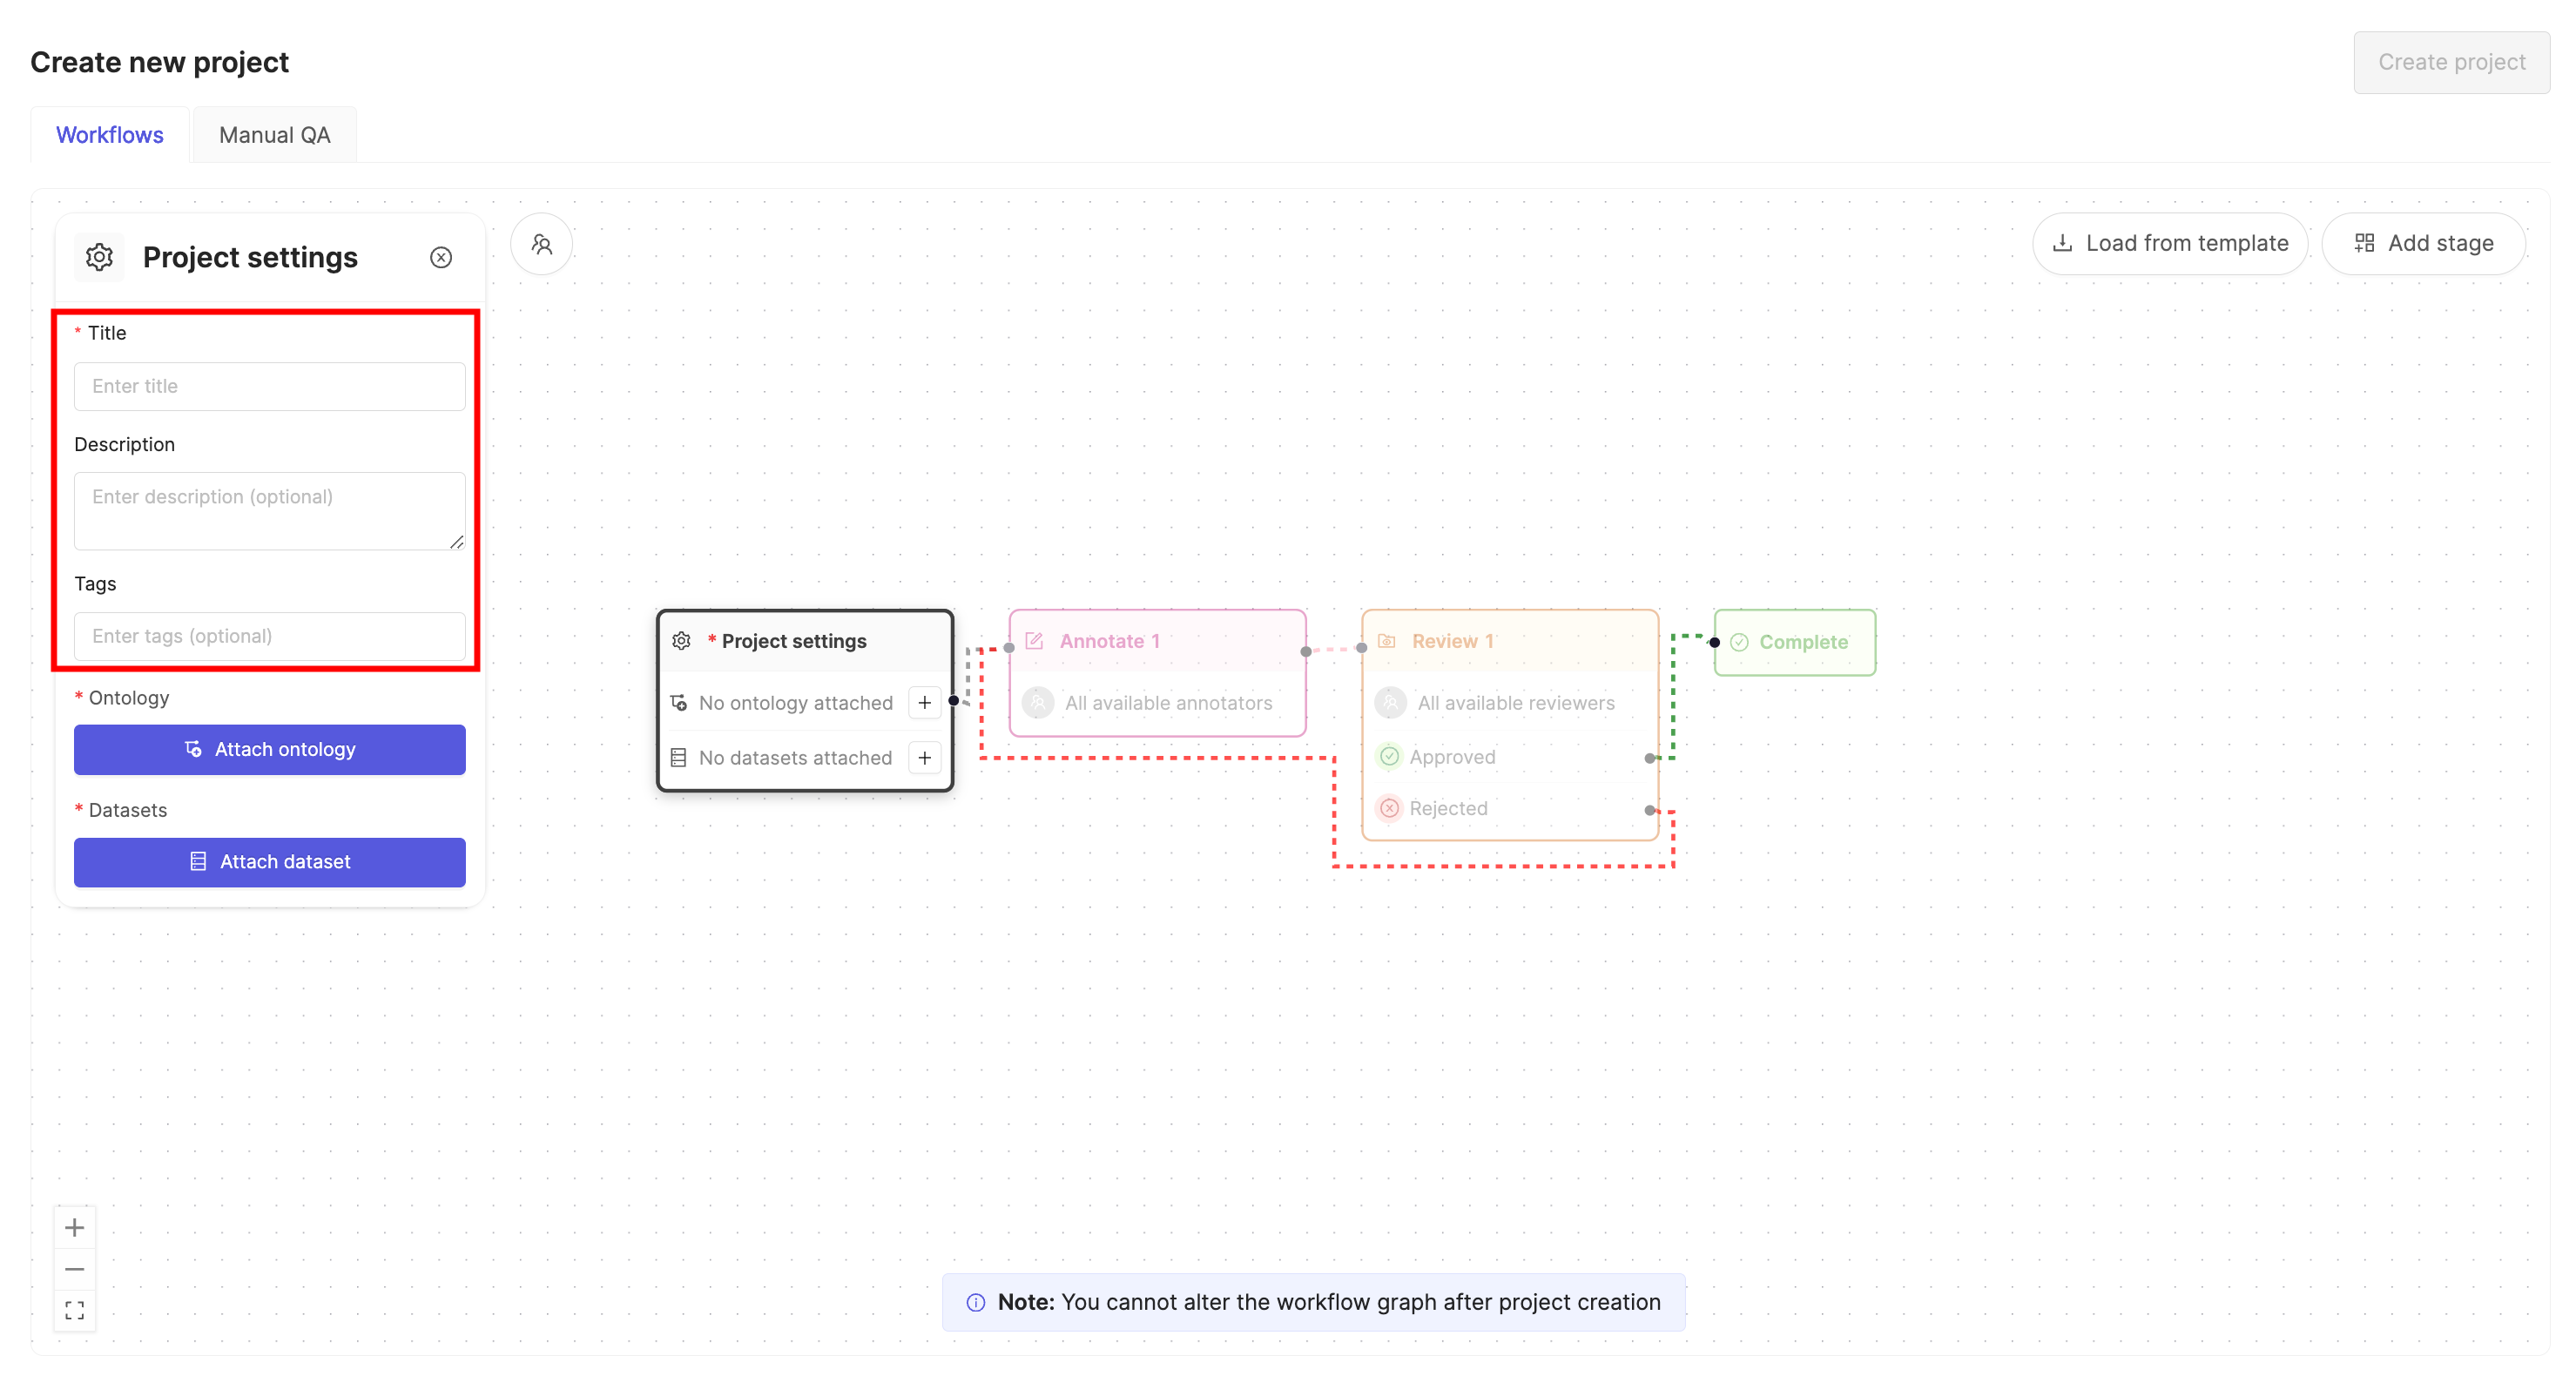
3. Give the Project a meaningful title and description.
If you are part of an [Workspace](/platform-documentation/General/general-workspace-settings), an optional [Project tags](/platform-documentation/Annotate/annotate-projects/annotate-project-settings#project-tags) drop-down is visible. Project tags are useful for categorizing and finding your Projects. Select as many tags as are relevant for your Project.
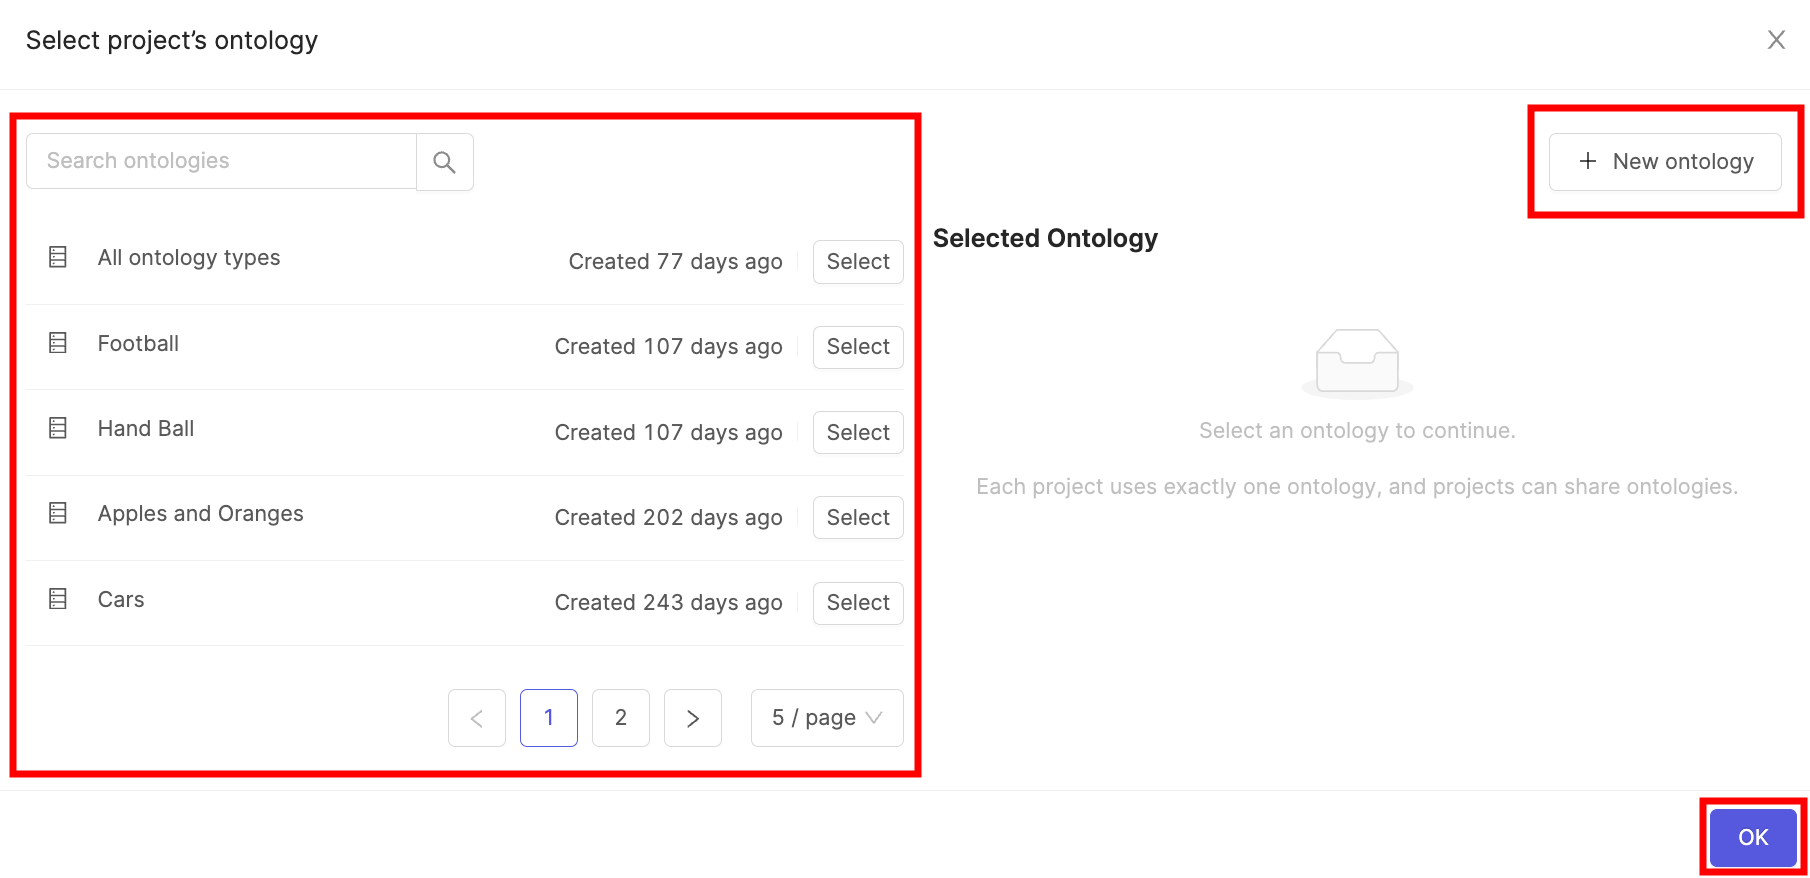
4. Click the **Attach ontology** button.
5. Select the [Ontology](/platform-documentation/Annotate/annotate-ontologies/annotate-ontologies) you created previously from the list using the **Select** button.
6. Click **OK** to attach the Ontology to the Project.
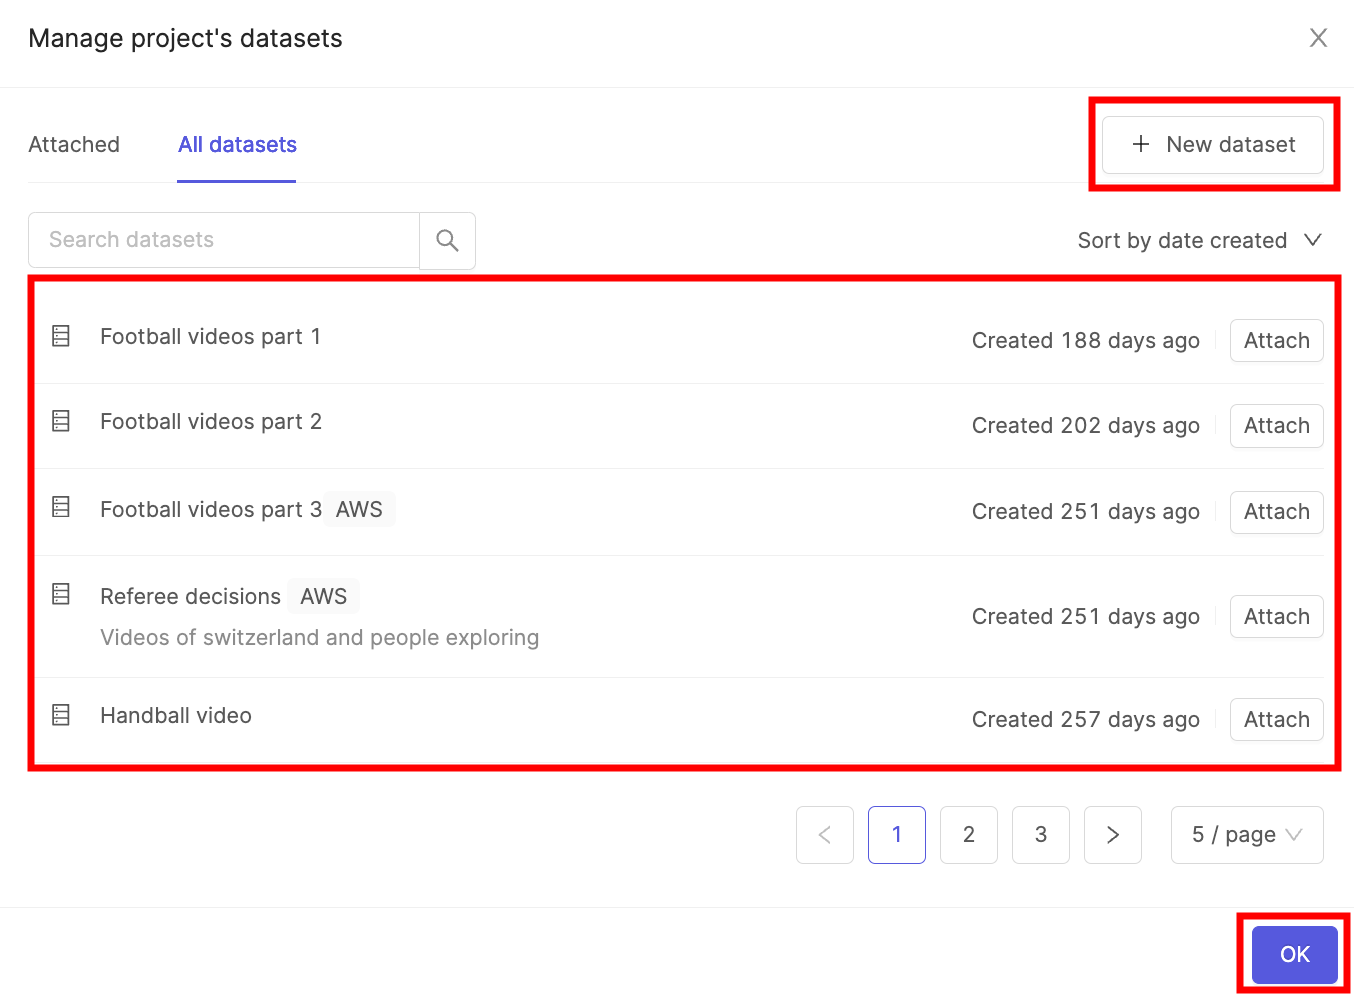
7. Click the **Attach datasets** button.
8. Select the [Dataset](/platform-documentation/Annotate/annotate-datasets/annotate-datasets) you created previously from the list using the **Attach** button.
9. Click **OK** to attach the Dataset(s) to the Project.
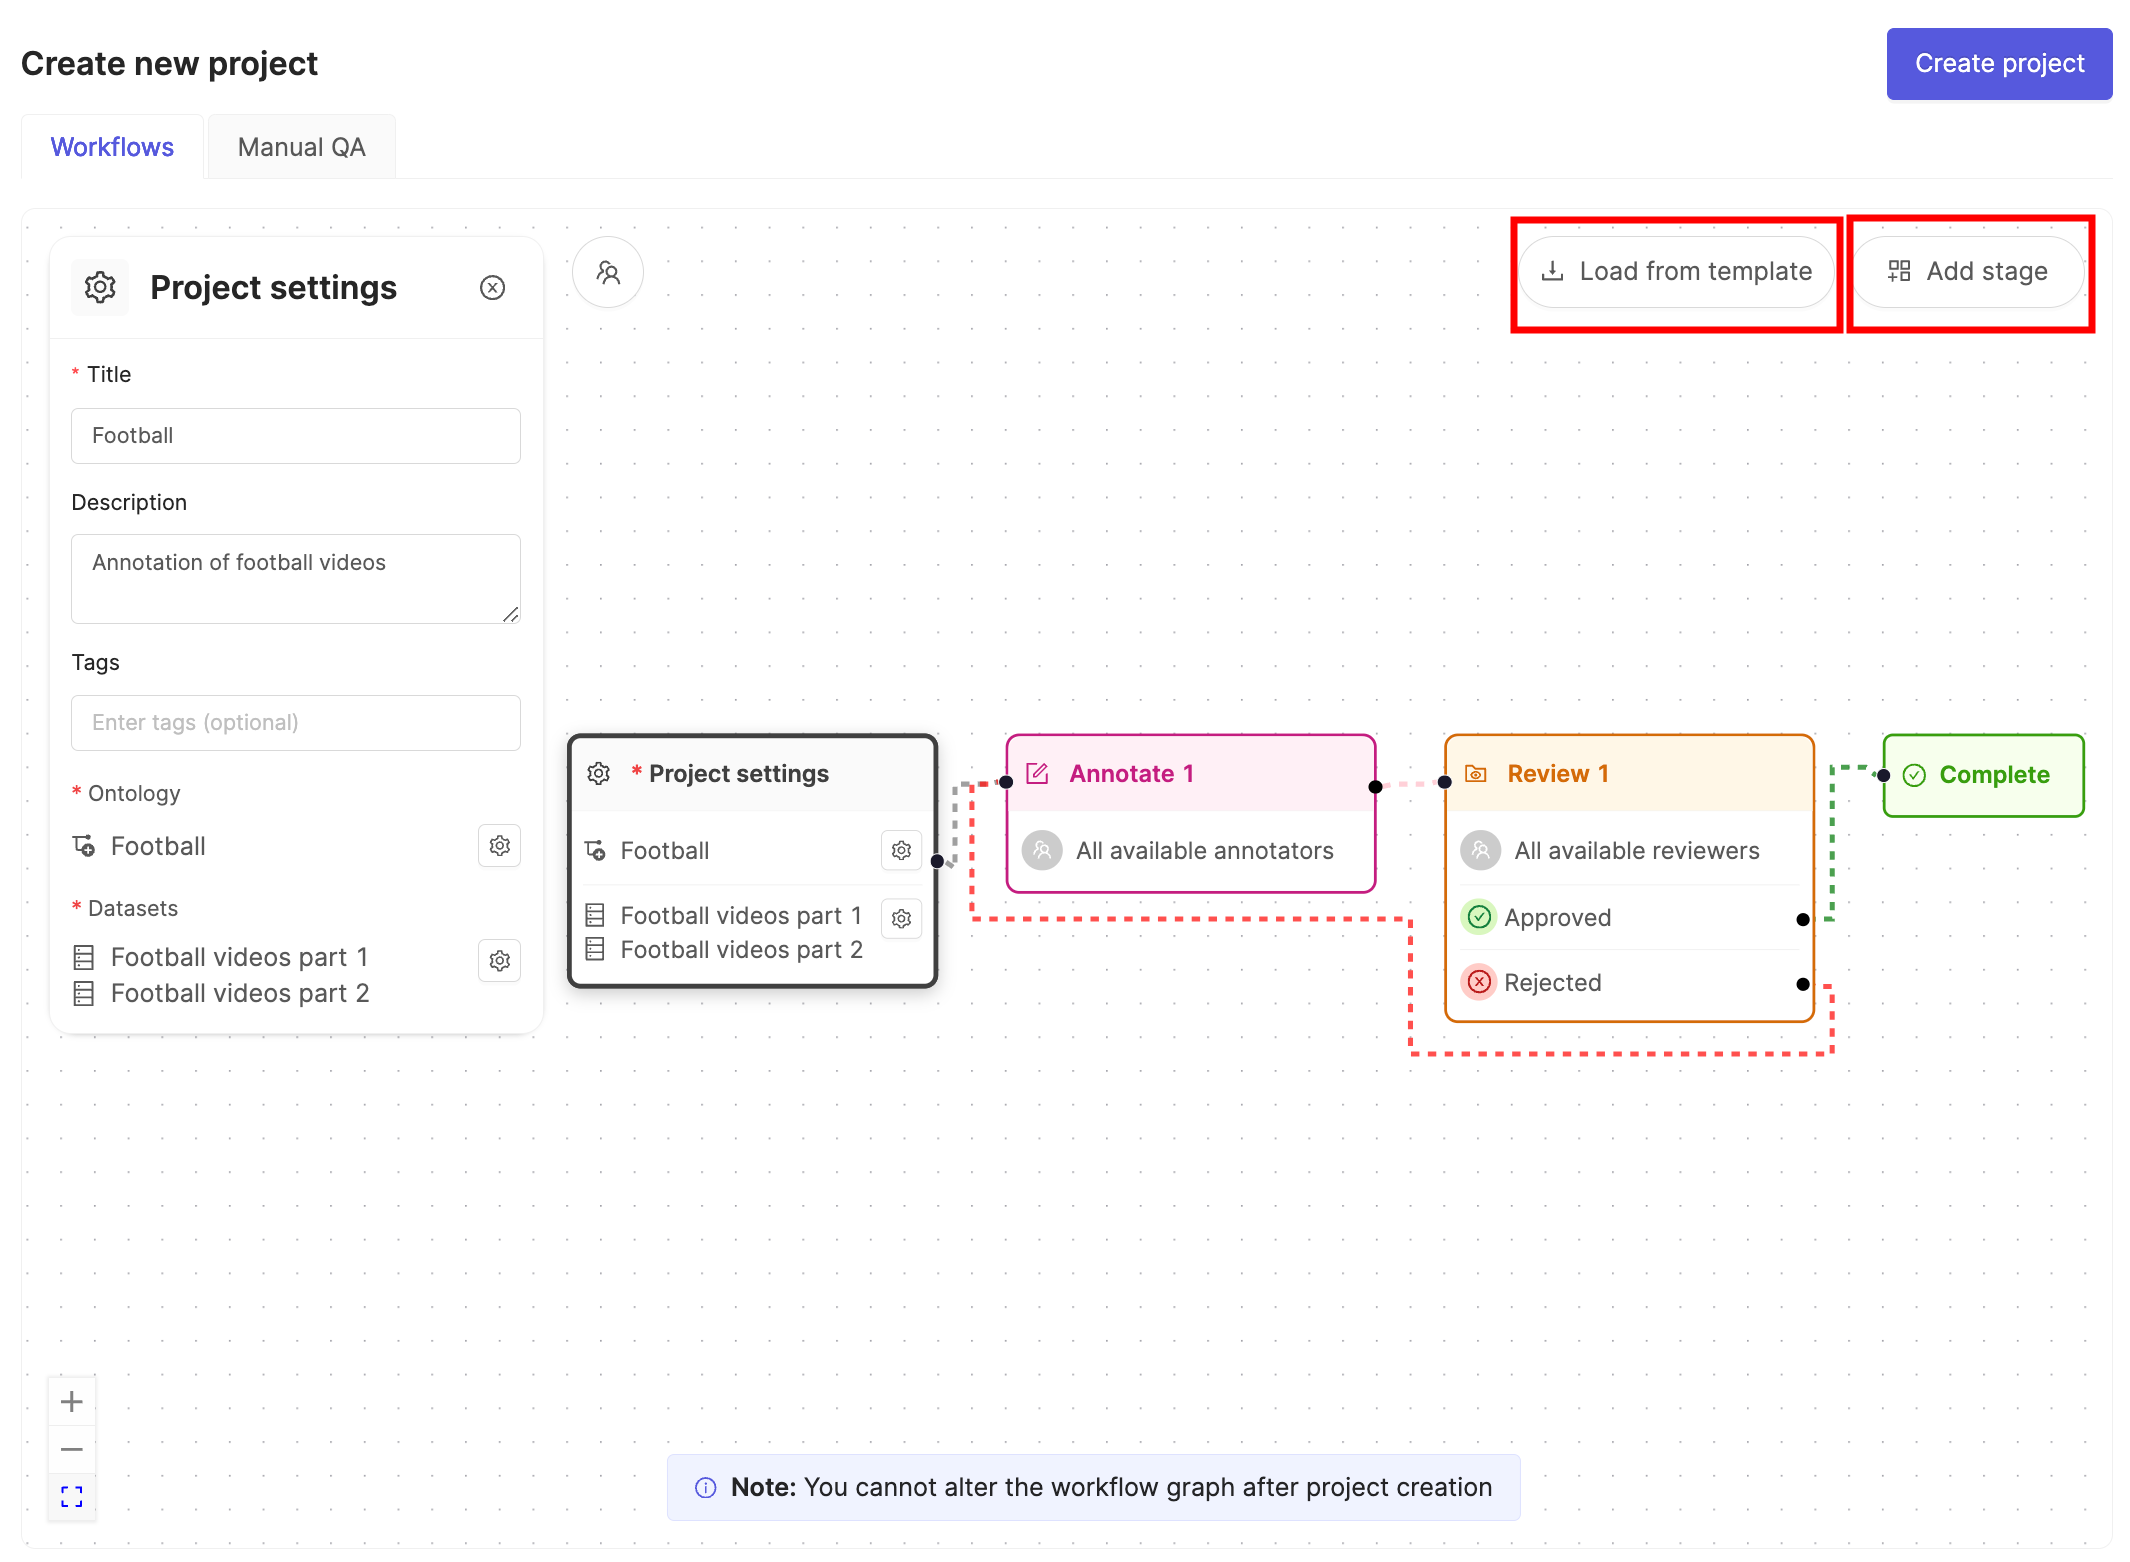
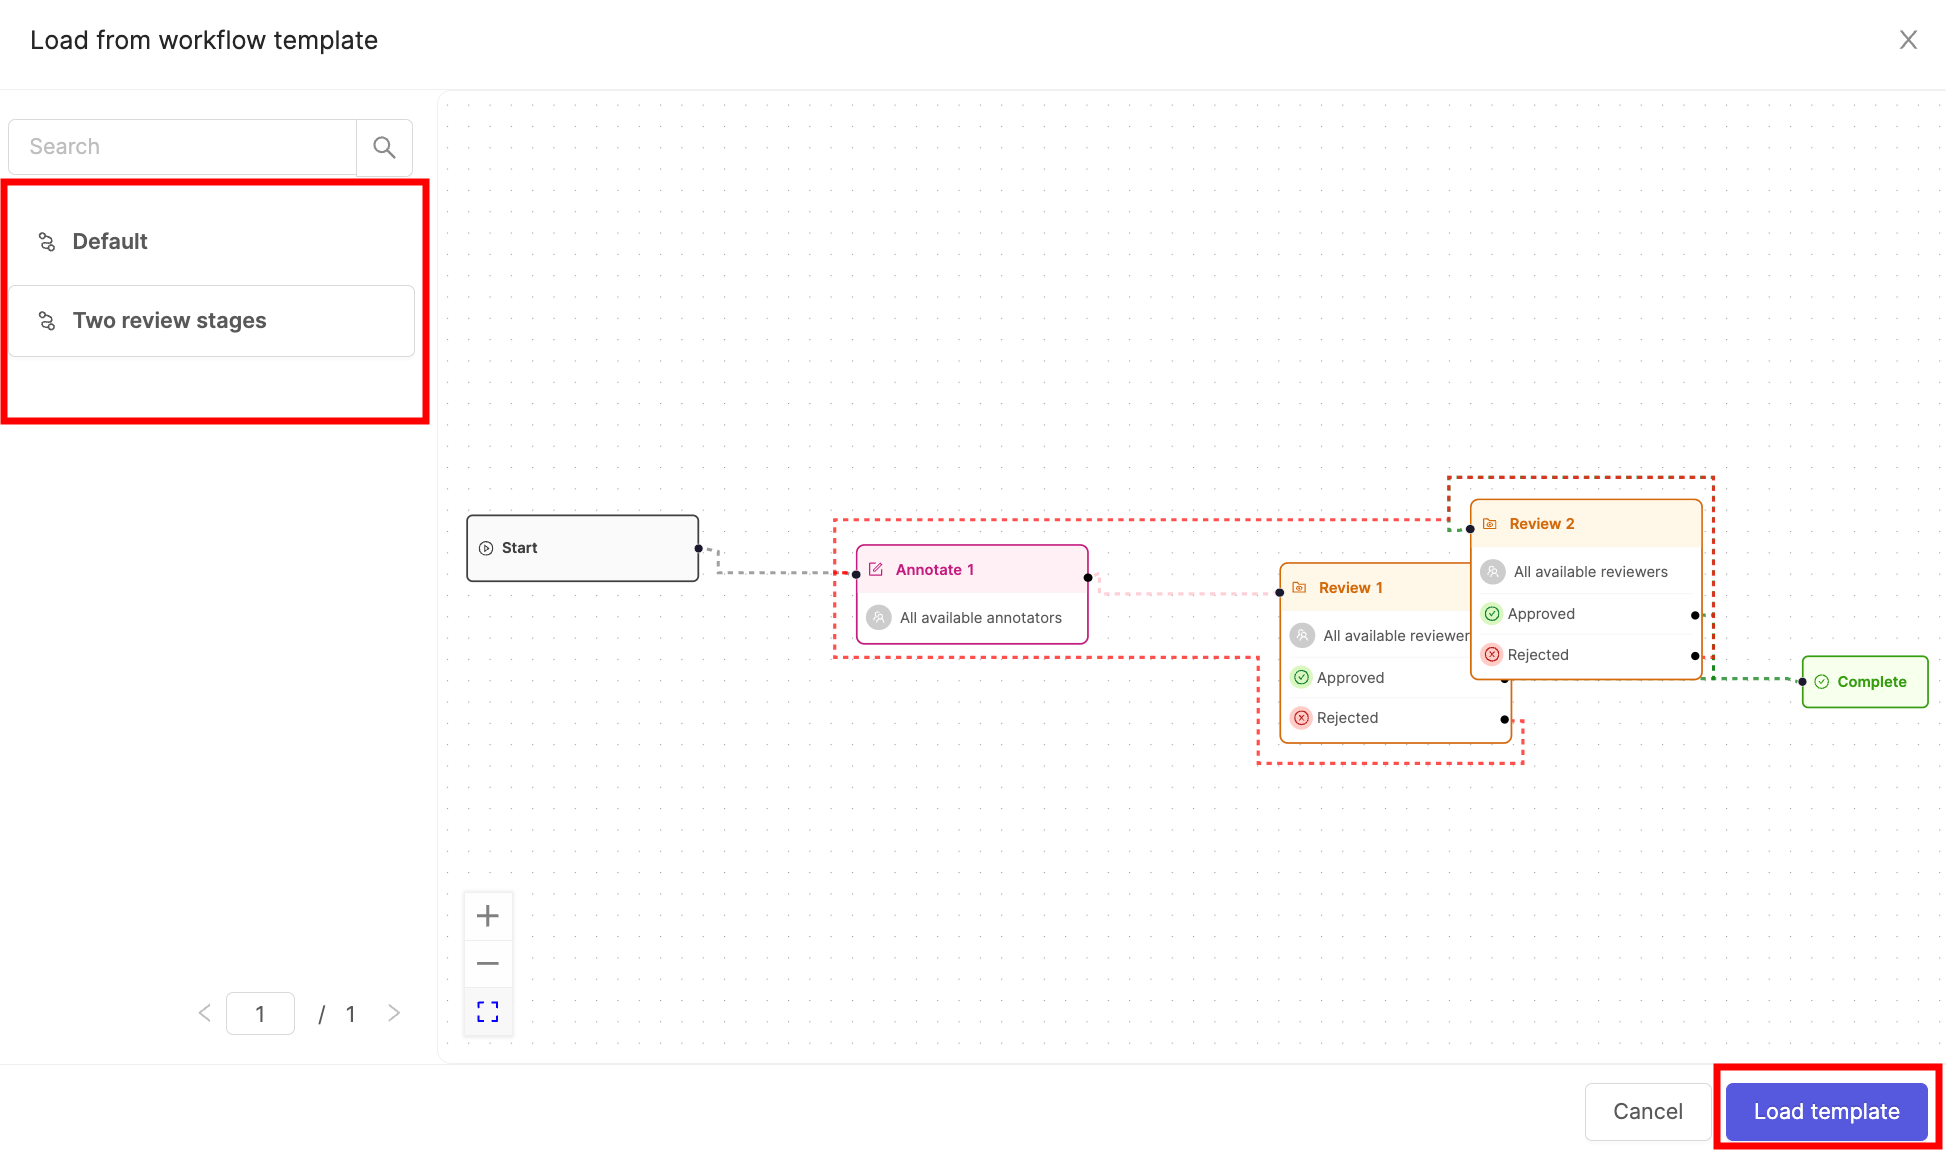
10. Click the **Load from template** button to use a [Workflow template](/platform-documentation/Annotate/annotate-projects/annotate-workflows-and-templates#templates).
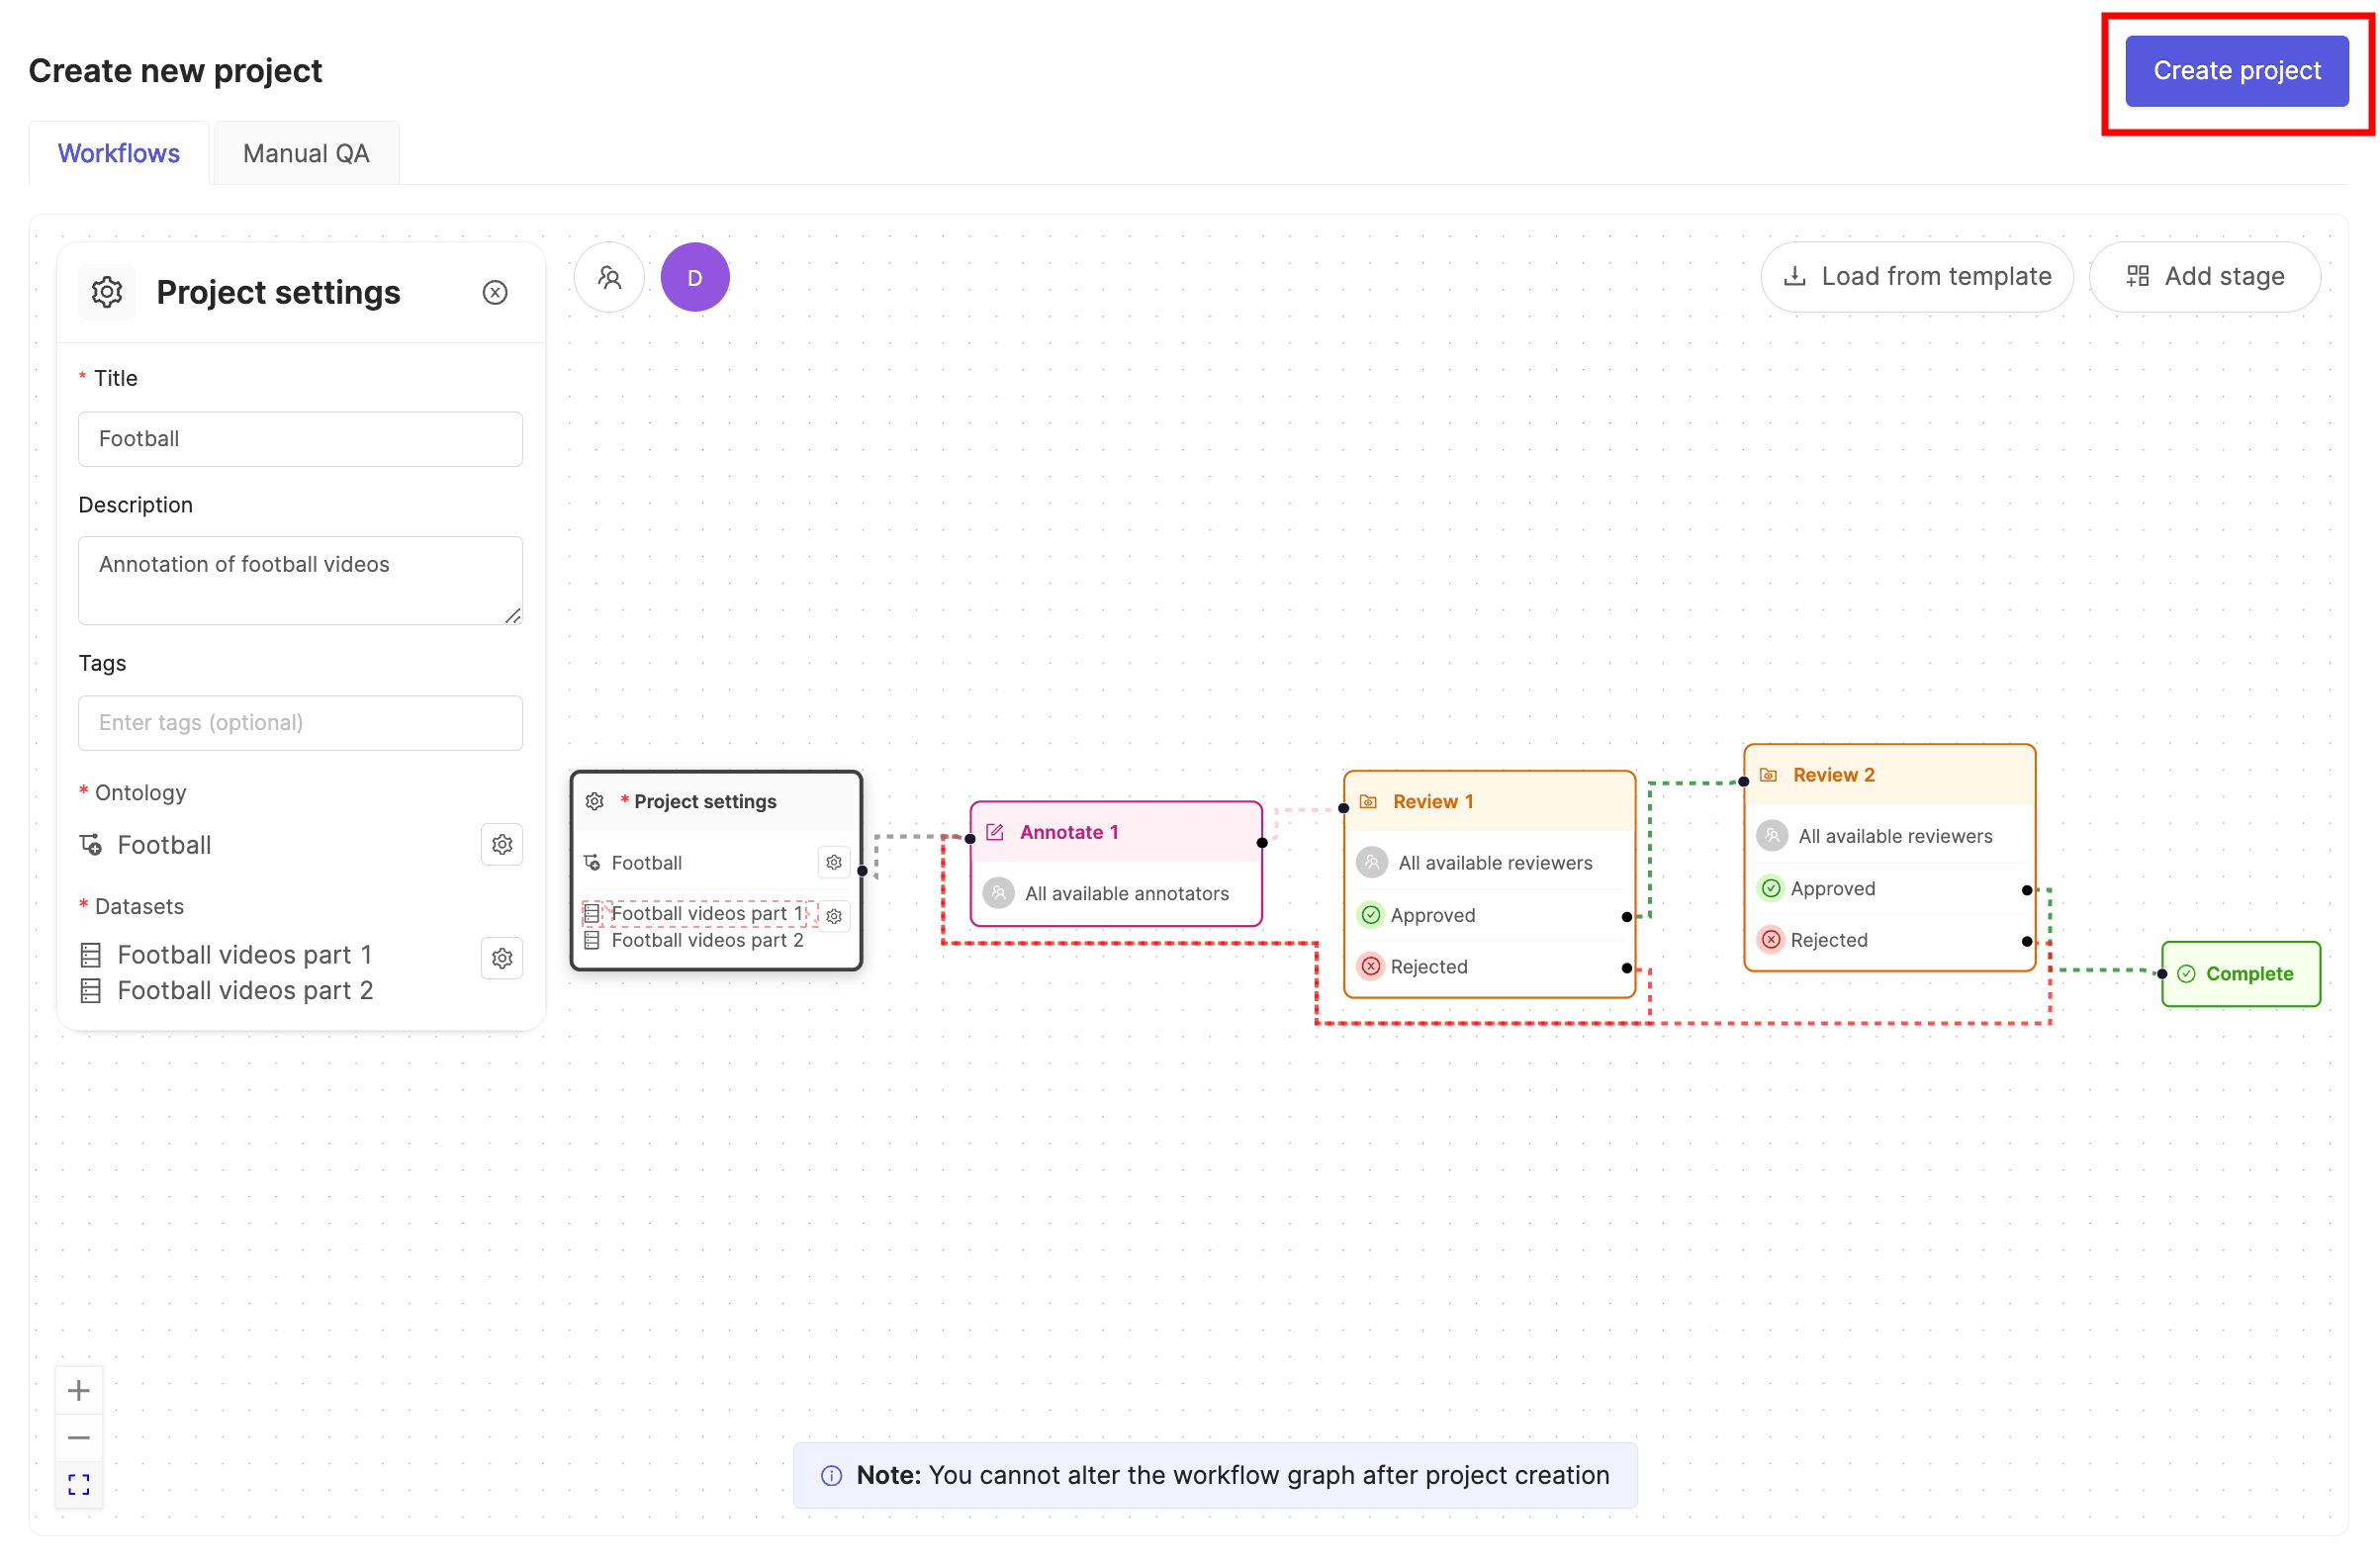
11. Select the template you want to use and click **Load template**.
12. Click **Create project** to finish creating the Project.
## STEP 3: Label Your Audio Files
Navigate to the *Queue* tab of your Project and select the data unit you want to label.
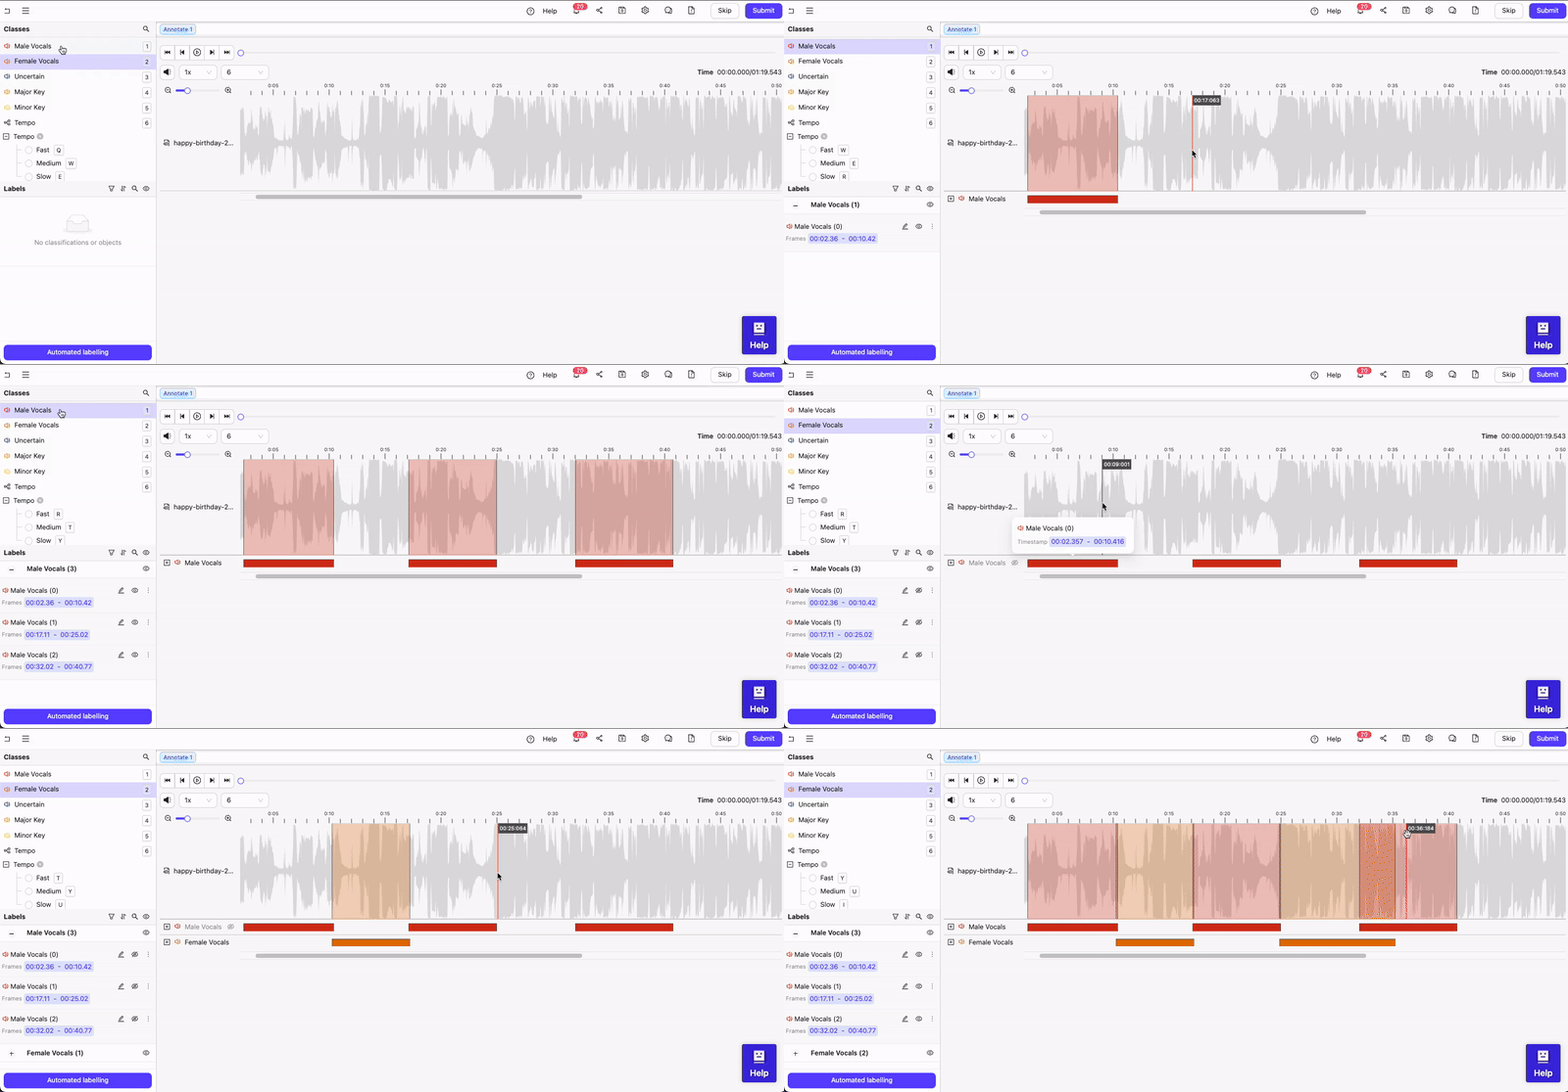
**To label an audio region**:
1. Select a *Audio Region* class from the left side menu.
2. Click and drag your cursor along the waveform to apply the label between the desired start and end points. Repeat this as many times as necessary while the class is selected.
3. If required, apply any attributes to the region.
4. Repeat these steps for as many regions as necessary.
Audio regions can be copy-pasted using CMD / CTRL + C and CMD CTRL + V.
When assigning multiple *Audio Region* class labels to the same section of an audio file, hide overlapping labels.
**To apply the classification to the entire audio file**:
1. Select the Classification from the left side menu.
2. For radio buttons and checklists, select the value(s) you want to classification to have. For text classifications, enter the desired text.
### Fill Range to the Playhead
You can quickly snap the boundary of a selected audio classification or audio region range to the current playhead (the visual marker on the timeline or waveform) position using the **Fill to playhead** action. This is useful when you want to extend a range to an exact point without manually dragging the timeline handle.
Position the playhead at the desired boundary point, select the audio classification/audio region range, then press `Alt+V` (Windows/Linux) or `Option+V` (Mac) to extend the nearest range edge to the playhead. You can also click **Fill to playhead** in the **Available Actions** panel in the left sidebar.
The action automatically determines which edge to move:
* If the playhead is **past the end** of the range, the end boundary extends to the playhead.
* If the playhead is **before the start** of the range, the start boundary extends to the playhead.
* If the playhead is **inside** the range, the action does nothing — it only ever extends a range outward, never trims it.
**Fill to playhead** is only available for editable ranges. The action and hotkey have no effect on read-only or locked ranges.
Use **Fill to playhead** together with the other range-editing shortcuts for fast, keyboard-driven timeline work:
| Action | Windows/Linux | Mac |
| ------------------------------- | ----------------- | -------------------- |
| Fill selected range to playhead | `Alt+V` | `Option+V` |
| Expand range right | `Alt+Right` | `Option+Right` |
| Shrink range right | `Alt+Left` | `Option+Left` |
| Expand range left | `Alt+Shift+Left` | `Option+Shift+Left` |
| Shrink range left | `Alt+Shift+Right` | `Option+Shift+Right` |